Nearest Store
- (510) 796-1985
- Get Directions
- Store Details
Mon-Fri: 8:00 AM - 6:00 PM
Sat: 8:00 AM - 5:00 PM

Find Another Store

Pre-Trip Safety Check*
A freebie that could save you more than money.
Before you head out on a road trip, schedule your free Pre-Trip Safety Check. Our pros will inspect your vehicle and send you on your way.
- (510) 796-1985
Safety Checks Done Right
- Schedule Your Free Pre-Trip Safety Check

When it comes to safety, the pros at Les Schwab know a thing or two about the services your vehicle needs for safety and performance. Our free Pre-Trip Safety Check goes beyond your tires and wheels with visual inspections of your steering, battery, brakes, suspension, and alignment.
Checking Your Tires and Wheels
Inspecting your wheels and tires for leaks, tread wear, and balance to keep you rolling the right way.
Aligning with Your Schedule
Potholes, curbs, and more can knock your vehicle out of alignment, reducing fuel efficiency and wearing out your tires a lot faster.
Keeping You in Contact with the Road
When your shocks and struts are working properly, they keep your tires in contact with the road. That connection adds up to safety and comfort.
Take Charge of Your Battery
If your battery isn’t running at peak capacity, neither will your vehicle, which could leave you stranded.
SCHEDULE YOUR FREE PRE-TRIP SAFETY CHECK
The Les Schwab free Pre-Trip Safety Check includes a long list of visual inspections. Once our pros are done checking out your vehicle, they’ll give you their honest advice and show you all of your options. If your car or truck doesn't have any issues, they’ll send you on your way — free of charge.
Services Include:
- Tire Inspection
- Tire Pressure Check
- Visual Wheel Alignment Inspection as Indicated by Tire Wear
- Visual Inspection of Front End Components
- Visual Inspection of Shocks and/or Struts
- Visual Battery Inspection and Load Test
- Visual Inspection of Brake Components, Including:
- Brake Rotors and Drums
- Brake Pads and Shoes (Including Braking Material Measurement Using a Brake Gauge)
- Brake Hose and Hardware
- Master Cylinder Including a Check of Your Brake Fluid
* Most Vehicles

What You Need To Know

Winter Driving Tips: Top Safety Reminders
Be ready to drive in any winter weather by following these tips.

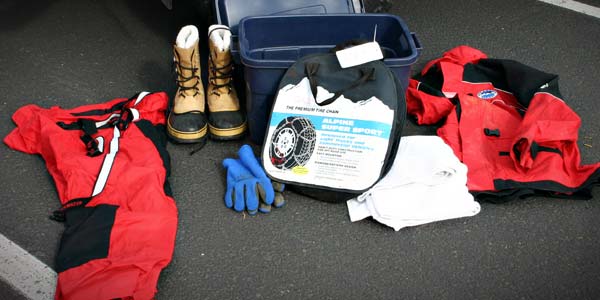
Be a Hero with a Summer Road Trip Safety Kit
Keeping a simple summer road trip safety kit in your vehicle during the warm months will make your travel more carefree — and you just might save the day.
14 Items to Put in Your Winter Road Trip Safety Kit
Now’s the time to get road-ready for the snowy months with a winter road trip safety kit. Here’s what should be in it.
- PRO Courses Guides New Tech Help Pro Expert Videos About wikiHow Pro Upgrade Sign In
- EDIT Edit this Article
- EXPLORE Tech Help Pro About Us Random Article Quizzes Request a New Article Community Dashboard This Or That Game Happiness Hub Popular Categories Arts and Entertainment Artwork Books Movies Computers and Electronics Computers Phone Skills Technology Hacks Health Men's Health Mental Health Women's Health Relationships Dating Love Relationship Issues Hobbies and Crafts Crafts Drawing Games Education & Communication Communication Skills Personal Development Studying Personal Care and Style Fashion Hair Care Personal Hygiene Youth Personal Care School Stuff Dating All Categories Arts and Entertainment Finance and Business Home and Garden Relationship Quizzes Cars & Other Vehicles Food and Entertaining Personal Care and Style Sports and Fitness Computers and Electronics Health Pets and Animals Travel Education & Communication Hobbies and Crafts Philosophy and Religion Work World Family Life Holidays and Traditions Relationships Youth
- Browse Articles
- Learn Something New
- Quizzes Hot
- Happiness Hub
- This Or That Game
- Train Your Brain
- Explore More
- Support wikiHow
- About wikiHow
- Log in / Sign up
- Cars & Other Vehicles
- Car Maintenance and Repair
The Ultimate Car Maintenance Checklist For Road Trips
Last Updated: May 19, 2024 Approved
Inspecting Your Vehicle
- Addressing Issues
Preparing to Depart
Expert q&a.
This article was co-authored by Tom Eisenberg . Tom Eisenberg is the Owner and General Manager of West Coast Tires & Service in Los Angeles, California, a family-owned AAA-approved and certified auto shop. Tom has over 10 years of experience in the auto industry. Modern Tire Dealer Magazine voted his shop one of the Best 10 Operations in the Country. There are 8 references cited in this article, which can be found at the bottom of the page. wikiHow marks an article as reader-approved once it receives enough positive feedback. This article received 15 testimonials and 100% of readers who voted found it helpful, earning it our reader-approved status. This article has been viewed 482,991 times.
Planning on going on a road trip soon? Before you do so, you should check your car to make sure that it is in good condition and running well. If you spend a little time preparing your vehicle for the trip beforehand, you can avoid most problems that might ruin your fun along the way.
Quick Steps
- Check that your tires are inflated and the treads are deep enough for long travel.
- Inspect your exterior lights, horn, and windshield wiper blades.
- Make sure your air filter isn’t clogged and that the AC and heat are working.
- Look at the belts in the engine for signs of cracking or glazing (shiny spots).
- Top off your oil, transmission fluid, and other fluids that are running low.
- Check and replace the brake pads if necessary.
- Prepare and pack a roadside emergency kit before you leave.

Blown-out lights can be hazardous as other drivers around you won't be able to know what you intend to do while driving, such as take a turn or put on the brakes. Also, a broken light can get you pulled over, which may leave you with an expensive ticket to pay.

- Place the penny upside down in the groove of the tire and see how much of Lincoln’s head you can see. If you can see further down Lincoln’s head than his forehead, the tires need to be replaced.

- Most air boxes are held shut with clips. Remove them to open the box and look at the air filter.
- The filter should be free of debris and usually white. If it looks particularly dirty, replace it before closing the airbox up again.
Addressing Issues that May Arise

- Plug the scanner into the open plastic connector port beneath the dashboard on the driver’s side.
- If the scanner doesn’t provide an English description with the error code, you can find the corresponding description in a vehicle-specific repair manual or often on the manufacturer’s website.

- Oil that’s in good condition will be translucent and slightly yellow or even greenish in color.
- To change the oil, slide a container under the oil pan that can capture the draining oil, then unscrew the drain plug (bolt at the bottom of the oil pan). Once the oil has drained completely, replace the plug and remove the oil filter. Install a new oil filter and then add the correct type and amount of oil for your vehicle, based on the information in your owner's manual.

- Automatic transmission fluid is one of the most important ones to check before a long road trip. Use your vehicle’s owner’s manual to tell you where to find the dipstick, then check it like you would engine oil.
- Make sure your radiator is topped off as well by comparing its fill line to the lower limit line visible on the reservoir.

Try to avoid packing things over your spare tire or emergency kit if you can. Setting off with a clean and organized car can give you added peace of mind.

- Driving without the appropriate documentation can lead to fines or even having your car impounded.
- Keep those important documents somewhere you can easily access in case you get pulled over.

- It’s also a good idea to carry a first aid kit .
- You may want to tailor some emergency supplies to your family or time of year. For instance, you may want to carry cat litter to help on slippery roads during the winter.

- You can get most commercial oil change facilities to do all of this for you at a (semi) reasonable cost. Thanks Helpful 1 Not Helpful 0
- If you are driving into remote areas ALWAYS ensure you have plenty of fuel in your tank, plenty of bottled drinking water, and ensure that someone knows how long you expect to be gone. Thanks Helpful 1 Not Helpful 1

You Might Also Like

- ↑ Tom Eisenberg. Auto Technician. Expert Interview. 26 July 2019.
- ↑ https://www.popularmechanics.com/cars/a26200/car-road-trip/
- ↑ https://www.cnet.com/roadshow/news/how-to-prep-your-car-for-a-road-trip/
- ↑ https://www.familyhandyman.com/project/changing-a-car-serpentine-belt/
- ↑ https://www.dmv.org/how-to-guides/pre-trip-maintenance.php
- ↑ https://www.familyhandyman.com/automotive/car-brakes/how-to-change-front-brake-pads/view-all/
- ↑ https://www.carproof.com/resource-centre/articles/preparing-your-vehicle-for-a-road-trip
- ↑ https://www.dmv.org/how-to-guides/emergency-kit.php
About This Article

To check your car before a road trip, start by looking over the car inside and out for any noticeable issues, like burnt out headlights, or worn windshield wipers. Make sure your tires are inflated to the pressure specified in the owner's manual, and check the tread on your tires using the penny test. Open the hood and turn on the car to make sure the serpentine and accessory belts are conditioned and tense. Before you hit the road, resolve any warning lights that appear on your dashboard to avoid issues during your trip. For tips on addressing problems as they arise and getting ready to leave, read on! Did this summary help you? Yes No
- Send fan mail to authors
Reader Success Stories
Dulce Ramon
Jul 14, 2017
Did this article help you?
Jun 8, 2017
Divya Prasher
Mar 4, 2017
May 19, 2018
Jul 17, 2018

Featured Articles

Trending Articles

Watch Articles

- Terms of Use
- Privacy Policy
- Do Not Sell or Share My Info
- Not Selling Info
Get all the best how-tos!
Sign up for wikiHow's weekly email newsletter

- Register / Login
- Trucker's Forum
- Paid CDL Training
- Truck Driving Jobs
- CDL Practice Tests
- High Road Training
Pre-Trip Inspection Study Guide

Our Pre-Trip Inspection Study Guide has everything you need to prepare for the Class A CDL Pre-Trip Inspection Exam . Our study guide will cover the pre-trip inspection terminology as well as a thorough list of all of the parts you will be inspecting on the vehicle. For each part you will be inspecting there will also be a list of items you will be checking for. Our study guide is broken down into the following sections:
- What You Need to Know About Pre-Trip Inspection
Pre-Trip Inspection Practice Questions
- Pre-Trip Inspection Checklist
Pre-Trip Inspection Videos
Pre-trip inspection printable resources, what you need to know about the pre-trip inspection.
The Pre-Trip Inspection is a thorough inspection of the vehicle and all of its major systems. Inspecting the vehicle before driving each day is a Federal requirement and normally takes about 15 minutes. It must be logged in your logbook as "on duty not driving."
You will have to do thorough safety inspections of the coupling system, the vehicle lights, engine compartment, tires and brakes, the chassis, the fuel tanks, and an in-cab inspection.
The following information is a brief summary of Daniel's Complete Pre-Trip Inspection taken from our oustanding free PDF download:
Engine Compartment

You will be checking the engine compartment for any sort of leaks. You will also be checking to see if all components are properly mounted and secured. None of the mounts must be cracked, bent, or broken.
You will be checking all hoses to make sure they aren't leaking, frayed, or sliced and the fluid levels including the oil level, the coolant, and the power steering fluid.
You must check the components like the water pump, the power steering pump, and the alternator to make sure nothing is leaking, the belts are not frayed, and that everything is properly mounted and secured.
From inside the engine compartment you will also find the steering system, the front suspension system, and the front brake system. All components of these systems must be properly mounted and secured without anything being cracked, bent, or broken. Finally you will be checking the tires, rims, and axle seals to make sure the tires are properly inflated, the rim isn't bent or cracked, and the axle seals are not leaking.
Fuel Tank And Battery Area

You will be standing along the side of the tractor doing a series of checks on the mirrors, fuel tanks, batteries, exhaust system, and more. You will check to make sure nothing is bent, cracked, broken, or leaking.
Check the mirrors, door hinges, door handle to make sure nothing is cracked, bent, or broken. Check to make sure there is no fuel leaking and that the fuel cap is secured and the gasket is not missing.
Check the exhaust system to make sure nothing is cracked, bent, or broken. Check the driveshaft, cat walk, and steps to make sure nothing is cracked, bent, or broken.
Check the frame and crossmembers for structural integrity. Check the air lines going to the trailer to make sure they're properly connected and that there are no abrasions, bulges, or cuts. Make sure the gaskets are present.
Check the suspension system and brakes on the drive axles, making sure nothing is cracked, bent, or broken. Make sure the brake linings are the proper thickness and that the air bags and properly inflated. Inspect the brake chambers, slack adjusters, and pushrods are properly mounted and secure. Not Cracked, Bent, or Broken. With the brakes released and pulled by hand, the Push Rod should not move more than 1 inch.
Check the rims, tires, and axle seals of the drive tires for proper inflation, no leaks around the seal, and the lugs are all present and secured.
Coupling System

You will be standing where the tractor and trailer are connected and you'll start by checking the electrical line and air lines to make sure they're properly mounted and secure at both ends. No abrasions, bulges or cuts. Not leaking air. Make sure the electrical line has no wires exposed. Check the gladhands to make sure the seals are in good condition, no cracks or signs of dry rotting. Not leaking air.
Check the skid plate of the fifth wheel and the apron of the trailer to make sure there is no debris and nothing is cracked, bent, or broken. Make sure the fifth wheel is properly greased. Also make sure there is no gap in between the fifth wheel and the trailer apron once the tractor and trailer are coupled. Make sure the kingpin of the trailer is properly mounted and not cracked, bent, or broken and that the locking jaws of the fifth wheel are properly secured when the tractor and trailer are coupled.
Check the mounting bolts where the fifth wheel attaches to the tractor frame. Make sure there are no missing bolts and that everything is secured properly. Check the locking pin if you having a sliding fifth wheel to make sure it's properly locked into place.
Make sure that there is the proper clearance space between the tractor mudflap and the trailer landing gear so that they don’t hit each other when making a turn.

You will start inspecting the trailer at the head board, which is the front wall of the trailer. Make sure there are no holes or missing rivets. Check the landing gear to make sure it is properly mounted and secure. Not cracked, bent, or broken. Make sure the fully raised and the handle is secure in the cradle when the tractor and trailer are coupled.
Check the frame and crossmembers under the trailer to make sure they're not cracked, bent, or broken. Check the tandem frame and release pins to make sure the frame is in good condition and the release handle and locking pins are in the fully locked position.
You will check the entire suspension and brake system for the trailer tandems the same way you did for the drive axles of the tractor. You will also make sure the mudflaps are properly secured. For dual tires check to see that there is proper space between the tires and there is nothing stuck between the tires.
Check the rear door and hinges to make sure they are properly mounted and nothing is cracked, bent, or broken. Make sure the door seals are not worn, torn, or dry rotted.
Light Check

You will be checking all of the lights and reflectors on both the tractor and the trailer. Check the reflectors and reflective tape to make sure they are properly mounted and secure, not cracked, bent, or broken, and clean and illuminated. Check that you have the proper color of amber to the front and sides, and red to the rear.
Start by turning on your marker lights and headlights. Now walk around the entire truck and trailer and point out the lights. Give the function of the light and the location. You should then ask your examiner to help you check your five functions.
While you're sitting in the drivers seat, the examiner will stand to the front of the truck, then behind the trailer. He will then check your Turn Signals, Four Way Flashers and Brake Lights. You must do each function at every location.
The five locations that you must check your lights:
- Front of the Truck
- Both sides of the Truck
- Rear of the Truck
- Both sides of the Trailer
- Rear of the Trailer
The Five Functions you are checking for:
- Left Turn Signal
- Right Turn Signal
- Four Way Flashers
- High Beams/Low Beams
- Brake Lights
In-Cab Inspection

The in-cab inspection and air brake check will cover the various gauges and systems inside the cab along with several tests to make sure you air brake system is working properly.
You will start by checking the following:
- Seat Belt- Properly Mounted and Secure. Not ripped or frayed Adjusts and latches properly.
- Fire Extinguisher- Properly Mounted and Secure. Fully charged
- Three Red Reflective Triangles- My three red reflective triangles are GIVE LOCATION
- Spare Electrical Fuses- My spare electrical fuses are GIVE LOCATION
- Volmeter, Oil Pressure Gauge, Water Temperature Gauge, and Air Pressure Gauge all show proper operation
- City horn and air horn functioning properly
- The windshield and mirrors are clean, no cracks or breaks, no obstructions. The mirrors are in proper adjustment.
- Windshield Wipers and Washers - Demonstrate that the washers work by spraying the windshield. The Wipers are: Properly Mounted and Secure and operate smoothly. The blades aren't cracked or dry rotten.
- Heater and Defroster - Demonstrate that both the Heater and Defroster are working properly.
- Lighting Indicators - Left Turn, Right Turn, Four Way Flashers, and High Beams.
Trailer Parking Brakes - Set the Trailer Brake, release the tractor brake, and then tug lightly on the trailer.
Tractor Parking Brakes- Then set the Tractor Brake, release the trailer brake, and then tug lightly on the tractor.
Service Brake Check - Release both Tractor and Trailer Brakes. Now drive at idle speed. Apply the Service Brake to make sure you come to a complete stop, and that it doesn't pull to the left or right when applying the brakes.
Air Brake Test

The air brake test will consist of a leakdown test to make sure your air brakes aren't leaking air and losing pressure. It will also test the warning lights and buzzer to make sure the driver gets the proper warning if the air pressure drops too low.
There are three stages to an Air Brake Test
#1: Applied Pressure Test
#2: Warning Light and Buzzer
#3 Tractor/Trailer Protection Valve Pop Out
Applied Pressure Test: Build the air pressure to governor cut out. Put the truck in the lowest gear. Then turn off the engine Immediately turn the engine back on. Push in both the tractor and trailer valves. (This will release the parking brakes.) Push and hold the Brake pedal fully. Allow the gauges to stabilize. Announce the gauges have stabilized and the Primary and Secondary PSI. With the Brakes fully pressed, you should not lose more than 4 PSI in one minute. Announce that you are listening for air leaks during that minute.
Warning Light and Buzzer Test: Pump down on the Brake pedal until the warning light and buzzer comes on, at or before 60 PSI.
Tractor/Trailer Protection Valve Pop Out Test: Pump down on the brake pedal until both the tractor and trailer protection valves pop out. They should both pop out between 40 and 20 PSI.
We have a ton of Pre-Trip Inspection Practice Questions along with the answers and a complete scoring system in our Free Online CDL Practice Tests :
The Engine Compartment Section will include questions about checking the oil level and coolant levels, inspecting belt-driven engine components (like the water pump, alternator, and air compressor), and the safety devices required in the cab. There will also be questions regarding the windshield wipers and free play in the steering wheel.
The Lights And Brakes Section will include questions about dashboard indicator lights, inspecting the parking brakes, and doing a leakdown test on the air brakes. It will also include questions about the low air pressure warning signal and testing your air horn and city horn.
The Suspension And Steering Section will include questions about the tractor protection valve, inspecting the steering box, and inspecting many suspension system parts. It will also include questions about welds being present on tire rims and the minimum tread depth required on steering axle tires.
The Tires And Coupling Devices Section will include questions about shiny trails or rusty threads on lug nuts, inspecting the battery box and cover, and inspecting electrical lines. It will also contain questions about inspecting the coupling devices and the fifth wheel skid plate.
The Emergency Equipment And Fifth Wheel Section will include questions about additional emergeny equipment required by school buses, inspecting the gap between the kingpin apron and the fifth wheel skid plate, and the landing gear securement. It will also contain questions about inspecting driver mirrors and the trailer frame.
Pre-Trip Inspection Checklist - Class A
Our pre-trip inspection checklist covers every part of the truck from front to back, both inside and outside of the truck. It covers the air brakes, suspension parts, steering components, wheels and rims, fuel tanks, batteries, lights, and more. It also covers the air brake tug test and checks for everything under the hood including alternator, water pump, fuel pump, fluids, and more.
This is a super handy checklist to study anytime you have a few minutes to spare:
Pre-Trip Inspection Checklist - Free Word Document Download (Editable Version)
Pre-Trip Inspection Checklist - Free PDF Download (Print Version)
Pre-Trip Inspection Video By Apex CDL Institute
Jeff from Apex Institute does an in-depth explanation of the entire pre-trip inspection process. This video is loaded with tips that go beyond the CDL test to help drivers really understand how to identify problems.
Pretrip Inspection Self-Test By CDL College
The Pretrip Inspection Self-Test By CDL College is really unique. It's a silent video which will show you the part you're inspecting and then gives you a few seconds to figure out what you should be checking for before giving you the answer. Definitely check this one out. Great for practicing before the CDL exam.
Pre-Trip Inspection Video By Averitt Express
This is a complete back to front pre-trip inspection of a truck and trailer by Averitt mainentance associate Kevin Breeding. This thorough pre-trip inspection covers all inportant points of inside the cab, lights, engine, the tractor itself and the trailer.
We have included two print versions of the pre-trip inspection process from Daniel. The first is the entire pre-trip inspection and the second is an abbreviated checklist for the inspection.
- PDF: Daniel's Pre-trip Inspection (Print Version)
- PDF: Daniel's Pre-trip Inspection Checklist (Print Version)

Why Join Trucking Truth?

- The High Road Training Program
- The High Road Article Series
- The Friendliest Trucker's Forum Ever!
- Email Updates When New Articles Are Posted
Apply For Paid CDL Training Through TruckingTruth
Did you know you can fill out one quick form here on TruckingTruth and apply to several companies at once for paid CDL training? Seriously! The application only takes one minute. You will speak with recruiters today. There is no obligation whatsoever. Learn more and apply here:
- Privacy Policy

- Request free trial
- Product Permit Management Incident Management Audit Management
- Why Safetymint
- Support Resources Help Docs
- About About Us Partners Careers Blog
- Request a Demo
Pre-Trip Inspection Checklist
Ensure safe journeys with our comprehensive Pre-Trip Inspection Checklist. This free PDF template covers all critical aspects of pre-trip inspections for vehicles, empowering drivers to identify potential issues, perform thorough inspections, and ensure the safety of passengers and cargo.

Digitize this Checklist on Safetymint
- Create unlimited, customized checklists
- Add Actions, with automated reminders
- Works seamlessly with or without internet
- Access via web browsers, mobile or tablets
Take a free trial

What is a Pre-Trip Inspection Checklist?
A Pre-Trip Inspection Checklist is a systematic tool used by drivers to assess the safety conditions of vehicles before embarking on a journey. It includes a series of checkpoints designed to inspect various aspects of the vehicle, such as brakes, tires, lights, fluids, and more. Regular pre-trip inspections are essential for preventing breakdowns, ensuring roadworthiness, and promoting safe travel.
Key Areas to Inspect in a Pre-Trip Inspection:
- Tires: Check tire condition, pressure, and tread depth.
- Brakes: Inspect brake functionality and fluid levels.
- Lights and Signals: Verify the proper operation of headlights, taillights, turn signals, and hazard lights.
- Fluid Levels: Check engine oil, coolant, brake fluid, and washer fluid levels.
- Belts and Hoses: Inspect belts and hoses for wear and damage.
- Windshield and Wipers: Ensure the windshield is free from cracks and that wipers function correctly.
- Safety Equipment: Verify the presence and condition of safety equipment, such as reflective triangles and fire extinguishers.
Common Pre-Trip Inspection Findings:
Frequent issues found during pre-trip inspections include:
- Underinflated Tires: Tires with insufficient air pressure, leading to reduced fuel efficiency and tire wear.
- Brake Wear: Worn-out brake pads or low brake fluid levels.
- Malfunctioning Lights: Inoperative or dim headlights, brake lights, or turn signals.
Pre-Trip Inspection Best Practices:
- Scheduled Inspections: Conduct pre-trip inspections before each journey and after long breaks.
- Checklist Adherence: Follow the pre-trip inspection checklist meticulously to avoid overlooking critical components.
- Driver Training: Train drivers on conducting thorough pre-trip inspections and reporting any issues.
- Documentation: Document pre-trip inspection results and any maintenance performed.
- Reporting Deficiencies: Promptly report any vehicle deficiencies to the appropriate maintenance personnel.
Safetymint for your Pre-Trip Inspections:
Streamline your pre-trip inspections with Safetymint, our advanced inspection software . Safetymint simplifies the inspection process, making it easy for drivers to conduct and document pre-trip inspections efficiently. Our cloud-based platform ensures data security and stability, making it the ideal solution for all your inspection needs. Try Safetymint free for 14 days and enhance your vehicle safety protocols.
Sign up for the 14-day free trial

Disclaimer: The Pre-Trip Inspection Checklist provided by Safetymint is intended for general informational purposes only. Each vehicle may have specific inspection requirements based on make, model, and regulations. Users of this template are encouraged to review and customize the checklist to align with their specific vehicles, environment, and safety regulations.
Related Checklists

GMP Audit Checklist

Pre-Startup Safety Review (PSSR) Checklist
Construction punch list checklist, project closeout checklist.
Daily Report Checklist

Safety Audit Checklist
- Optimization
- Safety & Security
- Truck/Vehicle
- Dry Trailer
- INTEGRATIONS
- Utilization
- Reefer Container
- Dry Container
- AIS DATA SERVICES
- VESSEL MONITORING SYSTEMS (VMS)
- Maintenance
- Construction
- Agriculture
- Customer Experience
- Customer Success Stories
- ORBCOMM University
- Customer Care
1-800-ORBCOMM
+1-804-404-8681
- Smart Terminals
- Satellite Modems
- Tools and Apps
- CONNECTIVITY
- Vessel Monitoring Systems
- White Papers
- Success Stories
- In the Media
- CargoWatch®
- Coldchainview
- Device Cloud
- FleetManager.com
- ORBCOMMconnect
- ORBCOMM Platform
- ReeferConnect
- ReeferTrak®
- Everything you need to know about pre-trip inspection checklists
- Transportation
- Jan 18, 2024
- Cody Lirette

Embarking on a safe and efficient journey as a truck driver begins long before hitting the road. The cornerstone of every successful trip is a thorough pre-trip inspection. This guide delves into the essential aspects of a pre-trip inspection checklist. These critical checkpoints can make all the difference in your driver’s safety and the efficiency and success of the journey.
What is a pre-trip inspection?
A pre-trip inspection is a proactive measure taken by truck drivers to ensure their vehicles are in optimal condition and adhere to safety standards and other relevant regulatory requirements. This assessment checks for signs of wear, damage or malfunction on critical components like the engine, brakes, lights, tires, fluid and more.
The goal of a pre-trip inspection is two-fold: safety and compliance . A thorough vehicle examination helps identify potential issues so they can be addressed promptly, minimizing the risk of breakdowns and accidents. The inspection is crucial for compliance with industry regulations and standards. Failure to do so could result in fines, penalties or suspensions.
The importance of a pre-trip inspection
Pre-trip inspections are more than a regulatory requirement; they can help keep drivers and the public safe, maintain cargo integrity and improve vehicle longevity. Here’s why this practice is essential:
- Enhanced safety: Identifies potential mechanical issues before they escalate. This means reduced risk of breakdowns and roadside emergencies.
- Improved efficiency: Addresses issues before they happen on the road to ensure fleets deliver on time.
- Better compliance: Helps meet legal requirements, avoid unnecessary fines and penalties and comply with industry standards and safety protocols.
- Protected cargo: Ensures cargo is secure and adequately loaded, preventing damage during transit.
- Maintain equipment health: Identifies wear and tear on components, allowing for timely maintenance, reducing long-term repair costs and prolonging the longevity of the vehicle and its critical systems.
- Boosted reputation: Demonstrates a commitment to professionalism and responsibility. This enhances a fleet’s reputation and builds stronger customer relationships.
- Driver confidence: Following a standardized pre-trip inspection checklist reassures drivers that their truck is in optimal condition.
Main components of a pre-trip inspection checklist
To ensure drivers cover all the essential components of pre-trip inspections, here are the main checkpoints to keep in mind:
Tire inspection

- Tread depth: Measure tire tread depth . Inadequate tread depth can compromise traction and vehicle stability, especially in unfavorable road conditions.
- Tire inflation: Verify that all tires meet the manufacturer’s specifications. Improper inflation poses safety issues and can lead to uneven wear and reduced fuel efficiency.
- Visible tire damage: Inspect each tire for cuts, bulges or other visible damage. Address these issues promptly to prevent blowouts and other safety concerns.
- Valve stem integrity: Inspect valve stems for damage or leaks and ensure caps are in place. Damaged stems can lead to pressure loss.
Lights and reflectors
- Headlights: Ensure both high and low beams work. Check for proper alignment to maximize visibility without blinding other drivers.
- Taillights: Verify that taillights work, including brake lights and turn signals.
- Clearance lights: Ensure clearance lights work. These enhance the visibility of the vehicle’s dimensions, especially in low-light conditions.
- Reflectors: Confirm the presence and condition of reflectors on all sides of the vehicle.
- Hazard lights: Ensure hazard lights work.
- Turn signals: Ensure the turn signals work on both sides.
Brake check
- Air brakes: Check air brakes for leaks by listening for hissing sounds. Confirm that air pressure builds within a reasonable time after starting the engine.
- Parking brake: Test the parking brake to ensure it holds the vehicle securely.
- Brake fluid levels: Check the fluid reservoir for proper fluid levels. Low levels may indicate a leak or wear.
- Brake pads and shoes: Inspect brake pads and shoes for visible wear. They may need replacing if they are too thin or show uneven wear patterns.
- Brake drums and rotors: Examine brake drums and rotors for signs of scoring, grooves or heat-related damage.
- Brake lines and hoses: Pay attention to visible damage, corrosion, bulging or leaks.
- Anti-lock braking system: Check the dashboard for warning lights.
Engine compartment
- Engine oil: Check the engine oil level. Ensure it falls within the recommended range.
- Coolant: Ensure the coolant reservoir has the appropriate amount to prevent engine overheating.
- Drive belts: Examine for signs of wear, fraying or cracking.
- Hoses: Inspect hoses for leaks, bulges or soft spots. Replace any damaged hoses to prevent leaks.
- Battery: Check battery terminals for corrosion and ensure they’re securely connected. Loose or corroded connections can lead to electrical issues.
- Air compressor: Inspect the air compressor for visible damage and ensure proper functioning for optimal brake performance.
- Power steering fluid: Ensure power steering fluid levels are within the recommended range.
- Air filter: Check for decay and debris. A clogged air filter can reduce engine efficiency and fuel economy.
- Fuel levels: Ensure the fuel tank is full.
- Fuel cap: Verify the fuel cap is tightly secured to prevent spillage and contamination.
- Fuel tank integrity: Inspect the tank for visible damage, rust or signs of leakage
Fluid inspection
- Transmission fluid: Check transmission fluid levels, ensuring they’re within the recommended range.
- Windshield washer fluid: Keep the washer fluid full.
- Differential fluid: Check differential fluid levels. Low levels can lead to differential damage and affect vehicle performance.
Windshield inspection
- Cracks and chips: Inspect the windshield for any cracks or chips. Address any large ones that affect visibility.
- Windshield wipers: Ensure the windshield wipers are functioning. Replace worn or damaged blades.
- Windshield washer jets: Confirm the windshield washer jets spray fluid evenly. Malfunctioning jets can result in uneven cleaning.
Emergency kit
A well-equipped kit ensures drivers are ready to handle unexpected situations on the road, promoting safety and efficiency:
- First aid supplies: Essential medical supplies including bandages, antiseptic wipes, pain relievers and any necessary personal medications.
- Reflective triangles or flares: Confirm that you have reflective triangles or flares to enhance visibility in case of roadside breakdowns.
- Fire extinguisher: Ensure the fire extinguisher has a valid inspection tag and is not expired.
- Essential tools: Check for the basics like a wrench, pliers and screwdrivers.
- Flashlights and batteries: Test the functionality of flashlights and ensure spare batteries are available.
- Blankets or sleeping bags: Essential for unexpected delays or overnight stops.
- Communication devices: Test radios or cell phones.
- Side mirrors: Confirm side mirrors are correctly adjusted for the driver’s line of sight and are securely attached.
- Convex mirrors: Verify the alignment of convex mirrors to provide an optimal wide field of view. Ensure they are not loose.
- Motorized adjustment: If mirrors have motorized adjustment capability, ensure these work.
Front suspension
- Shock absorbers: Inspect for leaks, visible damage or signs of wear.
- Springs: Pay attention to signs of sagging, damage or cracks.
- Bushings and mounts: Ensure bushings and mounts are in good condition and don’t have any significant wear, deterioration or damage.
- Alignment: Test steering stability to identify any abnormal vibrations or wandering.
- Tie rods and ends: Examine tie rods for signs of looseness, wear or damage.
Driver door
- Door Latches: Verify that door latches engage and disengage smoothly to maintain safety while driving.
- Hinges: Inspect door hinges for signs of wear, rust or damage.
- Seals and weatherstripping: Pay attention to any gaps, tears or deterioration of seals and weatherstripping. Proper seals prevent leakage and maintain a comfortable cabin environment.
- Mud flaps: Should be securely mounted.
- License plate: Ensure the license plate is securely attached and visible. A properly displayed license is crucial for regulatory compliance.
- Exhaust: Note any damage to the exhaust system, like rust or loose components.
- Rear doors or gates: If applicable, test the operation of rear doors or gates.
Coupling system
- Fifth wheel: Inspect for damage or misalignment.
- Kingpin: Ensure there is no wear or damage. A well-maintained kingpin ensures a secure attachment to the fifth wheel.
- Locking mechanism and safety latch: Test the locking mechanism to ensure it engages securely to help prevent accidental uncoupling during transit.
- Release handle: A properly functioning handle facilitates efficient coupling and decoupling.
- Connection hardware: Confirm that all connection hardware, such as bolts and brackets, is secure. Loose components can compromise the coupling system.
- Air and electrical lines: Inspect these lines for damage or leaks and ensure the trailer brake and light systems work.
- Structural integrity: Inspect the trailer for signs of structural damage, including rust, dents or wear.
- Lights and reflectors: Check that all lights and reflectors are functional.
- Brake system: Test the trailer brake system, including service and emergency brakes.
- Suspension components: Inspect suspension components for signs of wear.
- Tires and wheels: Ensure proper tire tread depth and pressure.
- Cargo: Confirm that cargo is securely fastened and within legal limits.
- Landing Gear: Check for proper functioning to ensure stability during loading and unloading.
In-cab inspection
- Steering wheel: Ensure the steering wheel is aligned and stable.
- Seat and seatbelt: Adjust the seat for comfort and confirm the seatbelt is in good condition.
- Pedals: Test the functionality of gas, brake and clutch pedals.
- Instrument panel: Inspect gauges on the instrument panel for proper readings about the truck’s status.
- Documentation: Ensure necessary documents like permits are present and up to date. This is essential for regulatory compliance.
- Electronic devices: Test GPS and communication systems.
How to properly report a pre-trip inspection
Reporting a pre-trip inspection is not just an industry requirement. It’s also a critical communication tool between drivers and fleet management . To effectively report results, it’s important to:
- Use a standardized form provided by the company or regulatory body.
- Record observations in an organized manner.
- Be specific and descriptive.
- Prioritize safety concerns in the report.
- Include suggestions for corrective actions.
- Submit the report promptly to allow swift resolution of issues and minimize the risk of operational delays.
- If available, leverage digital reporting platforms for efficiency. Digital reports can transmit information in real-time, streamlining communication between drivers and management.
- Confirm that the report has been received and acknowledged by the appropriate personnel.
What to do if there are issues in the pre-trip inspection
Encountering issues during a pre-trip inspection is common, and educating drivers on the importance of reporting is crucial for ensuring road readiness and compliance.
If issues arise, ensure they are documented thoroughly and reported promptly. If problems are safety-related, communicate these concerns to management immediately. Always practice clear communication, like concise and descriptive language, to ensure a shared understanding and quick resolution.
Frequently Asked Questions
When should a driver perform a pre-trip inspection.
A driver should perform a pre-trip inspection before embarking on each journey. This proactive examination of the vehicle’s mechanical and safety components ensures it’s in optimal condition for the road. Conducting an inspection daily or before the start of each trip is a regulatory requirement in many jurisdictions. Plus, it can enhance driver safety, limit the risk of mechanical failures and contribute to overall road safety.
What is the first step of the pre-trip inspection?
The first step of a pre-trip inspection should involve an external assessment of the truck or commercial vehicle. This includes visually inspecting the vehicle’s overall condition, ensuring no visible defects or safety hazards. Start with a walkaround to identify any significant issues. Then, break the inspection down into components. For example, start with the tires, then move on to the lights, brakes, mirrors, and under the hood.
What is the most overlooked part of pre-trip inspection reports?
Drivers may focus on more visible components, like tires and lights, neglecting critical elements like brake lines, suspension and the exhaust system. Checking for signs of leaks, loose parts, or damage underneath the vehicle is crucial for identifying hidden issues that could compromise safety and performance. Completing every part of the checklist ensures a comprehensive assessment, reducing the risk of overlooking these critical components.
What happens if I don’t perform the inspection?
Failing to perform a pre-trip inspection can have serious consequences, both legally and in terms of safety. Regulatory bodies often mandate these inspections, and non-compliance can lead to fines, penalties or even the suspension of driving privileges.
Beyond legal implications, neglecting the inspection jeopardizes safety. Without identifying potential issues before hitting the road, there’s an increased risk of mechanical failures, accidents, and breakdowns, posing a danger to the driver and others on the road.
Additionally, failure to perform pre-trip inspections may impact insurance claims and the overall reputation of the driver and transportation company.
What is a DOT pre-inspection checklist?
A DOT pre-inspection checklist is a comprehensive list of items and components that commercial vehicle drivers must inspect before embarking on their trip, as mandated by the United States Department of Transportation (DOT).
Where should the ignition key be during the pre-trip inspection?
During a pre-trip Inspection, the ignition key should be in the “off” position. This is a standard safety practice to prevent accidents during the inspection. Keeping the ignition key off allows the driver to thoroughly examine various components without the risk of moving parts or unexpected vehicle movement. This includes checking the vehicle’s lights, brakes, tires and other essential elements. It’s a precautionary measure that promotes the safety of the driver and those in the vicinity during the inspection process.
How long should a pre-trip inspection reports take?
The duration of a pre-trip Inspection can vary depending on factors such as the driver’s familiarity with the vehicle, the complexity of the truck itself, and the thoroughness of the inspection. On average, a comprehensive pre-trip inspection typically takes around 15 to 45 minutes.

Cody Lirette is Senior Content Marketing Manager at ORBCOMM. With over seven years of marketing and communications experience for both the public and private sector, he uses his passion for innovative technology and plain language to build compelling content that provides value.

- Container Shipping
- Jul 05, 2024
Life at sea is a calling for many of the 1.9 million seafarers who help sustain the global economy. It offers the chance for adventure and a rewarding career but is also dramatically different from any shore-based job. It’s a profession marked by long periods away from home and exposure to a uniquely dynamic risk…

- Jul 02, 2024
ORBCOMM has launched what it claims is an easier-to-install version of its reefer container monitoring system, CT 3600. Having recently branched out into dry container tracking, in agreements with container lines such as Hapag-Lloyd, ORBCOMM is revisiting its offering for the reefer industry, where container tracking began.

- Jun 26, 2024
Building a connected container fleet is easier said than deployed. With complex technology stacks, third-party installation costs and the sheer device count in some cases, there are real repercussions when maritime IoT deployments aren’t done right. Plus, there’s certifications to consider across different countries, potential container damage or downtime and high installation costs. We’ve designed…

Get started with ORBCOMM
Kelley Blue Book
Change Your ZIP Code
Kelley Blue Book® Values and pricing are based in part on transactions in your area. Your ZIP code also helps us find local deals and highlight other available offers.
Road Trip Safety Tips: NHTSA’s Pre-Trip Checklist
It’s summer, and time for the family road trip. Even before you hit the road, there’s a number of things you should do to ensure a safe and successful journey. The National Highway Traffic Safety Administration (NHTSA) has some common-sense tips on what you should check off your pre-trip list to avoid a costly and inconvenient breakdown or worse, a crash.
Here’s what the NHTSA advises:
Maintain your vehicle
Make sure that regular maintenance such as tune-ups, oil changes, battery checks, and tire rotations are kept up to date. Servicing your vehicle according to manufacturer recommendations is a sure bet that it will be in tip-top shape for your trip. If you’ve recently acquired a used vehicle and you’re not sure of its history , take it to your local mechanic for an inspection and any preventative maintenance that’s called for.
Check for latest recalls
Summer vacation trips are a good time to make a regular check to see if your vehicle is subject for any recalls that may have occurred in the past year that you may not be aware of. NHTA’s look-up tool lets you enter a Vehicle Identification Number (VIN) to find out if your specific vehicle is required to be repaired as part of recalls that go back 15 years. The tool can be found at NHTSA.gov/Recalls . And sign up for email recall alerts at NHTSA.gov/Alerts .
Carry an emergency kit
Be prepared for any contingency on the road with this emergency roadside kit recommended by NHTSA. Among the items you should carry are:
- Cell phone and charger
- First aid kit
- Flares and a white flag
- Jumper cables
- Tire pressure gauge
- Jack (and ground mat) for changing a tire
- Work gloves and a change of clothes
- Basic repair tools and some duct tape (for temporarily repairing a hose leak)
- Water and paper towels for cleaning up
- Nonperishable food, drinking water, and medicines
- Extra windshield washer fluid
- Emergency blankets, towels and coats
Perform these safety checks:
Tires. Inflation on all your tires should be checked to manufacturer specification at least monthly. Pressures should be measured on cold tires (not having been driven in the past three hours) as well as checked on the spare, if so equipped. The correct pressure can be found on the inside of the driver’s doorjamb or in the owner’s manual. You can use this time to also look for excessive or unusual tire wear which could be a sign that either one or more tires need to be replaced or rotated or that an alignment is required.
Lights. Inspect all the lights on your vehicle to make sure they are in working order. That includes headlamps, turn signals, brake lights, emergency flashers and interior lights. Also, if you tow, do a visual check to make sure that the trailer’s taillights, flashers and brake lights are functioning.
Cooling system. Check coolant in your radiator to make sure it’s filled to the proper level. Also check for color and particles. If the fluid is rusty or there’s some grit, it’s time to get the cooling system flushed and refilled. If there’s oil or sludge in the fluid, immediately take your vehicle to a mechanic, as this is a sign of serious engine trouble.
Oil and other fluids. Make sure your engine has the correct level of oil as well as look at the condition of the oil itself. If it’s dark or dirty, it’s time for an oil change, which should also include a new filter. Also check other fluids including the levels and condition in the brakes, windshield washer reservoir, and transmission. In addition to seeing if the reservoir is full, also check for leaks, which would require immediate service.
Belts and hoses. A look under the hood is recommended to check the hoses and belts for wear and possible replacement. Hoses that are cracked, bulged or blistered should be replaced as they have the potential for failure, especially in high summer heat. Also take the time to inspect the hose connections to ensure they are secure. Check belts for excessive wear or squealing when the car’s engine is revved. This is also a good time to check the condition of the air filter and change if necessary.
Wiper blades. Especially after severe winter weather or exposure to hot temperatures, windshield wiper blades are subject to degradation. Look at them for signs of wear, check to see if they properly clear the window in both directions and replace worn ones before you hit the road.
Air conditioning. Give your climate control system a good workout. Make sure the temp blows cold and that all the fan speeds work.
Does your car need work before your summer road trip? Find a local dealership now!
For Sale Near You
Browse Best Cars

Best Trucks

Best Minivans

Best Hybrids
Best Hybrid SUVs
Best Electric SUVs
Best Compact SUVs
Best 3-Row SUVs
Best Midsize SUVs
Best Fuel efficient SUVs
Sign up for Kelley Blue Book newsletters
The best cars and best deals delivered to your inbox
Take the Next Step.
Price cars, trucks and SUVs on KBB.com
Latest News

When Will New Car Prices Drop?

The Cheapest New Cars of 2024
Here are the 10 cheapest new cars of 2024, along with more than a dozen honorable mentions that all start below the $25,000 mark.

At Long Last, the 2025 BMW M5 Touring

Best 7-Seat Hybrids

‘Acura Performance EV Concept’ Previews a — You Guessed It

Some New Cars Easy to Find This Month; Some Not

2025 Lincoln Navigator: Imposing New Look, Huge Screens

Electric Car Rebates and Incentives: What to Know by State
- Search search
- ITS Dispatch
- Other Products
Pre-Trip Truck Inspections (11-Step Checklist)

There's a better way to find loads.
Demo the truckstop load board and see how easy it is to find the right loads fast., find your next load, make more money starting now..
The Federal Motor Carrier Safety Administration at the Department of Labor requires a pre-trip inspection by the driver. Any deficiencies must be acknowledged and certified that appropriate repairs have been made before a trip begins.
What is a pre-trip truck inspection?
A pre-trip truck inspection is a thorough check of the truck and its major systems to maintain safety on the road. Inspections need to occur before the start of a driver’s shift and at least once every 24 hours while on the road.
Truck pre-trip inspection needs to be performed by the driver while on duty, but before driving starts.
Why truckers should always perform a pre-trip inspection
Driving a truck is one of the most dangerous occupations, according to the Bureau of Labor Statistics. Drivers of heavy trucks and tractor-trailer trucks suffer fatal accidents more than any other occupation .
A pre-trip inspection checklist helps keep drivers safe. Your inspection is important to ensure safety, maintenance, and procedures are followed to help mitigate liability.
A CLD pre-trip inspection checklist helps uncover potentially dangerous conditions, such as unsecured loads or problems with brakes or steering. While it might be tempting for experienced drivers to skip or shortcut a pre-trip vehicle inspection , it’s never a good idea. “Better safe than sorry” should be the mantra 100% of the time, and drivers shold never skip a thorough pre-trip inspection before a truck hits the road.
Maintenance
A truck driver pre-trip inspection can find minor issues before they become serious. This can save you money on maintenance by solving problems before your trucks get on the road. Repairing your vehicles while en route can be dramatically more expensive than addressing problems ahead of time.
Your DOT pre-trip inspection helps you stay in compliance with Department of Transportation regulations. In the case of an audit, the DOT may review your pre-trip inspection checklist to ensure they have been filled out properly. If the audit shows that issues have been ignored or uncovers a violation, it can lead to fines and hurt your Compliance, Safety, Accountability (CSA) score.

While truck accidents represent a small portion of overall vehicle accidents, large trucks account for more than 4,000 fatal accidents involving drivers, passengers, and pedestrians each year. Even if drivers are not at fault, your liability can increase if you can’t show proof that a pre-trip inspection report was done, was completed improperly, or if known defects were not addressed.
How long should a pre-trip inspection take?
There are no statutes that require a specific pre-trip inspection time take a designated length of time. In practice, an inspection should take as long as necessary to ensure vehicles are safe to drive and have been properly maintained. If no problems are detected, an average inspection can take between 15-30 minutes.
Do not rush inspections. It’s easy to miss things that can put drivers and others at risk.
Pre-trip inspection checklist for truckers
Do you have to log a pre-trip inspection? The answer is yes. Not only are you required to do so by federal law, but you also want the documentation in case of any claims against your company. So, what should a pre-trip inspection checklist include?
Here are some of the most common items:
Inspect the engine compartment.
Inside the engine compartment, check components including:
- Air compressor
- Steering gearbox
- Steering linkage
- Hoses and wiring
Inspect the fuel tank and battery.
Your pre-trip inspection should include a visual check of your fuel tank and battery area to make sure nothing is cracked or leaking. Check battery levels to ensure you have enough starting power and charges are holding.
Inspect the fluids.
Check for fluid leaks by looking under the truck for signs of fluid on the ground, including:
- Power steering fluid
- Brake fluid
- Windshield washer fluid
You will also need to look under the hood to rule out any problems inside the engine compartment. Your pre-trip truck inspection includes checking for adequate fluid levels and the condition of hoses, belts, and wires for safe operation. Pay particular attention to the oil pressure gauge to make sure it’s working properly.

Inspect the brakes.
If your brakes aren’t working optimally, you put drivers and everybody else on the road in danger. A proper pre-trip inspection will include inspecting the brake system both in-cab and externally.
- Truck drivers should check the brake adjustment with the slack adjuster for proper alignment.
- Check brake linings for appropriate thickness.
- Ensure your truck’s air lines aren’t damaged, don’t leak, and are properly sealed.
Brake checks should include air brakes, parking brakes, and hydraulic braking systems.
Inspect the tires.
Inspect tires to make sure you have an acceptable amount of tire tread for safe operation. There should be no cuts, bubbles, or gouges. There should be no foreign objects, such as stones or large debris, between the wheels and no space between tires and rims.
Also, be sure to check and maintain the appropriate air pressure.
Inspect the wheel lug nuts.
Regardless of tire condition, you also need to check the lug nuts. Tighten any loose wheel fasteners. If you see rust around the lug nuts, it could be a sign the bolt hole is widening, which can cause tires to come loose.
Inspect the coupling system.
A failure in the coupling system can cause you to lose your load. Pay particular attention to your kingpin and the sliding fifth wheel locking pin. Then check the other components that connect your trailer to your cab, including:
- Electrical connections
- Locking jaws
- Mounting bolt
- Release arm
Inspect the lights and reflectors.
Exterior lights and reflectors help other drivers see your vehicle approaching and make your rig more visible at night. Check that lights, warning lights, and turn signals are working properly, and lenses are clean for maximum visibility.
Reflectors tend to fade over time from exposure to the elements. Make sure your truck’s reflectors are free of any dirt or debris. They should be intact without cracks, missing pieces, or peeling.
Inspect the trailer.
Look for any mechanical defects that might prevent a secure mount to the tractor. Do a pre-trip truck inspection to look for items such as holes, cracks, breaks, bends, or missing rivets in the:
- Release pins
- Crossmembers
- Release handles
- Locking pins
- Doors and hinges
Inspect the cabin.
Inside the cabin, check seatbelts for any signs of wear or fray and ensure a snug fit. You should also check the operation and functionality of your inside and outside mirrors, seat position, steering wheel, and pedals. Make checking the windshield for cracks or chips standard operating procedure, along with performing a safe start to make sure lights and turn signals are working properly. This includes ABS lights and gauges. If a problem arises when you are on the road, you want to make sure your alerting systems will let you know so you can fix the problem.
You’ll also want to check your windshield wipers and horns.
Inspect the emergency kit.
Trucks are required to carry emergency equipment kits that include:
- Fire extinguishers readily available for use
- At least one spare fuse for each type of fuse needed for parts and accessories
- Warning devices for stopped vehicles, such as bidirectional reflective triangles
- Red warning flags that can be maintained in an upright position
Each item should be in working condition in case of an emergency stop.
Safely haul more high-paying loads.
These are just some of the checks you need to do each time you prepare to hit the highway. Your pre-trip truck inspection checklist should include every aspect of your vehicle and its loads. Ensure you have all the necessary paperwork and documentation to prove the pre-trip inspection was done properly and retain copies for your records.
Once your pre-trip inspection is complete, you’re ready to hit the road and start making money! Find the highest paying loads with the Truckstop Load Board . Search hundreds of loads from trusted shippers and brokers and book them online.
Get a free demo of the load board that delivers more.
- SHARE ON TWITTER
- SHARE ON FACEBOOK
- SHARE ON LINKEDIN
Related Blogs

The Rise of Fraudulent Carriers: A Growing Threat to Freight Brokers

Parking Safety Tips for Female Truck Drivers

Is Trucking Business Profitable? 6 Ways to Make More Money
Browse by Topic
- Find Freight
- Get Authority
- Improve Carrier Safety
- Manage Business
- Move Freight
- Protect My Business

Schedule a demo.
Find out how our platform gives you the visibility you need to get more done.
Subscribe to our newsletter.
Get helpful content delivered to your inbox.
You did it!
Please provide email address and choose a newslettter option.
Thank you for subscribing! Watch for an email arriving in your inbox soon.
We are sorry, something went wrong. Please try again later.

Get started for just $39
Basic searching and posting on the internet's most trusted load board.
USD/User/Month**
- done Load Searching
- done Truck/Lane Posting
- done Decision Tools
- done Book It Now
Everything you need to start finding and booking loads now.
Everything in Basic plus tools to weed out slow-paying brokers.
USD/User/Month
Level up your profits with tools that make it easy to make more on every load.
** Price per user. Up to 3 users.
* Amount shown excludes applicable fees & taxes.
Tell us about yourself.
Please check that your entries below are correct.
Please check that your entries above are correct.
Recession-proof your trucking business with this FREE guide!
Get the trucker's guide to 2024: how to succeed in any market today.
- Partner Marketplace
- Terms and Conditions
- Partner Marketplace Terms of Use
- Privacy Policy
- Report non-payment
You did it! Thank you for subscribing! Watch for an email arriving in your inbox soon.
- 🙋🏻 We're hiring!
- Refer a Friend
Laura Flowers
Share to Social
Jan 7, 2020
5 minute read
10 Aspects Every Pre-Trip Inspection Checklist Should Include
Pre-trip inspections are integral to preventing downtime and allow fleet managers to keep a finger on the pulse of their assets. Using technology to conduct pre-trip inspections ensures your drivers complete fast, thorough inspections to confirm the health of your fleet.

The Benefits of Digital Pre-Trip Inspections Checklists
While pre-trip inspections are required practices for U.S. commercial fleets, they provide immense benefits into increasing the overall performance of your assets and your company’s earning potential.
Pre-trip inspections are typically performed each time a driver enters a vehicle (and are usually followed by a post-trip inspection). This allows the driver to check for any vehicle issues and communicate them with their fleet manager.
Many fleet managers still use inefficient paper-based inspection forms to manage their assets. Paper inspection forms are time-consuming for drivers, and issues can’t be easily reported to fleet managers in a timely manner, resulting in vehicle downtime.
Pre-Trip Inspection Apps
Trying to make sure your drivers complete pre-trip inspections can be challenging. Some drivers find the pre-trip inspection process tedious, particularly if they’re still using paper inspection forms, and rush through them (or skip them altogether). This can result in unplanned downtime, reduced vehicle lifespan or compliance violations.
Many fleets are making the switch to pre-trip inspection apps to streamline the inspection process, eliminate communication gaps and increase driver participation. Digital inspections, like eDVIR (electronic Daily Vehicle Inspection Reports) , provide an easy process that empowers drivers to complete thorough vehicle inspections in a mobile app.
Using a mobile app to synchronize vehicle inspections through software can reduce inspection times by 65 percent . When developing your own digital pre-trip inspection form , be sure to include the following aspects to guarantee your assets are in working condition.
1. Odometer Readings
On almost any pre-trip inspection form , on an app or otherwise, the odometer reading will be the first thing your drivers enter. Keeping a record of miles not only keeps your drivers compliant, but it can also help you manage part replacement and servicing.
Odometer readings also provide extensive insight into your assets and allow you to plan and carry out maintenance tasks. Watching your mileage closely ensures you adhere to your fleet’s preventive maintenance schedule , monitor asset utilization and track fuel performance.
2. Safety Features
Safety is continuously at the forefront of any fleet manager’s mind. Including safety items in your pre-trip inspection not only maintains compliance, but also ensures the safety of vehicles, drivers and the public.
When building your configurable pre-trip inspection form , consider adding items that help verify vehicle safety including but not limited to:
- Load security
- Emergency medical kit
Reliable tires are perhaps one of the most important parts of any vehicle. They’re the key to getting you to your destination, and ensuring that your fleet’s tires are in good condition prevents downtime.
Tires should be inspected for proper inflation and tread. Drivers should check for acceptable tire PSI (pounds per square inch) and monitor tire tread depth to ensure proper traction on the road.

4. Diagnostic Trouble Codes
Many fleets use telematics devices to track vehicles and improve processes such as preventive maintenance and data entry. Telematics devices also alert drivers to any major engine faults through diagnostic trouble codes (DTC).
DTC and fault alerts ensure you’re immediately aware of larger issues under the hood and can act quickly. While drivers should check their telematics devices for any DTC alerts, fleet managers can receive automatic DTC notifications in fleet management software to be notified immediately.
5. Vehicle Condition
It sounds basic, but walking around the vehicle and inspecting the body is an often overlooked aspect of pre-trip inspections. That said, checking the body for dents, scratches, or other issues not only helps drivers manage safety and liability, but it also can prevent more serious problems.
If your drivers swap vehicles or often park on their trips, each vehicle should be checked to make sure there is no damage to its exterior. Pre-trip inspection apps help prove chain of custody and can notify fleet managers of issues drivers spot from earlier trips or if the vehicle was hit while parked.
Though vehicle exterior damage is usually minor, it can also indicate more serious issues. If a truck is damaged near the fuel tank, the damage could easily compromise the tank, causing a larger issue.
When using mobile inspection forms, drivers can report these issues and take photos, helping fleet managers determine the severity of the issues and begin planning for repairs.
A vehicle’s lights both illuminate the road and provide signals to other drivers. Ensuring proper function of all exterior lights, reflectors and cabin lights should be included on each pre-trip inspection, regardless of the time of day.
Your assets have a variety of components that require fluids to function properly. While your preventive maintenance plan should include oil changes and fluid top-offs, your drivers should check fluid levels before each trip.
Proper fluid levels can be the difference between a well-performing vehicle and unplanned breakdowns.
Another aspect of pre-trip inspections that can be overlooked is the battery. One may assume that if the car starts, the battery is in working condition and doesn’t need to be checked.
While the battery may be in working order, the battery mounting, terminals and cables should be inspected prior to every trip to avoid any failures throughout a driver’s trip. Any signs of issues regarding voltage, corrosion or poor connections should be documented for the maintenance team to inspect.
Checking the engine compartment is one of the most comprehensive aspects of pre-trip inspections and requires thorough examination to ensure performance.
When checking the engine compartment, drivers should pay close attention to hoses and tubing, as well as any fluid reservoirs, for any obvious or potential leaks. All belts should also be inspected for performance, and drivers should document any signs of wear.
Many types of fleet vehicles, particularly in the trucking industry, have multiple brakes, and every component of the brake systems should be checked daily for the condition. Hydraulic, air and parking brakes should be tested manually for suitable function.
If issues arise during a pre-trip inspection, drivers can document them in detail on their vehicle inspection app. All issues are immediately recorded in fleet management software , and fleet managers can be notified immediately to remove information bottlenecks and begin maintenance quickly.
Take your pre-trip inspection process to the next level with Fleetio! Start your free trial or request a demo today.
About the Author

Content Marketing Specialist
Laura Flowers is the Content Marketing Specialist at Fleetio. When she’s not blogging, you can find her reading on the couch with her cat or in the studio tap dancing.
Ready to get started?
Join thousands of satisfied customers using Fleetio
Questions? Call us at 1-800-975-5304
or Start a Free Trial
Get Our Newsletter
Join a community of 70,000+ fleet industry professionals.
Complete CDL Pre-Trip Inspection Checklists for Class A and Class B Drivers
Your fleet is loaded, and the fuel tanks are full – you’re ready to move. Or are you?
If you haven’t completed a pre-trip inspection checklist, you might not be.
The Department of Transportation (DOT) requires all drivers holding a commercial driver’s license (CDL) to complete a pre-trip DOT inspection checklist before operating a commercial vehicle. Usually taking about 10-15 minutes, this inspection checks essential systems such as brakes and steering, as well as tires, mirrors, and emergency equipment.
So how can drivers know what to check? In this article, we’ll run down the DOT requirements for pre-trip inspection checklists, along with key differences between Class A and Class B inspections and even some useful tools that can help make the job easier.
What is a pre-trip inspection checklist?
A pre-trip inspection checklist is a list of items that CDL holders need to review before operating their vehicles. As you may have guessed, this process is known as a pre-trip inspection .
What is a pre-trip inspection?
Pre-trip inspections aren’t just an annoying routine – they’re an important and necessary safety measure that helps ensure that commercial vehicles are up to fleet safety operation standards .
While the scope and contents of a pre-trip inspection checklist vary according to the type of commercial vehicle and its use, you can complete most inspections in about 10-15 minutes. Checklist items generally include assessing the operational condition of anything the driver and vehicle need to operate the vehicle safely . This usually includes things like an air brake check, along with checking lights, tire pressure, couplings, and so on.
Drivers must also record their inspection results in a driver vehicle inspection report (DVIR), which is usually automated (or at least streamlined) in companies with established fleet management tools. Periodic inspection requirements require additional pre-trip inspections every 24 hours of continuous use or whenever the driver changes vehicles.
It may seem like a lot to review, but most of it boils down to common sense. Before you start crawling under the nearest truck, however, you may want to see whether you have to perform a pre-trip inspection in the first place!
Who needs to complete a pre-trip inspection?
Pre-trip inspections are mandatory for both Class A and Class B commercial driver’s license (CDL) holders.
If you’re a CDL holder, you probably already know which Class you fall into. But just in case, here’s a quick refresher on the types and weights of vehicles that different classes of CDL holders can operate.
- The Class A CDL applies to commercial vehicles weighing at least 26,001 pounds that can tow at least 10,000 pounds. This usually encompasses most towing commercial vehicles such as big rigs, tractor-trailers , and flatbeds.
- The Class B CDL applies to commercial vehicles weighing at least 26,001 pounds that can tow no more than 10,000 pounds. This usually encompasses most non-towing commercial vehicles, such as passenger buses, garbage trucks, and delivery trucks.
While there is also a Class C CDL, this usually extends to specialty vehicles not found under either Class A or Class B (such as hazardous waste transport). However, since their detailed inspection procedures are highly specific and beyond the scope of this article, we won’t cover them here.
But what’s involved in Class A and Class B inspections, and how can they differ?
Class A vs. Class B pre-trip inspections
While Class A and Class B vehicles share many of the same detailed inspection procedures (every commercial vehicle has brake lights, after all), each class and vehicle type has its own inspection procedures.
- Class A and Class B commercial vehicles share many common inspection items, such as front and rear suspension, brake lights, minimum brake pad thickness, oil level, etc. These are usually items that apply to any type of road vehicle.
- Class A inspection items are usually those related to towing systems in commercial vehicles, such as the trailer parking brake, coupling areas, etc. These inspection standards usually extend to the trailer, flatbed, or any other object that the truck is towing.
- Class B inspection items are usually those related to non-towing commercial vehicles. As this is a very broad category, some Class B vehicles may not require any additional inspections, while others may have several specific systems to inspect. In the case of the latter, these are usually items specific to the vehicle itself, such as checking for broken seat frames in passenger areas of a bus.
Of course, there’s much more to each pre-trip vehicle inspection than the handful of key differences we’ve listed here. In the next section, we’ll run down the pre-trip inspection process that applies to nearly every commercial vehicle and then detail more class-specific motor vehicle safety inspections.
CDL pre-trip inspection checklist
The standard CDL pre-trip DOT inspection checklist includes everything a commercial motor vehicle needs to navigate the road safely.
These are generally suspension- and engine-related items that would just as well apply to a regular car. As a general rule, a commercial pre-trip inspection test almost always includes the following motor vehicle safety inspections.
Brake system
There’s nothing more important than your vehicle’s air brakes. Note that the following air brake tests apply to both tractor brakes and trailer brakes on Class A commercial vehicles.
- Brake linings and brake pads: Brake pads should be no less than the minimum thickness of one-quarter inch (¼”). Also, be sure to check linings for oil and debris.
- Brake chamber: The brake chamber should be completely sealed with no audible air leaks.
- Air brake hose: No air should leak from the brake hose, and the line should be properly mounted and free of cuts or splits.
- Brake drum: Should not be blue from excessive heat.
- Hand brake: Push rods should have no more than one inch (1”) of play in either direction and stand up 90 degrees when pulled.
Depending on the vehicle, these items are usually checked with a 9-step, 7-step, or 5-step brake test. These tests usually involve pressing the brake pedal, service brake, hand brake, or foot brake under various conditions and seeing whether air pressure recovers to the proper level in time (see your vehicle’s operating guide).
For example, drivers can check for low air pressure by pressing the brake pedal to fan off the pressure. If repeatedly pressing the brake pedal results in a low pressure buzzer or light indicator, the brake system will require repair.
Engine compartment
Engine compartment inspection items include:
- Fluids: The coolant hose, power steering hose, and any tanks or reservoirs should all be securely mounted and have no leaks. Similarly, a dipstick should indicate that all fluid levels (including oil level and coolant level) are at their proper levels.
- Belts: All belts for compressors, pumps, and alternators should have no cracks or frays and give no more than one-half of an inch (½”) of play.
- Air compressor: Should be securely mounted and functional with no cracks or leaks.
- Water pump: Pump hoses must be properly connected with no leaks.
- Alternator: Wires and belts must be properly connected.
Front of vehicle
Front-of-vehicle inspection items usually include steering equipment such as:
- Steering column or steering shaft: The steering column should be straight and unbroken.
- Steering box: The steering gearbox should be intact, and all connected hoses should be securely mounted with no power steering fluid leaks.
- Tie rod and control arms: Both should be straight.
- Drag link: The rubber should be greased and uncracked.
- Pitman arm: All cotter pins and caste nuts are present, secure, and tight.
Front suspension
Front suspension inspection items include springs, spring mounts, shocks, and suspension airbags.
- Spring mounts and spring hangers: Spring mounts should hold spring hangers securely in place with no signs of wear, cracks, or breakage.
- Leaf springs: Should be secured to hangers with no cracks or breakage.
- Shock absorbers: Should have no leaks, splits, or dry rot in the rubber. Leaks are typically located where the top and bottom pieces overlap.
- U-bolts: Should all be securely fastened around the spring and axle.
Rear of vehicle
The rear of tractor or truck inspection items include the following.
- Driveshaft: Should be straight with unbroken U-joints.
- Exhaust: Should be free of rust with no leaks or excessive soot.
- Frame: Structurally sound with no damages or unauthorized repairs/welds.
- Steps: Structurally sound and mounted properly.
- Mud Flaps: Should be clean, unbroken, and secured at the right height.
Wheels and tires
Wheel and tire inspections check for both proper inflation and overall tire condition, specifically tread depth. Note that this also extends to trailers on Class A vehicles.
- Drive and steer tires: Tire tread should be even with a minimum tread depth of 2/32” on drive tires and a minimum tread depth of 4/32” on steering axle tires. Use an air pressure gauge to check inflation levels against manufacturer inflation levels. Treads and sidewalls should be free of cracks, bulges, and abrasions.
- Wheel rims: No unauthorized repairs or illegal welds.
- Hub seal and axle seals: Should show the axle and hub seal intact with no visible leaks or play.
- Dual spacing: Any dual tires must have enough spacing between them.
- Lug bolt holes: All lug bolt holes should have all lug bolts and lug nuts.
- Valve stem: No audible air leaks.
Lights and reflectors
Light and reflector inspections include everything from running lights to DOT tape and 4-way emergency flashers.
- High and low beams: Ensure both are functional on all forward lights.
- Turn signals: Make sure all are functional for both tractor and trailer.
- Brake lights: Make sure all are functional for both tractor and trailer.
- Running lights and license plate lights: Walk around the truck and make sure all are on.
- 4-way emergency flasher function: Walk around the truck to make sure the 4-way flasher rear and front lights are fully operational.
- Reflector tape and DOT tape: All DOT tape and reflector tape should be clean with no signs of excessive wear.
Driver door and fuel tanks
Cab doors and fuel tanks are often located in the same area on commercial vehicles. Be sure to check the following:
- Door and door hinges: Should be intact and latch completely. The rubber door seal should be clean and uncracked.
- External mirrors and mirror brackets: All external mirrors should be firmly attached to their mirror brackets. External mirrors should also be clean and uncracked. Also, be sure to adjust external mirrors and mirror brackets to provide an adequate rear view.
- Steps: Should be securely mounted and able to support the weight.
- Fuel tank: No leaks, with cap and seal unbroken and intact.
In-cab items
Cab inspection usually covers the following items:
- Steering wheel: Fully attached to steering column.
- Gauges: Check that air gauges, oil pressure gauges, and any other gauges for operation function normally within their operating range. Air pressure gauges should build pressure to the governor cut out during an applied pressure test.
- Warning lights: Lights should show clearly for any lighting indicators, such as ABS lights or oil pressure indicators.
- Windshield: Cracks beyond one inch (1”) are not permitted. Windshield wipers should be clean and work properly, and the truck should have enough windshield washer fluid.
- Seat belt: Should fasten securely.
- City horn and air horns: Both air and city horn should sound properly.
- Heater and defroster: Should heat and function properly.
Special checks for Class A and Class B inspections
As we mentioned earlier, a Class A pre-trip truck inspection will usually have different periodic inspection requirements than, say, a Class B pre-trip school bus inspection.
While periodic inspection requirements ultimately come down to the exact type of vehicle (a Class B garbage truck, for example, may require additional inspections for its armature and compactor), the main differences usually come down to trailers vs. passenger areas .
- Trailers share many of the same inspection checklist items as the tractor, specifically the wheels and tires, suspension, and rear of trailer lights and reflectors. Also, make sure that the landing gear is not broken and can be fully raised.
- Coupling area inspections include checking air connectors, electrical lines, and nearby glad hands. All mounting equipment, such as the fifth-wheel plate, kingpin, mounting bolts, skid plate, release arm, and locking jaw and pins, should be present, secure, and in good condition.
- Rear of truck suspension inspections share many of the same items as those of front inspections but with special attention paid to the torque arm (or radius rod), which should be mounted securely with intact brushings.
- Passenger items such as seating, passenger doors, and any wheelchair lifts should all be secure and in working order. Emergency exits should also be clearly labeled and sound an alarm when opened.
- School bus items include all of the passenger items listed above, with the addition of checking student loading lights, stop arm, student rear-view mirror, and a recent first aid and body fluid cleanup kit.
Pre-trip inspections made easy with CalAmp
With fleet management software from CalAmp, you can spend less time filling out pre-trip inspection reports and more time on the road. Request a demo today to see just how easy it is to use CalAmp’s pre-trip inspection tools!
Recent Related Stories
Connect with us.
Daily Pre-Trip Inspection Checklist for Truck Fleet Monitoring
- Ossian Muscad
- January 26, 2023

Last Updated on July 29, 2024 by Ossian Muscad
A comprehensive daily pre-trip inspection is the cornerstone of effective truck fleet management. By diligently examining every component of a truck before each journey, fleet owners can significantly reduce the risk of breakdowns, accidents, and costly repairs. This article will delve into the essential elements of a daily pre-trip inspection checklist and explain how it contributes to overall fleet efficiency and safety.
Table of Contents
What is a Pre-Trip Inspection?

A pre-trip inspection is a mandatory examination of a vehicle conducted daily before operation to verify its roadworthiness. Drivers use a checklist to systematically identify potential issues with the truck, such as mechanical problems, tire wear, or lighting failures. By catching problems early, pre-trip inspections help prevent breakdowns, accidents, and delays.
Failing to perform a pre-trip inspection can have serious consequences. Not only does it endanger the driver and other road users, but it can also lead to legal penalties, damage to a company’s reputation, and increased operating costs due to unexpected repairs.
Why Pre-Trip Inspections are Often Overlooked
While pre-trip inspections are crucial for road safety, many drivers neglect this essential task. Here are the primary reasons why:
Time Constraints
Truck drivers often operate under tight schedules, with delivery deadlines and route constraints. Performing a thorough pre-trip inspection can be time-consuming, requiring careful examination of various vehicle components.
Drivers may feel pressured to complete the inspection quickly to minimize delays and maintain their schedules. This rush can lead to superficial inspections, overlooking potential issues.
Process Complexity
A comprehensive pre-trip inspection involves more than just a visual check. Drivers must examine specific components, such as tires, lights, brakes, and engine compartments.
They also need to document any problems or defects accurately. This detailed process can be overwhelming, especially for drivers who are already fatigued or under pressure. The added task of documentation may further discourage drivers from performing thorough inspections.
Paperwork Burden
Traditional paper-based pre-trip inspection forms can be time-consuming to complete. Drivers must fill out detailed checklists, often in duplicate, and submit them to their supervisors.
This paperwork can be cumbersome and inefficient, especially for drivers who make multiple trips in a day. The administrative burden associated with paper-based inspections can contribute to driver frustration and neglect of this essential task.
Why are Pre-Trip Inspections Important?
Pre-trip inspections are crucial to maintaining vehicle safety and fleet efficiency. By systematically checking a vehicle before each trip, drivers and fleet managers can identify potential problems early on and prevent costly breakdowns and accidents.
Improved Safety
Regular pre-trip inspections significantly reduce the risk of accidents. By carefully examining vehicle components such as tires, brakes, lights, and steering, drivers can identify and address potential hazards before they become serious issues. This proactive approach helps protect both drivers and other road users.
Legal Compliance
Many jurisdictions require commercial drivers to conduct pre-trip inspections and maintain detailed records. Failing to comply with these regulations can result in hefty fines and penalties. By consistently performing and documenting pre-trip inspections, fleets can avoid legal trouble and maintain a strong reputation.
Increased Vehicle Lifespan
Early detection of minor issues through pre-trip inspections helps prevent them from escalating into major problems. Addressing small problems promptly can extend the overall lifespan of a vehicle, reducing the need for costly repairs and replacements. This ultimately leads to lower maintenance costs and better vehicle performance.
Cost Savings
Preventing breakdowns through pre-trip inspections helps avoid costly roadside repairs, towing fees, and lost productivity. Additionally, well-maintained vehicles tend to consume less fuel and require fewer repairs, resulting in overall fleet cost savings.
Enhanced Fleet Efficiency
Pre-trip inspections help maintain fleet uptime and productivity by identifying and addressing vehicle problems before they cause breakdowns. This means fewer delays, improved delivery schedules, and better customer satisfaction.
Pre-Trip Inspection Requirements

Before operating a commercial vehicle, drivers must conduct a thorough pre-trip inspection to ensure the vehicle is safe for the road. Transportation regulations mandate this inspection and includes several key components :
1. Vehicle Condition Assessment
The primary goal of a pre-trip inspection is to verify that the vehicle is in safe operating condition. This involves a careful examination of various components, such as tires, brakes, lights, steering, and engine systems. Drivers must ensure that all safety equipment, including emergency exits, fire extinguishers, and first aid kits, is present and in good working order.
2. Inspection Report Review
If a previous inspection report exists for the vehicle, drivers must review it to identify any reported issues. This review helps determine if necessary repairs have been completed and if any ongoing concerns require attention.
3. Driver Certification
After completing the inspection, drivers must sign and date the inspection report. This signature confirms that they have conducted a thorough examination and believe the vehicle is safe to operate. If any issues are found during the inspection, the driver must document them on the report and certify that the vehicle will not be operated until the problems are corrected.
4. Driver Vehicle Inspection Report (DVIR)
If a driver discovers any vehicle defects or deficiencies during the inspection, they must complete a Driver Vehicle Inspection Report (DVIR). This report details the specific problems found, including their location and severity. The DVIR also includes information about the vehicle, driver, and carrier. The vehicle must be taken out of service until the identified issues are repaired.
By following these requirements and completing thorough pre-trip inspections, drivers can help prevent accidents, reduce breakdowns, and ensure compliance with transportation regulations.
What is a Daily Pre-Trip Inspection Checklist?
A daily pre-trip inspection checklist is a tool designed to help monitor trucks effectively by providing detailed information about the vehicle’s daily condition before each journey. This information eliminates potential risks and disruptions to fleet operation. In addition, it makes it easy to track maintenance schedules, detect problems early, and ensure compliance with safety regulations.
What to Check During a Pre-Trip Inspection?
The specific items included in a pre-trip inspection can vary based on local regulations and the type of vehicle. However, a thorough inspection typically covers key areas. With that said, here are some of the areas that you should cover during a pre-trip inspection.
1. Vehicle Exterior
- Tires: Check for proper inflation, tread wear, damage, and foreign objects.
- Wheels and Rims: Inspect for cracks damage and secure lug nuts.
- Lights and Reflectors: Ensure all lights, including headlights, taillights, brake lights, turn signals, and emergency flashers, are working correctly.
- Windshield and Wipers: Verify windshield clarity and wiper function.
- Mirrors: Check for proper alignment, cleanliness, and absence of cracks.
- Body: Inspect for dents, scratches, or any signs of structural damage.
2. Vehicle Interior
- Seat Belts: Verify proper function and condition.
- Horn: Test for clarity and functionality.
- Emergency Equipment: Check the availability and condition of the fire extinguisher, first aid kit, warning devices, and other required items.
- Driver’s Seat: Adjust for comfort and visibility.
- Controls: Ensure proper operation of the steering wheel, brakes, accelerator, and other controls.
3. Under the Hood
- Engine Oil: Check level and condition.
- Coolant: Verify level and condition.
- Brake Fluid: Inspect the level and check for signs of leaks.
- Power Steering Fluid: Check level and condition.
- Battery: Assess condition, terminals, and secure mounting.
- Belts and Hoses: Look for signs of wear, cracks, or leaks.
- Air Filters: Inspect for dirt and debris.
4. Additional Checks
- Fuel Level: Ensure sufficient fuel for the planned trip.
- Cargo Securement: Verify proper loading and securing of cargo (if applicable).
- Coupling System (for trailers): Inspect for damage, wear, and proper connection (if applicable).
Note: The content above is also the same as what you should include in your daily pre-trip inspection checklist. By consistently performing thorough pre-trip inspections, you can significantly improve vehicle safety, reduce breakdowns, and extend the life of your vehicle.
Benefits of Using a Digital Pre-Trip Inspection Checklist
Fleet managers often struggle to keep track of daily pre-trip inspections and ensure that vehicles comply with safety regulations. A digital pre-trip inspection checklist can help with the following:
Improve Fleet Safety and Compliance
A digital pre-trip inspection checklist can help fleet managers stay current on vehicle safety standards and quickly identify and address potential issues. Pre-trip inspections provide a comprehensive overview of vehicle safety and help ensure compliance.
Reduce Vulnerability To Accidents
By using a digital pre-trip inspection checklist, fleet managers can quickly identify and address any safety issues before they become a problem. This helps reduce the chances of an accident or disruption to fleet operations.
Save Time and Money
A digital pre-trip inspection checklist helps streamline the pre-trip inspection process and save time, which can ultimately result in cost savings. This improved workflow also eliminates the need for manual paperwork and reduces the risk of human error.
Ensure Quality Control
Using a digital pre-trip inspection checklist helps fleet managers keep track of all pre-trip inspections and quickly address any quality issues. This provides an easy way to identify problems and ensure that all pre-trip inspections are completed accurately and in a timely manner.
How to Create a Daily Pre-Trip Inspection Checklist
Creating a digital pre-trip inspection checklist is simple and can be done in just a few steps.

- Gather the relevant information: Start by gathering all the relevant information you need to include on your checklist, including the items listed above.
- Create the form: Use a digital solution such as Microsoft Word to create a pre-trip inspection checklist form.
- Make it easily accessible: Ensure the pre-trip inspection checklist is readily available to all drivers and vehicle operators.
- Monitor the process: Regularly monitor and review the pre-trip inspection checklist to ensure it is being filled out correctly and in a timely manner.
- Automate reminders: Set up automated reminders to ensure the pre-trip inspection checklist is completed before each trip.
- Implement the checklist: Once you have created a daily pre-trip inspection checklist and developed processes to ensure completion, implement it into your fleet operations.
- Track results: Keep track of all pre-trip inspection checklist results and use the data to identify areas for improvement.
- Use analytics: Use analytics better to understand the effectiveness of your pre-trip inspection checklist and make necessary changes.
- Make adjustments: Regularly review the pre-trip inspection checklist and make any necessary adjustments.
- Train drivers: Ensure all drivers are trained and knowledgeable on completing the pre-trip inspection checklist.
Creating and implementing a daily pre-trip inspection checklist allows you to conveniently monitor your truck fleets and ensure daily pre-trip inspections are completed. This can proactively reduce risks and prevent disruptions to fleet operation.
Frequently Asked Questions (FAQs)
Q1: how often should a daily pre-trip inspection be conducted.
A daily pre-trip inspection should be performed before a commercial vehicle is operated every day. This is a mandatory requirement to ensure road safety.
Q2: What is the ideal time allocation for a thorough pre-trip inspection?
While the time can vary based on the vehicle’s size and complexity, a general guideline is to allocate at least 30 minutes for a comprehensive inspection. However, it’s essential to prioritize thoroughness over speed.
Q3: Can I use a pre-trip inspection checklist template?
Absolutely. Using a pre-trip inspection checklist template is highly recommended. It helps ensure consistency and reduces the chances of missing critical items during the inspection. Many templates are available online for free.
Q4: What should I do if I find a problem during the pre-trip inspection?
If you discover any issues during the inspection, you should immediately report them to your supervisor or fleet manager. The vehicle should not be operated until the problem is resolved. Complete a Driver Vehicle Inspection Report (DVIR) to document the issue.
Q5: How detailed should the documentation be for a pre-trip inspection?
Documentation should be clear, concise, and accurate. It should include the date, time, vehicle identification number, driver’s name, and a detailed list of any defects or deficiencies found during the inspection.
Q6: What are the potential consequences of skipping a pre-trip inspection?
Skipping a pre-trip inspection can lead to serious consequences, including accidents, vehicle breakdowns, and legal penalties. It also puts the driver, other road users, and the company’s reputation at risk.
A daily pre-trip inspection is a critical component of safe and efficient fleet operations. By conducting thorough inspections, you can significantly reduce the risk of accidents, breakdowns, and costly repairs.
This article has outlined the importance of pre-trip inspections, the key components to check, and the potential consequences of skipping this crucial step.
Our goal was to provide you with essential information to create a comprehensive pre-trip inspection checklist and to emphasize the importance of making it a daily habit. By implementing a robust pre-trip inspection program, you can improve safety, reduce costs, and enhance overall fleet performance.
We encourage you to download a pre-trip inspection checklist template to get started. By making pre-trip inspections a non-negotiable part of your daily operations, you’re taking a proactive step toward a safer and more efficient fleet.
Streamline Pre-Trip Inspections with DATAMYTE
DATAMYTE is a quality management platform with low-code capabilities. Our Digital Clipboard , in particular, is a low-code workflow automation software that features a workflow, checklist, and smart form builder. This tool lets you create a digital daily pre-trip inspection checklist, ensuring all necessary checks are systematically documented and performed efficiently.
DATAMYTE also lets you conduct layered process audits (LPA), a high-frequency evaluation of critical process steps, focusing on areas with the highest failure risk or non-compliance. Conducting LPA with DATAMYTE lets you effectively identify and correct potential defects before they become major quality issues.
With DATAMYTE , you have an all-in-one solution for optimizing and simplifying the pre-trip inspection process, ensuring compliance and safety standards are consistently met. Book a demo now to learn more.
Related Articles:
- 30 of the Most Common Types of Forms & How to Create Them
- What is a Teacher Evaluation Form & How to Create One?
- Implementation
- Case-Studies
- White Papers
- Knowledge Base
Experts in the Connected Factory

- 1-800-455-4359
- (763) 553-0455 ext. 1
- [email protected]

Column Headline
A step-by-step guide to conducting effective pre-trip inspections.
.png "pre trip car inspection")
Whether you're a seasoned trucker or considering a career on the road, understanding the importance of pre-trip inspections is crucial. These inspections serve as your vehicle's health check before hitting the road, ensuring safety, efficiency, and compliance. I n this guide, we'll walk you through the step-by-step process of conducting effective pre-trip inspections, helping short haul drivers stay on top of their game. Let's dive in!
The Key to a Successful Journey
In the fast-paced world of short haul transportation, time is of the essence. Pre-trip inspections are your ticket to a smoother journey. This essential practice involves thoroughly checking your truck, trailer, and load for any potential issues that might jeopardize your trip. By dedicating time to a pre-trip inspection, you're setting the stage for efficient operations and, most importantly, a safe trip.
A Closer Look: The Pre-Trip Inspection Guide
Step 1: Essential Tools
Equip yourself with the necessary tools to conduct a thorough inspection, including a flashlight, tire pressure gauge, and reflective triangles.
Step 2: Visual Check
Begin by visually inspecting your vehicle for damages, leaks, or anomalies. Pay attention to tire condition, lights, mirrors, and overall vehicle appearance.
Step 3: Tire Check
Assess tire inflation, tread depth, and any signs of damage. Uneven wear can hint at potential alignment or suspension issues.
Step 4: Lights Examination
Inspect all lights, including headlights, taillights, turn signals, and brake lights. Promptly replace any burnt-out bulbs for optimal visibility.
Step 5: Fluid Level Verification
Check fluid levels like oil, coolant, and windshield washer fluid. Adequate levels are essential for smooth vehicle operation.
Step 6: Brake Test
Test your brakes for responsiveness and uniformity. Listen for unusual sounds or vibrations, and ensure the parking brake functions correctly.
Step 7: Mirror Assessment
Adjust mirrors for optimal visibility, minimizing blind spots. Keep them clean and properly positioned.
Step 8: Safety Gear Evaluation
Ensure safety equipment, such as fire extinguishers and reflective triangles, is present and in good condition.
Step 9: Documenting Findings
Take down any observed issues, damages, or irregularities in your notepad. These notes serve as a reference for addressing maintenance needs.
Pre-trip inspections are a must for short haul drivers, offering a blend of safety and efficiency. By committing to this routine practice, you're not only safeguarding your journey but also minimizing unexpected breakdowns that could disrupt your schedule.
What if there was an easier way to manage these inspections?
Traditionally, pre-trip inspections involved paper checklists that were prone to errors and often lost or damaged. Qv21 replaces these cumbersome checklists with digital versions accessible via tablets or smartphones. Drivers can quickly and accurately complete their inspections, reducing the risk of overlooking critical safety checks.
In the fast-paced world of short-haul trucking, every minute counts. A Transportation Management System (TMS) serves as an essential tool for short-haul drivers, enabling them to efficiently conduct pre-trip inspections. From real-time scheduling to digital checklists and data analytics, Qv21 streamlines the inspection process, enhances safety, and ensures compliance with regulations. Ultimately, Qv21's TMS helps short-haul drivers stay on the road, delivering goods safely and on time, while also prioritizing safety and compliance.
So, to all the short haul drivers out there, remember that a comprehensive pre-trip inspection is your gateway to a successful trip. Embrace it, master it, and hit the road with confidence knowing that you're well-prepared for whatever the journey brings. Safe travels!
Contact our team now to learn more and take your understanding to new heights.

Elevating Customer Success: Qv21 Technologies
The Customer-Centric Approach In a world where customer expectations continue to soar, the trucking industry is no exception. Customers seek more...

Overcoming TMS Implementation Challenges with Qv21
Change can be daunting, especially when it involves the adoption of new technology like a Transportation Management System (TMS). While the promise...

Embracing Change: Overcoming the Fears of Transitioning to a TMS
In the fast-paced world of logistics and trucking, the landscape is evolving at an unprecedented pace. With technology-driven advancements at the...
Competitive fuel discounts and powerful security controls.
Pay drivers instantly — and for less — with AtoB.
Who we serve
For neighborhood, regional, and other short-journey fleets.
For fleets with nationwide and interstate reach.
Partner with AtoB
Launch a cobranded card solution with AtoB
Launch your fuel card program with AtoB
Join the AtoB Discount Network and grow your gallons
Sustainability

Your Pre Trip Inspection Checklist: 5 Steps
Whether you’re headed out for an overnight delivery or a simple day trip, a proper pre trip inspection of your vehicle will help you identify potential problems before they can throw a wrench in your travel schedule.
Pre trip inspections are a must for both long-haul deliveries and casual road trips. But fleet drivers and owner-operators should take extra care to check that their vehicles are up and running before hitting the road. It’s a must not only for the safety of you and others on the road, but also for your efficiency and the optimal operation of your vehicle.
In this guide, we’re breaking down everything professional drivers should review before starting their next trip. We’ll cover the basics and provide a comprehensive pre trip inspection list you can use as you go along. While this guide is specifically tailored toward professionals (semi-truck drivers or fleet van operators, for instance), fleet drivers and everyday commuters alike can use this checklist to enhance driving safety.
What Is a Pre Trip Inspection for Fleets?
So, what is a pre trip inspection exactly? At its core, a pre trip inspection is a stepwise review that ensures that a vehicle’s major components are in working order before a trip 1 . Pre trip inspections should:
- Test major vehicle components (e.g., brakes, headlights, and brake lights)
- Review components of safety and emergency kits
- Record important vehicle inspection information for tracking or documentation purposes
For professional drivers, performing a pre trip inspection is like checking to make sure you have all of the necessary ingredients before cooking a meal. Instead of discovering that you’re out of chocolate chips in the middle of making cookie dough, you can take action (like heading to the grocery store to get some) before you start preparing the dough if your inventory is low.
In the context of a truck’s preparation for a long journey, instead of discovering that they don’t have a spare tire after running over a nail on a trip, drivers should use a pre trip periodic inspection to make sure they have the necessary tools (like a spare or a patch kit) to fix the problem before hopping into the driver’s seat.
5 Pre Trip Inspection Steps for Fleet Managers and Drivers
Now that you understand the basic philosophy behind a pre trip inspection—identifying and fixing potential problems before they potentially disrupt your trip—let’s break down five major vehicle inspection areas to review before heading out on your next job.
#1 Interior Items
A commercial driver should always carry a few critical tools in the cab during travel. The following interior items are critical components of any robust pre trip inspection list:
- Identification and paperwork – Make sure you have your driver’s license, insurance, registration, certification, or any other relevant paperwork you’ll need to identify yourself or your vehicle during an emergency or a traffic stop.
- Payment method – Even if you don’t plan to stop for food, you should ensure that you have your fuel cards or another payment method on-hand for refueling or incidental purchases (like roadside meals).
- First aid kit – A first aid kit can help you dress wounds, triage injuries, and address other emergency situations in the field. A quality first aid kit should include bandages in varying sizes, a few pairs of latex or nitrile gloves, antiseptic wipes, antibiotic ointment, tweezers, and a few doses of over-the-counter pain medications (like aspirin or ibuprofen) 2 .
- Emergency kit – While we’ll break down what you should include in your emergency stop kit in the next section, make sure that you have a visual on your emergency kit and double-check its contents before you depart.
- Personal care and hygiene items – If you’re headed out for an overnight trip, don’t forget personal care essentials like a toothbrush and toothpaste, prescription medications, menstrual products, or anything else you might need to maintain your hygiene while away from home.
#2 Safety Checks
Before heading out on your next delivery job, don’t forget to perform some basic safety checks. Arguably the most important is reviewing the contents of your emergency stop kit—the items you might need if you blow a tire, have a mechanical problem, or get in an accident.
Your emergency stop kit should include:
- Flares (be sure to check expiration dates) 3
- Flashlights or headlamps (preferably a primary light and a spare)
- Spare tires
- A tire iron
- Reflective triangles or small barricades
- Personal protective equipment (e.g., a reflective vest or heat-resistant gloves)
- Jumper cables
You’ll also want to have a basic mechanical tool kit, including:
- A torque or socket wrench
- Screwdrivers
In addition to checking your emergency stop kit, you should also review other critical safety items before your trip:
- Check for active vehicle or component recalls.
- Make sure that your fire extinguishers aren’t expired.
- Ensure that your seatbelts are in working order.
- Test that your emergency radio is working.
- Make sure you have a backup cell phone charger or battery pack.
- Carry a small amount of cash for emergency purchases.
Once you’re satisfied with your vehicle safety checks, review your instrument panel and gauges. This step in your pre trip inspection checklist serves two purposes:
- Ensuring that your vehicle is in working order.
- Recording any pertinent information, like your odometer reading.
If your employer requires drivers to record their odometer readings or reset their trip meters before departure, make sure to complete these tasks before you hit the road. Extra-vigilant drivers might also record their odometer readings after refueling or before their return trips.
After completing any necessary documentation, take a close look at your dashboard lights to make sure you don’t have any active warnings, like:
- A check engine light
- A tire pressure warning
- Low fuel indicators
You’ll likely have to start the engine to assess your instrument panel, but making sure that your vehicle turns on and off without issue is also a useful step in a pre trip checklist.
#4 Mechanical Checks
Ensuring proper ignition and cool-down are just two of many mechanical checks that should be included in a proper pre trip inspection. Before hitting the road, ensure that other mechanical items are functioning properly, like:
- Lights, signals, and horn – Test your headlights (including high beams), brake lights, turn signal lights, horn, and hazard lights before departure. You might need a partner to test your brake light functions—ask a fellow car or truck driver to stand at the rear of your vehicle (in view of your mirrors) while you depress the brake pedal. Asking a partner to help check your regular and turn signal lights can also help you save time in your pre trip procedure.
- Brakes – If your vehicle has air brakes, watch your pressure gauge and watch for major pressure drops while you depress the brake pedal. If your vehicle doesn’t have air brakes, make sure your brakes don’t feel spongy, your brake linings are in place, and your vehicle doesn’t pull to one side when you depress the brake pedal at a slow, safe speed. Also, be sure to test the parking brake for extra measure.
- Battery – Check that you have sufficient battery using a multimeter. Different batteries have different charge capacities, so make sure to establish maximum capacity before taking a measurement. If your battery is low, consult a mechanic or consider replacing it before your trip.
- Climate control – While it might sound like a luxury, climate control is a must for today’s professional drivers—especially drivers making long-haul or overnight trips. Make sure that both the heat and air conditioning are in working order before departure.
- Fluid levels – Check your oil, coolant, windshield wipers, and hydraulic power steering fluid levels before departure (and levels of any other additional fluids used in your vehicle). Add more fluids or consult a mechanic if any of your levels are below the threshold.
- Tires – Check the condition and measure the air pressure of each individual tire (including your spare) before heading out on your next trip. Use an air compressor on your fleet lot (or at the next available fuel station) if any of your tires are low. In addition, look for signs of leaks and patch or replace any punctured or leaking tires.
#5 Exterior Checks
Finally, review the exterior of your vehicle and record (or address) any outstanding issues. You’ll want to assess your vehicle body and check for any previously undocumented:
- Paint chipping
In addition, you’ll want to:
- Check that your license plate is intact, visible, and in-date
- Ensure that your hood, hatches, and fuel cap are secure
- Make sure that you’re carrying the keys for locking fuel doors and caps
- Look for windshield and window cracks
Professional drivers should document any damages to their vehicles—even if they’re small or don’t impact the function of the vehicle. Use your smartphone to take photos, and make sure these photos are uploaded to the cloud. Photos are particularly useful when filing insurance claims, so consider taking “before” photos of your vehicle prior to each trip 4 .
If you lease your vehicle or drive a fleet truck, make sure your inspection report includes any damages to management before you hit the road. Even if you think a blemish is minor, your fleet manager may want to fix the problem before sending your vehicle back into the field to prevent additional damage and reduce fleet expenses in the future.
Embrace Tomorrow’s Trucking Technologies with AtoB
Conducting a periodic inspection can help you prioritize safety on the road and solve potential vehicle issues before they interrupt your next job. Assessing your interior, performing safety checks, checking your gauges, testing your mechanical functions, and addressing exterior issues are all part of a comprehensive pre trip inspection checklist. And now that you’ve got these tips and tricks under your belt, learn about what goes into a post trip inspection .
Today’s trucking technologies make it easier than ever to inspect vehicles, conduct fuel tracking and related purchases, handle driver payroll, and more. With AtoB, you can take complete control of your fleet with a multi service fuel card . Our platform is simple, sleek, and user-friendly—and we’re dedicated to helping fleet managers, owner-operators, and professional drivers optimize every trip.
If you’re ready to start saving money and time, fill out your AtoB fuel card application today.
1 US Department of Transportation. Vehicle Inspections. https://csa.fmcsa.dot.gov/safetyplanner/MyFiles/SubSections.aspx?ch=22&sec=65&sub=148
2 American Red Cross. Making a First Aid Kit. https://www.redcross.org/get-help/how-to-prepare-for-emergencies/anatomy-of-a-first-aid-kit.html
3 California Coastal Commission. Disposal of Expired Marine Pyrotechnic Flares. https://documents.coastal.ca.gov/assets/water-quality/marina-boating/factsheets/Marine%20Flares%20Disposal%20Factsheet%20-%20rev%2012-2-19.pdf
4 Direct Auto Insurance. 8 Tips for Taking Pictures After a Car Accident. https://www.directauto.com/learning-center/car-insurance/how-to-take-car-accident-pictures
Get started with AtoB

Reviewed by
Vedant Khamesra is the driving force behind product management at AtoB. Specializing in strategic partnerships, SMB solutions, and new product development, Vedant seamlessly navigates P&L responsibilities while leading product execution and strategy. He is fueled by AtoB's mission to empower truckers and fleets with intelligent financial tools and services, making their lives easier and more rewarding.
Start saving today

Log in Log in Get started Get started
What is a Pre-Trip Inspection for Class B CDL?
October 22, 2021

Get Started With Samsara
Key Takeaways
Pre-trip inspections are an important part of a driver’s daily routine. For Class B commercial driver’s license (CDL) holders — many of whom drive passenger-carrying vehicles — a pre-trip inspection can help ensure everyone stays safe. Learn more about what’s involved in a Class B pre-trip inspection.
What is a pre-trip inspection?
A pre-trip inspection is a thorough review and examination of a commercial vehicle's major systems and parts before heading out on a route. Completing the pre-trip inspection is one of the most common and important tasks commercial drivers must perform. Drivers have to perform this vehicle inspection at the start of a new day, every 24-hours, and whenever they change vehicles. After completing this inspection, drivers must complete a driver vehicle inspection report (DVIR) recording the completed inspection.
Pre-trip inspections for class B licensees
The class B commercial driver’s license (CDL) covers both passenger carrying and non-passenger vehicles. These might include straight trucks, box trucks, large passenger buses, dump trucks, waste collection trucks, tractor-trailers and more. Depending on the vehicle driven, the class B pre-trip inspection may have slight variations.
The Department of Transportation (DOT) requires drivers to perform a pre-trip inspection before driving a commercial vehicle. Similar to Class A CDL holders, the actual daily pre-trip inspection takes about 15 minutes or less. Typically, the inspection includes the following with employer and business-specific inspections.
Brakes and air system
Steering mechanism
Lights and reflectors
Tires, wheels, and rims
Windshield wipers
Rearview mirrors
Emergency equipment
Class B CDL pre-trip inspection checklist
When getting a CDL, passing the pre-trip inspection test is much more intensive than the pre-trip inspections drivers perform while on the job. This pre-trip inspection checklist for a Class B CDL gives drivers an overview of what and how to perform an inspection. Check your state’s CDL manual for a complete list of inspection requirements.
See Class A pre-inspection checklist here.
Engine compartment
Fluids - coolant, oil, and power steering : Reservoirs and tanks should not leak. Check hoses for splits or cuts and that they are securely mounted on both ends. Verify proper fluid levels with a dipstick.
Belts - alternator, pumps, compressor : All belts should be securely mounted without cracks or frays. Belt should have no more than 1/2" to 3/4" of play.
Hoses (passenger and driver’s sides) : All hoses, including the power steering hose and coolant hose, should be secured on both ends. They should not have splits, cuts, or leaks.
Air compressor: May be difficult to see. Ensure it’s securely mounted, not broken, cracked or leaking.
Alternator : All wires are properly connected.
Water pump : All hoses are properly connected and not leaking.
Front of vehicle
Steering gearbox and hoses : No damage or leaks. Hose should be secured on both ends. They should not have splits, cuts, or leaks.
Steering shaft/steering column : Not bent or broken.
Pitman arm : All caste nuts and cotter pins are present and tight.
Drag link : Rubber is not split and properly greased.
Upper and lower control arms and tie rod : Tie rod should be secure, not cracked or bent.
Front suspension
Spring mounts/spring hanger : Not cracked or broken
Leaf springs : None are cracked, broken, or shifted.
U-bolts : All accounted for.
Shock absorber : No visible leaks. Leaks will show at the point where the top and bottom of the shock meet. Rubber is not split or shows signs of dry rot.
Airbag : Check rubber for abrasions, cuts or audible leaks plus any missing bolts.
Side of cab and under vehicle
Mirrors and bracket: Hardware attached properly. Mirror should be clean and not broken.
Door and hinges : Demonstrate door operations, latching properly, hinges intact. Door seals should not be torn or rotten.
Steps : Mounted properly and can hold weight.
Fuel tank: Not leaking; cap is tight with seal intact.
Catwalk (if applicable) : Properly mounted and clear of loose objects.
Baggage compartment (if applicable) : Demonstrate door operations, latching properly, hinges intact. Door seals should not be torn or rotten.
Drive shaft : Not twisted, U-joints not broken and free of debris.
Exhaust system: Not loose, no sign of leaks (exterior soot).
Frame : Nothing broken or unauthorized welds.
Brake system (both tractor and trailer)
Brake hose : Securely mounted on both ends. No splits, cuts, and not leaking audibly leaking air.
Brake chamber : Not audibly leaking air.
Slack adjuster and push rod : When brakes are released and pulled by hand, the push rod should have no more than 1” of play. It should stay at a 90° angle to the brake chamber.
Brake drum : No bluing from excessive heat.
Brake pads/brake lining : Check for oil and debris on the lining. Minimum brake pad thickness is ¼.”
Wheel system
Wheel rims : No unauthorized or illegal welds.
Steer tires : Look for cuts, bulges, and abrasions on the tread and sidewalls. Tread depth should be a minimum of 4/32”. Tread should be evenly worn. Check inflation levels on tires with an air gauge, filled to manufacturer’s specifications.
Drive tires : Look for cuts, bulges, and abrasions on the tread and sidewalls. Tread depth should be a minimum of 2/32”. Tread should be evenly worn. Check inflation levels on tires with an air gauge, filled to manufacturer’s specifications.
Valve stem . Properly secured, metal cap in place. Not audibly leaking air.
Lug nuts : All accounted for. Check for rust or cracks.
Hub seal/axle seal : Should not be loose. No visible leaks.
Spacing (if applicable) : There must be proper spacing between the tires if equipped with duals.
Rear suspension
Airbag : Check rubber for abrasions, cuts or audible leaks, plus any missing mounting bolts.
Torque arm/radius rod : Secure mounting, bushings intact.
Rear of vehicle
Doors and hinges (if applicable): Secured and should open, close and latch properly. Door seals have no separation, no rubber tubing sticking out.
Mudflap : Secured, not missing or broken. At the right height.
Check all lights on the front, both sides, vehicle rear. Turn on to ensure lights and reflectors are working.
Running lights : Walk around the vehicle to examine all.
High beams/low beams: Walk around the vehicle to examine all.
Turn signals : Signal both right turn and left turn. Walk around the vehicle to examine all.
Hazards/4-way flashers and clearance light : Walk around the vehicle to examine all.
Brake lights : Ask the examiner to watch brake lights. Confirma they worked using the side mirror.
License plate lights : Walk around the vehicle to examine all.
Reflector tapes : Clean and not worn. Walk around the vehicle to examine all.
Passenger items
Doors and hinges (if separate from driver door) : Secured and should open, close and latch properly. Door seals have no separation, no rubber tubing sticking out.
Wheelchair lift: No wear, damage, or other abnormal conditions.
Handrails and step lights : Handrail mounted firmly, bolts accounted for. Step lights are all working.
Emergency exits : Labeled and able to open and close. If there is an alarm for the door, ensure it works when the door is open.
Seating : Not torn, securely mounted.
School bus items
Student loading lights: Walk around the vehicle to examine all. None cracked or broken. All lights able to flash.
Stop/safety arm : Able to fully extend with lights
Student mirror : Secure, not cracked or broken. No obstructions and properly adjusted.
First aid and body fluid cleanup kit : Labeled and stocked with supplies. Nothing expired.
In-cab inspection and air brake test
Seat belt: No rips or frays and should adjust and latch properly.
Lighting indicators : See lights and reflectors section
Oil pressure indicator : Demonstrate normal operating range.
Water temperature gauge : Demonstrate normal operating range.
Air pressure gauges : Build to governor cut out.
Ammeter/voltmeter : Charging between 13 and 14 volts.
Mirrors : Secure, not cracked or broken. No obstructions and properly adjusted.
Windshield : No more than a 1” crack is permitted. Clean and free of debris.
Windshield wipers and washers: Turn on to show they are working properly.
Horns (city and air) : Show they are working properly.
Heater/defroster : Turn on to show they are working properly.
Safety/emergency equipment : Must have fire extinguisher, three red reflective triangles and spare electrical fuses. Extinguisher must be fully charged and secured.
Steering wheel : Secured to steering column.
Foot pedals : Free of grease and debris. No obstructions.
Hydraulic brake check : Pump the brake pedal several times. Apply pressure to the pedal and hold for five seconds. The pedal should not move.
Air brake check : Air brake devices vary. Drivers must test three components of the air brake check correctly: applied pressure, warning lights and buzzers, and valve pop-outs.
Parking brake: Apply and put the vehicle in low gear and try to move. Drivers must test separate brakes (tractor and trailer) individually.
Service brake : Release brakes. Drive 3 – 5 mph. Apply the service brake and come to a complete stop. Ensure steering does not pull to the left or right when applying the brakes.

- SCHEDULE AN APPOINTMENT
- VEHICLE INSPECTION SERVICES
- VEHICLE INSPECTION CHECKLIST
- COMPLETE VEHICLE INSPECTION
- AUTOMOTIVE TECHNICIAN
- ALTERNATOR PROBLEMS
- TUNE-UP SYMPTOMS
Locations in Saint Petersburg, FL
More information, courtesy checks & vehicle inspections in saint petersburg, fl.
Rely on us for a courtesy check or complete vehicle inspection by Saint Petersburg's top technicians. Make an appointment at your nearest location today and get your car checked by our qualified technicians.
Begin with a Free Courtesy Check in Saint Petersburg, FL
You adore your car or truck. When it doesn't work, everything is harder, from running to the grocery store to picking the kids up from school. We're car people too at Firestone Complete Auto Care, and couldn't agree with you more. That's why we always offer free courtesy checks in Saint Petersburg with every service or repair we perform. (Note repairs not included and extra.) During your car inspection, a qualified technician will look over your hoses, battery, belts, wipers, fluid levels, lights, air filter, and tires to give you an idea of any small issues that may be arising. Routine inspections can be a great way to safeguard against major repairs and frustrating breakdowns.
Next Level Car Care: Complete Vehicle Inspections in Saint Petersburg, FL
Need a more in-depth evaluation of your car's health? Schedule an appointment for a complete vehicle inspection at your Saint Petersburg Firestone Complete Auto Care. An experienced technician will check everything that's included in our courtesy check-up, but also your vehicle's brakes, steering and suspension system, and exhaust to make sure they are in line with manufacturer specifications. Complete vehicle inspections offer the most beneficial health check your car can get.
Point Your Dash in Our Direction
Spongy brakes or weird tires noises, you always want to start with an auto inspection. Visit your local Firestone Complete Auto Care at the first sign of car troubles. If repairs need to be made because your safety is at risk, you can trust the Firestone Triple Promise Guarantee. It means that your car will be Fixed Right, Priced Right, and Done Right On Time. Whether you need peace of mind before a cross-country road trip or a new dashboard light popped on, book an appointment online for a complete vehicle inspection in Saint Petersburg, or a courtesy check! Car care isn't something you want to put off!
- * You will receive recurring text messages from Bridgestone. Message and data rates may apply. Text STOP to cancel, text HELP for help. By texting BRIDGESTONE, you agree to receive text messages from Bridgestone at your mobile number, which may be sent through an automatic telephone dialing system. Consent not required to be considered for employment. View our privacy policy here and our Terms and Conditions here .
Tire Offers
Service offers, get flexible while earning rewards with a firestone credit card.
Subject to credit approval
Auto Care that Counts: From Maintenance to Repairs in Saint Petersburg
From transmission work to steering and suspension to tire repair, turn to your local Firestone Complete Auto Care for your auto service needs. We're your local car care center, tire store, and automotive shop combined into one. Our skilled technicians work hard to help ensure that your vehicle runs the way it should. When you need work done on your car or truck, we promise affordable prices and exceptional service. Explore our services and at your convenience, schedule your next courtesy check or repair in Saint Petersburg, Florida today.

Careers - Become a Teammate

Want your work to make a difference? When you're part of the Firestone Complete Auto Care Crew, it can! Not only will you join a nationwide team of passionate auto technicians, service specialists, and retail professionals, but you’ll also help motorists keep their cars and tires in tip-top shape. Plus, you’ll enjoy various industry-leading perks, including competitive pay, performance-based incentives, paid training, and healthcare benefits. Call 877-734-9512 , or text BRIDGESTONE to 97211* to apply. Click below to find job opportunities at your nearest Firestone Complete Auto Care.
Firestone Complete Auto Care Locations Nearby
- 6291 9th St N
GET OFFERS & PROMOTIONS
- Today's news
- Reviews and deals
- Climate change
- 2024 election
- Fall allergies
- Health news
- Mental health
- Sexual health
- Family health
- So mini ways
- Unapologetically
- Buying guides
Entertainment
- How to Watch
- My Portfolio
- Latest News
- Stock Market
- Premium News
- Biden Economy
- Stocks: Most Actives
- Stocks: Gainers
- Stocks: Losers
- Trending Tickers
- World Indices
- US Treasury Bonds Rates
- Top Mutual Funds
- Options: Highest Open Interest
- Options: Highest Implied Volatility
- Basic Materials
- Communication Services
- Consumer Cyclical
- Consumer Defensive
- Financial Services
- Industrials
- Real Estate
- Stock Comparison
- Advanced Chart
- Currency Converter
- Investment Ideas
- Research Reports
- Credit Cards
- Balance Transfer Cards
- Cash-back Cards
- Rewards Cards
- Travel Cards
- Credit Card Offers
- Best Free Checking
- Student Loans
- Personal Loans
- Car insurance
- Mortgage Refinancing
- Mortgage Calculator
- Morning Brief
- Market Domination
- Market Domination Overtime
- Asking for a Trend
- Opening Bid
- Stocks in Translation
- Lead This Way
- Good Buy or Goodbye?
- Financial Freestyle
- Capitol Gains
- Fantasy football
- Pro Pick 'Em
- College Pick 'Em
- Fantasy baseball
- Fantasy hockey
- Fantasy basketball
- Download the app
- Daily fantasy
- Scores and schedules
- GameChannel
- World Baseball Classic
- Premier League
- CONCACAF League
- Champions League
- Motorsports
- Horse racing
- Newsletters
New on Yahoo

- CA Privacy Notice
Yahoo Finance
Pre-trip inspections, fleet maintenance pave way for safer roads.
When people think about compromised fleet safety, they often imagine dangerous driving behaviors like speeding or distracted driving. What drivers do behind the wheel, however, is only one part of a much broader safety equation.
Regular fleet maintenance and thorough pre-trip inspections are cornerstones of safer fleets – and safer roadways. At the same time, overlooked maintenance and rough inspections can lead to costly consequences for trucking companies, drivers and the entire motoring public.
Staying on top of routine vehicle maintenance is crucial for fleets aiming to improve their overall safety profile and help reduce their financial risk exposure.
When potential maintenance issues are caught and remedied early, trucking companies can help avoid emergency maintenance costs and shipment delays. Additionally, well-maintained fleets are less likely to fall victim to the increasingly common nuclear verdicts, which can cause serious financial loss or even bankruptcy.
“By having a good maintenance program in our company, we establish that we are not negligent in how we take care of our vehicles,” said Northland Insurance Transportation Specialist Anthony Slamar.
Some modern telematics solutions can help identify potential issues by sending preventative maintenance reminders and providing diagnostic information on vehicles. These services can make it easier for company management to stay ahead of maintenance issues while simultaneously aiding drivers in pre-trip inspections.
Just like it is important for trucking companies to prioritize regular maintenance, it is also crucial for drivers to consistently complete thorough pre-trip inspections. Often, issues that are caught during a pre-trip inspection and fixed promptly can save drivers significant frustration later while simultaneously helping to prevent possible injuries on the road.
“If you find an issue, let’s get it fixed. Finding it on the front end can potentially save a lot of money down the road,” Slamar said. “This will improve fleet safety and can help keep costs under control.”
When completing pre-trip inspections, there are a few areas drivers should pay additional attention to in order to have the largest safety impact.
“Tires and brakes are critical for keeping the vehicle under control,” Slamar said. “Lamps, lights and reflectors help other motorists with spatial awareness and help other motorists know if you have an emergency.”
Drivers should ensure all these features are properly maintained and in good working order, including assessing wear and tear on tires and noticing any burned out lights.
In addition to making sure the truck itself is in good working order, drivers should always check to ensure that all cargo is secure during their inspections. Load securement violations are common, and improperly secured loads can have serious consequences for both drivers and other motorists during a crash or other traffic incident.
While these things can be easy to overlook when drivers are on a tight schedule, missing something seemingly small can lead to big problems later.
“We want to emphasize that this does not take a significant amount of time,” Slamar said. “What can take a significant amount of time is an out of service violation where you’re taken off the road because of a maintenance issue.”
For fleets hoping to encourage better pre-trip inspections and promote a culture of safety, Slamar recommends incentivizing drivers through rewards. Often, carriers choose to do this by offering bonuses to drivers who get clean DOT inspections. This type of rewards program can go a long way toward improving a company’s overall safety profile.
More safety awareness within fleets leads to safer drivers and safer roadways in general, creating a winning situation for everyone involved. The best time to get started is now. Click here to learn more about Northland’s risk control offerings .
The post Pre-trip inspections, fleet maintenance pave way for safer roads appeared first on FreightWaves .
IMAGES
COMMENTS
Before you head out on a road trip, schedule your free Pre-Trip Safety Check. Our pros will inspect your vehicle and send you on your way. Nearest Store Change Store. 5800 E Arrowhead Pkwy. Sioux Falls, SD 57110 1056.3 mi.
Quick Steps. Check that your tires are inflated and the treads are deep enough for long travel. Inspect your exterior lights, horn, and windshield wiper blades. Make sure your air filter isn't clogged and that the AC and heat are working. Look at the belts in the engine for signs of cracking or glazing (shiny spots).
A pre-trip inspection is a federally mandated inspection of a vehicle done daily within a 24-hour driving period to ensure its roadworthiness. Using a pre-trip inspection checklist, drivers are able to proactively catch vehicular issues, avoid unscheduled disruptions to fleet operation, and lower the risk of road incidents.
A pre-trip inspection checklist is a list of vehicle items that truckers must thoroughly examine before starting a trip. It helps identify and address mechanical and maintenance issues early on and prevent unexpected delays, breakdowns and severe accidents. Performing thorough pre-trip inspections promotes safety, ensures compliance and reduces ...
Our Pre-Trip Inspection Study Guide has everything you need to prepare for the Class A CDL Pre-Trip Inspection Exam. Our study guide will cover the pre-trip inspection terminology as well as a thorough list of all of the parts you will be inspecting on the vehicle. For each part you will be inspecting there will also be a list of items you will ...
What is a Pre-Trip Inspection Checklist? A Pre-Trip Inspection Checklist is a systematic tool used by drivers to assess the safety conditions of vehicles before embarking on a journey. It includes a series of checkpoints designed to inspect various aspects of the vehicle, such as brakes, tires, lights, fluids, and more.
Be prepared on your next road trip. Join Tim from AutoZone as he breaks down everything you need to get your vehicle ready for your next long trip. So you're...
The duration of a pre-trip Inspection can vary depending on factors such as the driver's familiarity with the vehicle, the complexity of the truck itself, and the thoroughness of the inspection. On average, a comprehensive pre-trip inspection typically takes around 15 to 45 minutes.
Pre-Trip Inspection. My pre-trip begins as I approach the vehicle. I am looking for leaks, leaning one way or the other (which may indicate a low tire or bad suspension). Hint: Start at the bottom and work your way up. License plate - Secure, clean and up to date. Bumper - Secure, not cracked, bent or broken.
Drivers complete a driver vehicle inspection report (DVIR) recording the completed inspection. Class A CDL pre-trip inspection checklist. When getting a CDL, drivers need to pass a pre-trip inspection test. It's more intensive than the inspection drivers perform daily. This pre-trip inspection checklist for a Class A CDL gives drivers an ...
Jack (and ground mat) for changing a tire. Work gloves and a change of clothes. Basic repair tools and some duct tape (for temporarily repairing a hose leak) Water and paper towels for cleaning up ...
A pre-trip truck inspection is a thorough check of the truck and its major systems to maintain safety on the road. Inspections need to occur before the start of a driver's shift and at least once every 24 hours while on the road. Truck pre-trip inspection needs to be performed by the driver while on duty, but before driving starts.
The Benefits of Digital Pre-Trip Inspections Checklists. While pre-trip inspections are required practices for U.S. commercial fleets, they provide immense benefits into increasing the overall performance of your assets and your company's earning potential. Pre-trip inspections are typically performed each time a driver enters a vehicle (and ...
The Department of Transportation (DOT) requires all drivers holding a commercial driver's license (CDL) to complete a pre-trip DOT inspection checklist before operating a commercial vehicle. Usually taking about 10-15 minutes, this inspection checks essential systems such as brakes and steering, as well as tires, mirrors, and emergency ...
step of the pre-trip inspection. 1. Vehicle Overview A pre-trip inspection should begin with a quick scan of the vehicle. Walk around the entire perimeter of the vehicle. Look for anything obviously wrong—such as: Body damage o Fluid on the ground o Whether the vehicle's leaning o Unsecured doors or cargo
A pre-trip inspection is a mandatory examination of a vehicle conducted daily before operation to verify its roadworthiness. Drivers use a checklist to systematically identify potential issues with the truck, such as mechanical problems, tire wear, or lighting failures.
A Closer Look: The Pre-Trip Inspection Guide. Step 1: Essential Tools. Equip yourself with the necessary tools to conduct a thorough inspection, including a flashlight, tire pressure gauge, and reflective triangles. Step 2: Visual Check. Begin by visually inspecting your vehicle for damages, leaks, or anomalies.
At its core, a pre trip inspection is a stepwise review that ensures that a vehicle's major components are in working order before a trip 1. Pre trip inspections should: . Test major vehicle components (e.g., brakes, headlights, and brake lights) Review components of safety and emergency kits. Record important vehicle inspection ...
A pre-trip inspection is a thorough review and examination of a commercial vehicle's major systems and parts before heading out on a route. Completing the pre-trip inspection is one of the most common and important tasks commercial drivers must perform. Drivers have to perform this vehicle inspection at the start of a new day, every 24-hours ...
An effective inspection exposes safety concerns and potential maintenance issues. Repairs can be addressed before they become costly, major repairs. Supervisor and Service Garage should be notified immediately of any safety concerns. As you approach the vehicle , notice its general condition. Look for fresh oil, coolant, grease or fuel leaks.
Plus, you'll enjoy various industry-leading perks, including competitive pay, performance-based incentives, paid training, and healthcare benefits. Call 877-734-9512, or text BRIDGESTONE to 97211* to apply. Click below to find job opportunities at your nearest Firestone Complete Auto Care. Careers at Bridgestone.
Staying on top of routine vehicle maintenance is crucial for fleets aiming to improve their overall safety profile and reduce their financial risk exposure. The post Pre-trip inspections, fleet ...
See more reviews for this business. Top 10 Best Car Inspection in Saint Petersburg, FL - August 2024 - Yelp - Mike's Affordable Auto Repair, Bob Lee's Tire Company, Fix To Go Auto Care Center, A & D Automotive Center, Andy's Automotive, Greg Bailey's Automotive, Bernie's Auto Service, Cooper's Automotive Repair, JB Import Automotive Repair ...
Reviews on Pre-Purchase Car Inspection in Saint Petersburg, FL - Mike's Affordable Auto Repair, JB Import Automotive Repair, Dirty D's Mobile Repair, Fair Tech Mobile Car And Truck Repair, Bernie's Auto Service
See more reviews for this business. Top 10 Best Pre Purchase Inspection in Saint Petersburg, FL - August 2024 - Yelp - Mike's Mobile Mechanics, JB Import Automotive Repair, Survivor Classic Car Services, Autobahn Automotive, Tampa Bay Auto Care, Kaufman's Auto Repairs, Affordable Auto and Truck Repair, New Hope Auto & Truck Services, Debrick ...