
Tin Can Tourists
The Original Vintage Trailer and Camper Club

How to Restore a Vintage Trailer

So, you want to adventure in a vintage RV ? You’re not alone; however, restoring a vintage RV trailer can be a costly catastrophe, if you’re not careful. Here’s what you need to know before you buy and restore your vintage ride.
Think Before You Buy
Restoring a vintage trailer can be a lot of work. It has old bones that may take a lot of time, effort, and money to restore. After all, its seen a lot of the world long before you’ve gotten behind the wheel. Before you make the decision to buy and restore, consider the costs.
Ready to buy? Check out our classifieds
Repair Costs
First and foremost, you need to look at your budget. You may find what seems like a good deal on a vintage RV, but how much will it cost to renovate and restore it? How much money are you willing to put aside for this project?
Before you take the leap into a vintage trailer, carefully examine the camper’s condition . Elements that’ll prove very cost-intensive include:
- Electrical issues
- Water damage
- Structural problems
- Plumbing and leaks
- Rancid smells
Restoring trailers with issues such as these is not impossible; however, they can be expensive, time-consuming fixes. Investigate thoroughly to estimate just how much money, time, and effort you’ll need to invest into the vintage RV of your dreams.
Hiring Help
The best cost-saving tip when it comes to renovating a vintage RV? Do the job well the first time. If you experience issues with plumbing, braking systems, wiring, or any of the more complicating fixes, it may be best to hire help to resolve them. Vintage restoration professionals can not only aid in restoration but also customization.
Restoration Tips
Bought your vintage trailer and ready to get restoring? Let’s get you started.
Replace Broken Parts
Before you make your vintage trailer your own with design, make sure to fix what is broken. Check on the electrical system, brakes, propane lines, plumbing, and appliances. Repairing or replacing such things, as previously mentioned, will take the biggest chunk out of your budget; however, finding the parts necessary shouldn’t take too much out of your time.
Original parts for your vintage RV may be tough to find. Places to look are:
- Vintage RV Shops
- Local Body Shops
- Vintage RV Supply Stores Online
If you’re lucky, vintage shops may have the original RV parts or your local shop may be able to replace old parts with newer, compatible parts. If you find yourself unlucky in that search, check for vintage parts online. Shopping for restoration parts online will give you the best and most diverse selection.
Work from the Ground Up
Laying down new flooring is a good place to start your RV renovation. Whether you’re ripping up carpet to put in hardwood or replacing vinyl composition tiling, this job will be one of the most intricate of them all. It’s totally feasible to complete this job on your own if you have the time and handiness. If not, there’s no shame in hiring a professional.
Paint Before You Decorate
A new paint job is not a menial task. Being that it’s easy to make a mess in the process if you’re looking to repaint walls or cabinets, do that first.
Add Some Decor
This Vintage RV is now yours, so make it that way by adding your personal touch and style to the space.
Stick on wallpaper is all the rage because it’s easy to install, cheap, and spices up any space.
Mirrors open up a room, making even the smallest RVs look and feel bigger.
Throw Pillows and Curtains
Your RV should feel like your home on wheels. Adding throw pillows and curtains to fit your design style will give your space that warm, homey feeling.
Don’t ignore the decor possibilities outside of your rig. Sure, a good paint job will spruce up the exterior, but what can you do beyond that? Adding an awning is one way to maintain the vintage feel of your camper or trailer while still showing off some personality. Not to mention, the UV protection it provides.
Clean or Change Your Windows
Before you hit the road, how are your windows? Your RV windows are what you see the world through, so it’s important that they’re in tip-top shape. A lot of vintage RVs have plastic windows that get easily scratched. If your windows are plastic, it may be time to replace them. Glass windows get grimey. If there are no dings or scratches, give them a good cleaning.
Appraise and Insure Your Vintage Rig
In order to buy or sell a vintage recreational vehicle, or a vehicle for that matter, one should contact vintage rv appraisers . An appraisal determines the fair market value of the trailer so that you can negotiate an insurance plan based on its carefully determined worth.
Like with any vehicle, your RV needs insurance. Make sure you’re getting the best trailer insurance with an agreed-upon value policy. Get free RV insurance quotes. Compare policies and prices.
Looking for Inspiration?
If you’re needing some inspiration to get your redesign gears turning, look no further than these restored rides.
View this post on Instagram Loving our living/dining/work/sleep area!👉Swipe to see the transformation from use to use. It has so many possible functions and uses and on top of that tons of storage space! 😍 .NOTE: The dining photo was taken before cabinets were finished. . . #airstream #airstreamreno #airstreamremodel #airstreamrenovation #airstreamdreams #airstreamgoals #liveriveted #tinyliving #rvlife #vintagecamper #vintagerv #vintageairstream #diy #tinyliving #rvlife #stl #stlouis #ikea A post shared by Crista and Marlon Hilmes (@penelopetheairstream) on Jun 13, 2018 at 11:50am PDT
View this post on Instagram We know not everyone wants to live in a van and the purpose for our little corner on IG is to not to make you feel like you need to. Our purpose on here is to inspire you to chase your dreams, whatever they may be, because dreams really do come true. We hope to inspire you to be fearless in your pursuit of what sets your soul on fire and to let you know it’s okay to risk everything to chase a dream no one else can see but you. Every morning that we wake up we have two decisions to make: to continue to sleep with our dreams or to get up and chase them. We hope when you leave our page, you feel motivated to get up and chase them, that you believe in yourself and you learn to TRUST. We can’t stress how important it is for you to hold the vision and trust the process. Many will say “it’s easier said than done” but If you want something you’ve never had, you have to do things you’ve never done. Whether it’s creating a vision board, whether it’s writing reminders all over your house, whether it’s praying or having quiet time meditating or envisioning yourself living the life you desire- YOU DO IT! Disbelief, uncertainty and doubt are the complete opposite of having trust and there ain’t no room in chasing dreams for those things y’all. A post shared by BUS LIFE| Jake + Gianna + Luna (@ourvanquest) on Jan 30, 2020 at 9:15am PST
View this post on Instagram Same view before and after! Swipe left to see the D I F F E R E N C E ! #tiffanythetrailer💎 #bolerreno #fiberglassrv #fixerupper #boler #passionproject A post shared by Wanderlust Vintage Trailers (@wanderlustvintagetrailers) on May 27, 2020 at 9:48pm PDT
View this post on Instagram 🌹🌹 Everything’s coming up Rosie!! 😜😂 Swipe over for a few before and after shots, and check out the link in our bio for the full before and after breakdown ✌️✌️ 3 months ago we got this 1969 vintage camper and have spent a whole lotta time updating each and every inch of her with help from a few local artists and our partner for this project, @ebay 👌👌 The stripe was hand painted by @fayekaubell 👩🎨 the floors and table by carpenter @chadrobin 🔨 and lighting by @sazerac_stitches 💡 let us know what you think, and where we should take her next! 💃💃 #vanlife #vanlifediaries A post shared by Probably This (@probablythis) on Oct 18, 2017 at 1:50pm PDT
View this post on Instagram It took many months and a lot of hard work getting to this point. Now, Jane’s interior is the cutest little (and I do mean little) thing I’ve ever seen. 😍 A post shared by Jane The Camper (@janethecamper) on May 22, 2018 at 2:39pm PDT
View this post on Instagram Cozy Rosie 🐘 Almost all of our trailers feature a convertible dinette bench & table which fold down to create an extra bed, or the perfect lazy day chill space 🙏 . . . 📷: @ambielue A post shared by Hotel Luna Mystica (@hotellunamystica) on Jun 7, 2018 at 2:24pm PDT
Ready or Not?
Not ready to buy and restore your own vintage rv? That’s okay. Dip your toes into the world of vintage trailers by renting an RV on Outdoorsy. Get a taste of the glory before you jump in.
10 comments
I have a small vintage camper, would would like to restore. Would ,the ski light be a spot , for a small AC unit. Got to have air . I live in Texas.
IJust bought a 1969 camper to restore .it is going to be a task but I am looking forward to it .and I could use any pointers you may offer in restoration tricks.
I have a Lafave Loaf 5868 from Olds trailer company. We would like to restore it but would also like to learn something about it. Can you help?
Whoops that is a Lafave Loafer. Not loaf.
That isn’t a brand we are aware of. You can contact the RV/MH museum to see if they have any record of the brand. There were thousands of brands that didn’t last long and little records exist – this might be one of those…
Have a 1968 Terry trailer. The exterior skin isn’t bad and the framing is good–just need some reinforcement in a couple spots. I’m kinda lost as where to start the restoration process now. Any step by step advice?
Check out the Mobiletec YouTube videos. They do a great job explaining the restoration process.
How can you repair hail damage without replacing the whole skin
Unfortunately there isn’t an easy fix for this. Aluminum stretches when dented and it’s very difficult to flatten. Replace the entire panel or live with its beauty marks.
My 1972 camp trailer need a lots of work need new floor and window are not good …. Not know what to put new floor have to take off floor and put new floor ?
Leave a comment
Your email address will not be published. Required fields are marked *
Save my name, email, and website in this browser for the next time I comment.
Sign me up for the newsletter!
- Skip to primary navigation
- Skip to main content
- Skip to primary sidebar
- Skip to footer
Journey With Confidence
A True Passion For Vintage Trailer Restoration

- Top Stories
When most people see a rusty RV parked on cinderblocks in a grassy field, they usually don’t say to themselves, “ Now that one’s a winner! ” But in Colorado there’s one real estate agent who does and she’s having a ball giving old trailers new life with modern RVers who crave all things vintage.

April’s passion for buying and selling vintage trailers is what she’s dubbed “Aluminitis” – an addiction to fixing up the aluminum trailers of yesterday.
“I love giving life back to them and digging out their stories,” says April Wantiez , a vintage trailer restoration authority in Fort Collins, CO. “It’s sort of like granting the ‘old horse put out to pasture’ an agile, pretty and worthy existence again.”

Is this trailer a good candidate?
April fell in love with vintage trailers six years ago. Lacking the funds to pay a pro to restore her first trailer, she got to work. Today, April’s passion for buying and selling vintage trailers is what she’s dubbed “Aluminitis”–an addiction to fixing up the aluminum trailers of yesterday.
“Some of the wood and craftsmanship in certain trailers is amazing. These trailers were built by good hard working Americans and have a historic charm,” she says. April has owned more than two dozen vintage trailers since she began her part-time passion, but she doesn’t take on every project she sees.
Vintage trailer restoration lessons

A project gone awry?
As a real estate agent by day, she knows that any diamond in the rough can have costly faults. When she stops to look at a candidate, she does her best to keep calm and look for hidden problems that could cost too much money to fix.
From the roof to the axles, restoring a vintage trailer calls for a sharp eye and powerful self-restraint. “I used to think they all could and need saving,” she explains. “However, now I’ve slowed down purchasing. I have five in my boneyard backyard I’ve not had much time to touch.”
The vintage trailer restoration projects she’s completed have taught her many lessons about what to look for and avoid in a trailer. Although she pays the pros to handle things like repacking wheel bearings and if necessary, glass replacement, she only purchases a trailer if she’s confident she can do most of the repair work herself. Through the years she’s also learned the best way to tame her budget is to keep things simple. For example she:
- Draws the line at serious water damage. “Water damage is the number one flaw,” she says. Visual water damage is deceiving and she’s learned that usually there’s 30 to 40 percent more that isn’t visible to the naked eye. “If it has too much water damage where I know I’ll have to tear out complete walls or the ceiling (which will entail removing the exterior skin), I now walk away. Even from a free one.”
- Avoids fully contained models. “ I have owned them and some families require them. To me, it just means more work so I keep things simple. All I search for these days is a place to put a portable potty and a means to refrigerate some food and beverages.”
- Doesn’t really care about appliance colors. “I’ve had avocado green, brown, bright orange, sea foam green. Some people look for a trailer based on color of appliances. I could care less. I know I can decorate around it,” she says.

The final product.
Once the mouse feces are cleaned out and the major renovation work is over, April gets into her favorite part of the job: decorating. “If it’s a 1950s or 1960’s with great wood interior and original interiors and appliances, I try and keep it as original as possible. I might ‘funk it up’ with pillows, curtains and décor,” she explains. In other cases, she says that anything goes. “My style and stash of staging décor is usually themed somewhat western, log cabin and cowgirl,” she says. “But I’ve had some that spoke to me differently so I’ve gone for a more retro style.”
If you’re dreaming about your own vintage trailer restoration project, April’s best advice is to ask for help from others, don’t be afraid to learn new skills and always keep the end result in mind.
“When you finally haul down the road and people rubberneck, honk, and holler, you will feel extreme joy and pride. When you wake up at a camp site and people are standing outside your door waiting so they can look inside and ask you questions—you will be proud. When you finally lay down to sleep for the first time in your ‘labor of love’, you will be given a new existence. A true rocky mountain high in my experience,” she says.
All photos by April Wantiez
For more vintage trailer restoration advice from April, see this article from Do It Yourself RV

RV renovation – How to remodel a Camper on a Budget (Full Process)
By: Author Joy & Ken Kelley
Categories Farmhouse inspiration , Our Camper Trailer , RV feature , RV Inspiration

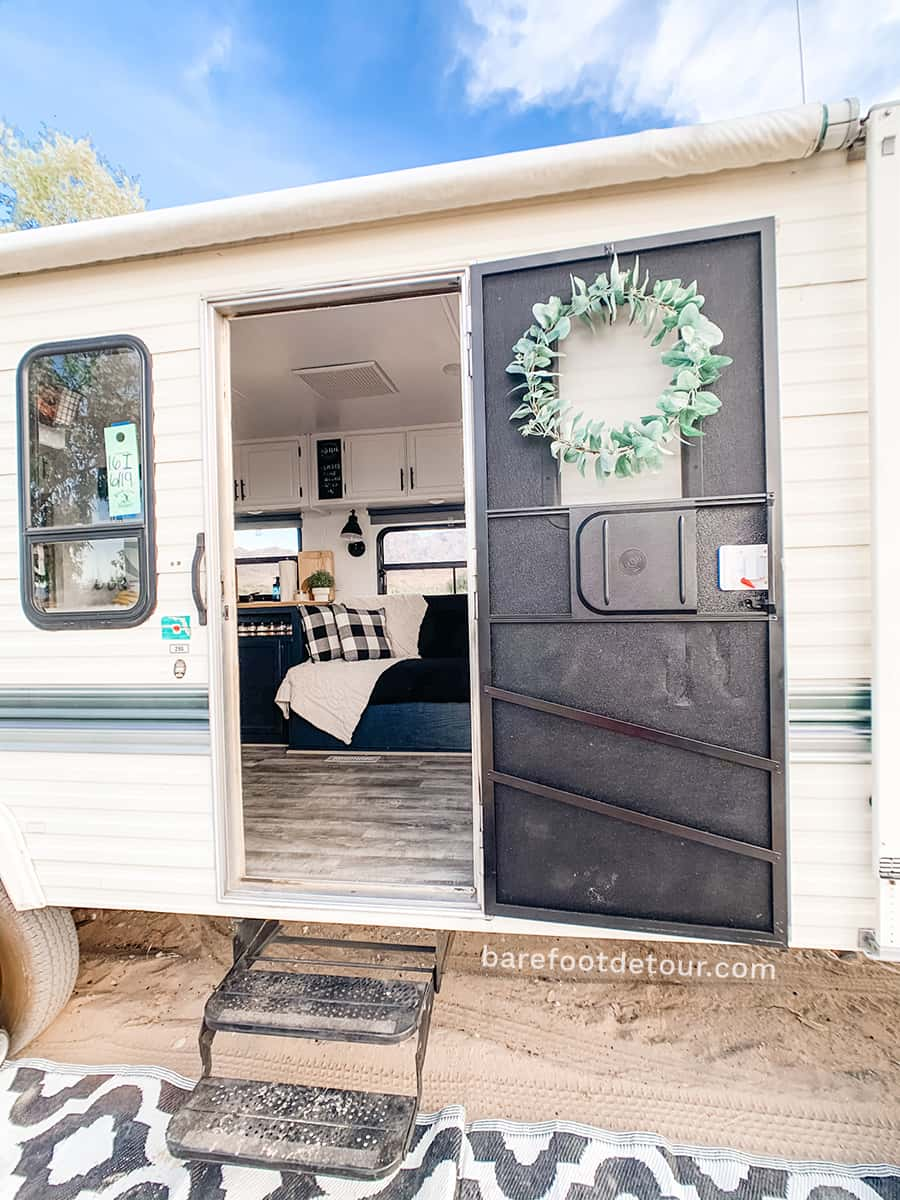
Ever since we posted the first picture of our remodel on social media, there have been so many requests asking to reveal how we did our RV renovation and the details that went into it, so finally here is everything that you should know to conquer a camper remodel!

So today we will be sharing a step-by-step post describing everything we considered and also the steps we took for our RV renovation. From the materials we used, the resources we checked, and some tips we picked along the way in our (one month) Camper remodel on a budget!
I’ve tried to cover as much as possible with this post, but if there’s anything in particular that you would like us to cover, just contact us! We are happy to share about all the things we learned in this process, the good and the bad and we will also cover a breakdown of the exact cost of this remodel in a future post!
(If you are curious about the source list of all the items in the camper, I have them linked at the bottom)

Now I want to share that in this post, we will be focusing on the interior RV renovation, we are still planning to paint and renovate the outside of our camper, but that is material for a whole different post! If you want to see a full tour of how it looked before, check this post .
I also want to mention that we did this renovation in the middle of 2018, so we have been using and camping on it for a while now. There are some things that we have changed along the way, so I will also cover that at the end of the post.
1 – Find an old camper
2 – plan the rv renovation, 3 – shop for the rv renovation, 4 – repair any damages, 5 – demo the inside of the rv, 6 – prep the different surfaces, 7 – add inner shelves or separations for organization, 8 – prime and paint, 9 – renovate countertop and table, 10 – add peel and stick backsplash, 11 – replace lights, 12 – redo flooring, 13 – add furniture, 14 – renovate the couch and dinette pillows, 15 – select mattresses and bedding, 16 select kitchen wares, 17 decorate and select different hanging methods, 18 – make it homey, 19 updates after two years of use, 20 – rv renovation resource list, wrapping thing up.
This post outlines the process that we followed in order to renovate our RV, and while my husband has experience in renovation while working with my father-in-law (he is a Licensed Contractor). We are no professionals at this. We just love sharing and hopefully helping others =]

I already shared how we came across our camper in the before blog post where I share what our plans were when we go it. We purchased it from a family friend for around $3,000 USA dollars, this is very cheap compared to what is normally available around us in California, so we jumped at the opportunity.
Here are some pictures of how our camper looked before, if you want to see a full tour of the before, check out this post .

If you are buying an RV from a complete stranger , we would recommend that you check the list we are adding below, because if any of those things are broken or not working correctly, it can set you down in your budget as repairs or replacements can cost a few hundred dollars.
- WATER DAMAGE : This is one of the most common issues in the RV world because the roofing on RV’s has to be re-touched (especially if the RV sets outside in direct sunlight) yearly or every a few years depending on the kind of roof sealer the RV has.Direct sun can wear the protective layer of the roof making it weak and allowing rain to cause many issues, from fully collapses roofs, to damage in interior walls and nasty mold inside and outside the walls. So if you find something with a little bit of water damage, it could be that you still have to replace a big portion of it.
- WORKING APPLIANCES : If you are buying something smaller than a pop-up or teardrop camper, you want to make sure that the included appliances like the stove, oven, microwave, and refrigerator are working properly.
- FUNCTIONAL WATER AND BATHROOM : Again, this only applies if the RV you are purchasing includes it, double-checking that the water tank, as well as the water systems inside the RV, are working is very important!
- AC and HEATING SYSTEMS : Depending on the season you purchase your RV, one of these might be overlooked, but it’s important to check both when you are purchasing to make sure that there’s no extra repair that you will need in order to use them.
- TIRES, BRAKES and TOW SYSTEM : These while super basic, could be items that you don’t pay too much attention when trying to assess the state of the interior, we had to replace the whole breaking systems in our camper, and we are so glad that we did look before taking our first long trip because not having enough braking power could have been not just a mistake but an accident waiting to happen.
- AWNING : I’ve seen many campers that have broken awnings, and while you can easily find replacements for the fabric for one or two hundred dollars, replacing the whole system can get super expensive, like almost a thousand of extra dollars depending on the size. So it’s definitely something you should check.
The main reason why we recommend you check all these things before purchasing is because those items will be expensive to replace or fix, so if you can get away with not having to invest money on the basic functionality of your RV, you will have more money to allocate to make it look AMAZING!
The planning phase of your RV renovation can seem like such a not important thing to focus on, but if you (like us) are working on a budget, planning your priorities and where you want to splurge is super important to keep the renovation (and yourself) organized and account for everything you will need to purchase.
There are so many steps I recommend in order to plan the “look” of your RV so that you achieve exactly what you have in mind, spending as little as possible.
- Define your decoration style : This is such an important step, because, in order to outline your remodel, you do need to know what style talks best to you. In my case, I love the mix of Industrial, Modern, and Farmhouse. So I focused on some items for each that really made me happy and decorated from there.
- What items in your style will you want to include : Even when two people like the same style, there are preferences that we have over the items that we like in each style, so it’s important for you to select what you want to include that is important to you, this could be bedding, a rug, decor pieces, wallpaper, etc.
- Select what items will be your “big ticket” items : After you have all the items that you wish to include, select when ones that are the most important to you. In my case, it was the peel and stick subway tile and the black kitchen sink . I wanted them so bad that I allocated a big portion of our budget to them and compromised on other items that I wanted but that ended up being not so high in my list, like the kitchen faucet and the bathroom sink and faucet.
- Find budget-friendly alternatives for expensive items : As I mentioned, I decided that items in my list were not as important, so I found very cheap alternatives for things like the kitchen and bathroom faucet and the bathroom sink. (I ended up paying $25 for the kitchen faucet by getting a 50% off coupon from Google Shopping, $4 for the bathroom faucet and $6 for the new bathroom sink from E-trailer during a sale) So if you wait for sales or use extra coupons, your cost can go down a ton!
- Make a list of all the basics you will need : From the outside in, when I first started to plan the remodel I overlooked the number of items we would need that are just basics, like tape and paper to cover while painting, sanding paper, and tools like drills and hammers that if you don’t already have, can add pretty quick to your budget. So make a list of basics, if you don’t have the tools, check to see if you can borrow or rent instead of buying.
- Make a list of all the decor and extra items you will need : I know that by now you get that I am a list-making lover. But when planning a complex project like an RV remodel, staying organized on the things you need to do and how much you will spend on it can help you stay on track of the budget and also of the task you need to get done. I made a list of everything we needed to buy, where we will buy it and how much it was, that way I could organize our shopping trips (shopping with 3 little ones is complicated enough as it is, am I right?) and stay in budget!
Of course, this is just how we did things, there is no right or wrong way to approach a project! If you don’t like list-making, that is totally ok =]

As I mentioned, during the planning phase of our remodel, I made a list of everything we had to purchase, separated it by place, and also by importance.
The basics that will get us started were at the top of the list, the decorating items and things like flooring were at the bottom because we would not get to that until pretty much all the painting was done.
As I shared in our 5 biggest lessons we learned while renovating our RV post, we live in the mountains so shopping is already a full-day thing for us because most stores are 45 minutes down the mountain.
We basically shopped in person only at Home Depot and Ikea, and everything else we purchased online at Amazon and a few things from Target .

I recommend that you double-check the return policy on anything that you purchase for the remodel because until you see it where it’s supposed to go (even after measuring) you might change your mind.
Working with small spaces is tricky, and sometimes you will find something that you like but that it’s not necessarily the best use of the space. So that’s when the decision of what’s more important to you will weigh in.
I also recommend getting an Amazon Prime account because you will receive your items so much faster!

Before anything can start, you have to fix any water damage or other damages that your RV might have, especially if they are interior damages.
If your damage is only in the exterior, make sure that your RV is protected against the weather while you wait to get to it, that way it will not get worse.
Once the damages are addressed and fixed, we can move to the FUN part! Well, at least that is my husband’s favorite part of any project! DEMO!
Depending on what you plan to do with the interior of your RV, at this stage you might need to take cabinets out, or like in our case, take all the doors of the cabinets out!

We decided against taking too much of the storage out, and instead, we only took the pieces that were outdated (TV stand and music system) and used the space in a very bad way.
By removing those cabinets we saved enough weight to replace with something different, we found a cabinet for the bottom at the idea that was the exact measurements we wanted and taller than the old one so we could take advantage of the storage.
We also took all of the countertops, the one in the kitchen, bathroom, the table in the dinette, and the counter in the nightstand of our bedroom.

In most RVs, you will find a mix of particle board cabinets, some solid wood pieces, and veneer coverings. Most walls are either painted boards or wallpaper.
And depending on how old your RV is you might find even more surfaces like glass and poly doors and other plastic panels.
Preparing each surface for an efficient and successful covering is not only the most time-consuming part of this whole process but also one of the most important!
If you read my post about the 5 lessons we learned while remodeling , you already know that prepping was something we didn’t invest too much time in the beginning, and we ended up working double because of this!

So, How do you prep and RV for paint?
The short answer is, it all depends on the kind of surfaces that you have and the condition of your walls and cabinets.
Most old RVs have either a mix of particleboard (fake wood) and real wood, wallpaper and some have peel-and-stick surfaces.
For all the real wood parts in our RV, we decided to use liquid sander since we didn’t want to have to sand like crazy, every single part of the cabinets of the RV.
As the name hints liquid sander it’s a liquid that helps remove all the “gloss” out of your surfaces, we used about 2 layers of that, and then we lightly sanded all the parts that were going to be exposed to a lot of wear just to be safe.
For all the particleboard parts, we sanded a layer off (lightly) so that the primer would have a better surface to adhere to. We used a hand-held orbital sander that made the process so much faster than doing it manually!.
The sanding part, while annoying is super important to not skip over because if your primer doesn’t adhere well, the paint will chip with any minor scuff.
We didn’t remove the wallpaper on our walls because it was in very good condition , so removing it would have been more work for pretty much the same result.
So we decided to plain on top of it instead.
If you need to remove your wallpaper , I’ve read good reviews about this wallpaper stripper and also this wallpaper streamer that uses only water, no chemicals.
Just to be safe I wiped our walls (with wallpaper on) with this TSP substitute , this way I knew the surface would be spotless and in the best condition, so our primer would adhere better.
For all plastic parts, I washed them with the same TPS substitute as I did the walls and used spray paint for plastic, taping around the edges.
Because we rolled the paint on the walls and ceiling, painting around the already painted plastic parts was super easy.
(Ken did try to spray the camper instead of rolling, but he didn’t like how the coverage looked, so we opted for rolling instead)

Since I purchased containers to organize the kitchen as much as possible, I asked Ken to build extra shelves inside two cabinets so that my basket containers could fit perfectly, this way I was using every single inch inside the cabinets and keeping everything labeled and organized.
We did this at this stage so that we could paint those cabinets and later add shelf liner along with all the other cabinets.

Below you can see the finished shelves, with liner and the boxes on top. I used black vinyl to cut oval and rectangle labels and used a Posca ink marker to write the labels (and the spice jars below my sink )
Below the left picture, you can see how I used these containers , and boxes from Ikea for above the sink. For the right picture you can see that I used 4 baskets from Target for the area above the couch, we left the last cabinet at full height for all the tall kitchen appliances.

Just as important as selecting your paint is to select the right kind of primer.
As I already mentioned if you plan to paint over different kinds of surfaces as we did: wallpaper, laminate, etc.
We definitely recommend you select a shellac primer ( Zinsser Bullseye is what we use) or good oil-based primer.
Water-based primers can moisten and sometimes lift off a porous substrate, and that can cause the paint to lift or crack.

And if you have any laminate (fake wood) you want to go with an oil-based paint that will “attach” better to the surface.
To Prime our walls and cabinets, we used the Rust-Oleum Zinsser Bullseye primer because we’ve had a great experience with it in the past, and it’s good for pretty much every surface we’ve worked with (it’s oil-based).
I could not recommend it enough and at Home Depot we got the best price for it, we rolled the walls and also sprayed the bathtub before using this tub refinishing kit .
In our camper, the only particleboard parts we had were mainly the cabinet structure, bathroom structure, and countertops but since we replaced all countertops, we only worked on the rest of the surfaces.
When we selected our colors, I knew we wanted two very contrasting colors. So when looking at swatches we decided on using BEHR Night club for everything that was dark and BEHR Silent White for everything light.

Probably one of the most common questions we get asked on Instagram is how did we refinish the countertop and didn’t break the bank in the process.
Because I wanted a very special sink (this one) we allocated most of the kitchen budget towards that and the peel and stick subway tile.
This left us without the kind of money we would need in order to get a “real” butcher block counter.
So we put our thinking caps on and thought about using something different for the same look. After some research in our favorite stores, we found the perfect solution, this Ikea tabletop used for desks.

The only problem was that our counter was longer than the tabletop.
So we decided to also change the table in our dinette, this way we could use the remainder of that cut to finish the countertop.
It worked so perfectly! The seam is behind our stovetop, so I placed a basket on the back to cover the seam.

I am so happy with the way that the counter looks, they have worked perfectly even without any treatment on the top.
We considered doing a layer of poly sealer but decided to try and see how it went without it.

Below is a top view of the table in our dinette, this one was super simple, Kenny just cut it to size and switched the mechanism from the old table.
Because this table was a little more narrow than the older table, in order to make the transformation to a bed work. Ken added pieces on each side of the dinette (the bottom part) so that the width would compensate for the missing 1 ½ inches from the desk. He also added a small piece of wood at the bottom of the edge he cut to add support and strength when used as a bed.
This way, it looks good, but it’s still functional in case we need to use the bed of the dinette.

As I’ve already shared, one of my priorities was to get the black sink and the peel and stick backsplash tiles. I did SO MUCH reading of all kinds of reviews in order to select the Smart Tiles, at the time there were not many options, but from what I read, they had some of the best reviews I found.
I selected the full white subway tile because I really liked the look, I kept going back and forth about either selecting the ones I did or the ones that have the gray “faux grout” and I was *this* close to going with that one =]
The instructions are super simple and it was pretty easy to install, you do want to make sure you have a clean surface and the necessary tools for the job.

You will need:
- Cutting surface – I used this self-healing cutting mat
- Metal ruler
- Box cutter or Xacto knife
- Small level
- Sharpie or a pencil
- Masking tape or painters tape
I like starting by making a reference line where the top of my first row should go, I used the level to mark and make sure it was straight. A note here would be to make sure that the RV is level because if the RV is not level, your line will not be straight.
You also want to start at the bottom-left side of the area you want to cover and work from there to the side and up.
I used some sheets of newspaper to create a cutting template for the windows since they have those tricky curves that you want to cut as clean and close as possible.
I also dry-fitted all my pieces with painter tape and peeled a bottom edge while still having the painters tape on the top, so this way they were perfectly positioned. Once about ½ an inch was stuck in the bottom, I removed the painters tape and proceeded to remove the backing of the rest of the piece, this made the process super easy, and I had no need to remove any pieces to re-adjust.

I was so excited to have enough of it leftover to also add a little piece of backsplash in the bathroom!

Peel and stick wallpaper
If you follow us on Instagram, you probably already know that I am a little obsessed with “faux wallpaper” I call it faux, because in order to save money I used shelve liner as wallpaper for all of our accent walls in the RV.
I basically used two different kinds, the shiplap one , and the gray chevron .
One “hack” that helped me make seamless lines when adding different sheets of the chevron shelve liner , was to cut the edge of the pattern in order to place it as close as possible to the edge without having crazy lines.
I’m sorry I am one of those people that little miss-alignments in patterns would just drive me bananas, and I will see it every time I enter the bathroom, so I wanted to try and make it look as seamless as possible.

I have to mention that this shelf liner has stood out the test of not only time but also, humidity and heat.
Something that the shiplap one didn’t!!! I’ll explain more about the issues we ran into at the bottom of the post, but what you should know is that I am not happy with the shiplap shelf liner. We store the RV in the high desert, so it gets super HOT and sadly the shiplap paper shrank with the fluctuation of temperature.
Don’t get me wrong, the cubbies that I have in my craft room (that I cover with this exact same one) are still holding beautifully! But there is not such an extreme fluctuation of temperature in our house, so it makes sense.
I did learn my lesson with that one though, and as I am going to go over at the end of the post, I recently ran into LoomWell , a company that carries wallpaper that is resistant to higher temperatures . So I plan to at some point upgrade to one of their patterns for some of the shiplap walls.

One thing I was so happy to find out when doing research on light fixtures was that you can use any kind you want for an RV , the only thing is that you need to use low voltage light bulbs , for our camper we used 12V light bulbs for the light fixtures that needed bulbs.
In the picture below you can see how it looked when we detached all the lights from under the cabinet , and ceiling.

I knew I wanted something brighter, more efficient, and less dangerous than those lights (I’ve read horror stories of burns with these bulbs!)
So I knew LED lights and bulbs were the way to go. So let’s discuss what we ended up doing for each area:
Couch area light
For the lights above the couch area , I fell in love with these set of scones below, they were in my price range and also in the modern farmhouse look I was after, you can check them out here .

The only downside of the set of scones is that they do not come with switches.
But that can be easily fixed with these little guys , just drill a hole on the side and connect them like you would any other switch.
(if you have done electrical work before, if you don’t know what you are doing, please ask for advice from a professional, don’t risk injuries!).
Bedroom light
For the light in our bedroom, we pretty much did the same thing, I made sure to select something that was more flush because we are both tall.
I settled for this ceiling light that had just the perfect industrial feel and accompanied it with this bulb , we also added a switch .

I was planning on using this remote control switch , but it made the bulb look too long (I think they are better suited for bulbs with lampshades that are not see-through, so I’m saving them for our brick and sticks house)
And this is how it looks in our bedroom:

Dinning light
For our dining room, I wanted something special but also budget efficient. So we decided to make our own light using the same bulbs we had for our bedroom , a shelving bracket , a vintage cage lampshade , and a pre-made lamp cord .
Since we wanted to make another for our house, we purchased everything in pairs, it was cheaper, but you can definitely buy everything in singles.
We already had a switch from the old light we had there, so we didn’t need another switch, but if you do, this is the one we used in all other lights that needed it.

All other lights
For every other light in the camper, we replaced the old lights with these small round LED lights , why?
- they are smaller.
- they save a ton of energy.
- and look SO MUCH BETTER.
- the light is so much brighter than the yellow low light that our old ones gave.
Let me show you a closer look:

I am so in love with them!
You turn them on and off by pushing in the circle in the middle, and after they are off, that little piece glows in the dark, so they are easy to find!
You can see our new LED lights in action in the picture below, they are in our ceiling and also under the cabinets, we replaced the ones in our bathroom, the boy’s bunk beds, and under the cabinet in our bedroom as well.
We used 16 of them to replace all the lights that we had left.

I also wanted to mention that since we purchased everything on Amazon using my Prime membership , I knew I had the option of returning if I didn’t like what I had ordered.
Because I wanted to be able to test options before buying in bulk to replace all the lights in the camper.
I purchased 4 different alternatives for the remaining lights.
That way I could see in person the kind of light they give and how they looked in the camper.
Once I was happy with the bulb size and the kind of light that gave (some are warmer than others, so if you want a cooler light, the best way to go is by testing)
I purchased the total of lights I needed to replace (and in the case of the bulbs, I purchased extras, so we could have them in hand in case one broke.)
Also, just a note: I mistakenly bought bulbs that were not 12V , and they pretty much died as soon as I tested them in the camper.
So make sure you read the details carefully! I, of course, could not return those, because it was my fault for not reading the details.
Ps. NOTE OF CAUTION – We are lucky to have my father-in-law that is a licensed building contractor nearby, and Ken has electrical experience as well. BUT if you are not sure, please don’t put yourself in danger when re-doing electrical work, and either consult an electrician or hire one instead.

If you are familiar with snap flooring, adding flooring to your RV would be the exact same process.
One thing that Ken was not happy about was that he didn’t account for the expanding of the flooring with the very high temperatures we experience where we store our RV, he added a little bit of room for expansion, but what he normally does at home.
If you are going to store your RV in an area that gets very hot, I would recommend you account for a more than average expansion of the floor.
We do want to see how this peel and stick flooring or this one behaves to see if that would be a better option for our next renovation.

I’ve seen that some people also use peel and stick floor tiles for RV renovations and while I want to give those a try as well, I will probably make a full post diving onto the possibilities of flooring for RVs.
We only added the corner white cabinet from Ikea, Ken bolted it to the wall to make sure that it would not move. We added it before adding the flooring, so the flooring goes to the edge of it and not under it. We don’t plan to switch it so it made sense to us.
If you are not 100% sure if you will put something in your RV permanently, make sure you only added it after you re-do the flooring.
Also, in the beginning, I wanted to fully replace the couch, and place a regular sleeper sofa there, but then we realized that our water tank was under there, so we decided not to mess with it and just make new covers.
In our case, we didn’t change as much as we wanted and did more cosmetic upgrades instead. So I have no experience changing too much furniture, but I did all the research when I considered switching the RV couch for an RV sofa bed and posted it here .

This is probably another of the most asked questions that we get. So I had to include it as a point and I will elaborate more on each one in a full post later.
I basically selected 2 different fabrics in order to make the new covers.
For the couch, I selected a long hair Minky fabric that was super fluffy, I love the idea of having that for the winter, so it was almost like having a blanket for the cover.
And for the dinette, I selected a great water-resistant fabric , so that I could wipe it down. Since we have 3 little (and very messy) boys, I needed something that I didn’t need to wash every two minutes.
I purchased my fabric from fabric.com but unfortunately, the exact same ones I purchased are no longer carried. But they are very similar to this grey waterproof one and this black minky .
To make the cover I basically placed the fabric inside out and pinned the corners, I sewed the edges and make sure that I have enough fabric for the edges to come all the way in so we can hook them using the hack I describe below.
Cover securing hack One hack I used to make sure the cover doesn’t move is to attach curtain hooks with wire to different parts in the bottom and back of the couch.

This way I could hook the cover (that is basically fabric with sewn sides) and make it stay in place even when transforming the couch into a bed and vice versa. The more hooks you have the more you can secure the cover.
And for added security, I also added 3 in the middle, those are a little tricky to hook because you will have to shove your hand in the middle until you see the fabric from the bottom, then hook them.
For me, it works better when I keep the couch semi-folded in order to hook the bottom and middle best, I hook the back once the couch is in an upright position.

Dinette couch covers
I used a fabric similar to this grey waterproof one, and I made covers by contouring the cushions with the fabric.
I used elastic around the edges to secure them but they ended up moving a little bit, so I added two extra pieces on each side so that I could tie them down and secure them better.

I did this for the big bottom ones and the small backsides I just made them using an envelope fold in the back since I made them with the fabric inside out, and super-tight, while they are a little tricky to pop out to wash, they stay without needed any extra ties.
We decided to get brand new mattresses and bedding for the bunk beds and also our bedroom.
Our bedroom mattress is a standard RV Queen so we just purchased this one . We love that it has cooling gel and honestly, we sleep better in that mattress than we do in our bricks and sticks house.
But if you are looking for different mattress sizes for RVs, we have two awesome recommendations for you:
They are 100% made in the USA and part of Brooklyn Bedding, specialized in RV mattresses and with 4 different options of comfort.
Bear offers RV mattresses that have a breathable Celliant Cover to help improve athletic performance, also 100% made in the USA.
Master bedding : Our sheets and comforter are from Ikea, and while they still have the inner comforter, I was not able to find the duvet cover online, and I have not seen it anymore at the store, but this one is very similar . I actually liked the pattern in the camper so much that I wanted something similar for our bed at home, but Ikea does not carry California King sizes, so I bought this one, and I am loving it!
I also added a hand-lettered pillow with back background, you can check my pillow collection here , you can change the background color to any color you want!

Bunk beds bedding : The duvet cover is the exact same one as the one we have in our master bedroom, from Ikea (they have different patterns per each side) but I found this one that is similar , and use it in our brick and stick home, along with the buffalo plaid one)

To finish up their bunk beds, I hung one of my favorite pieces of artwork, the “ Little one, you will move mountains ” and while this is a swaddle, I am working on adding it to my shop as prints and tapestry. And also these adorable log pillows .

We purchased everything for the kitchen of our camper, from plates, cups, and wine glasses, to pans and pots. Of course, we made sure to get as many things as we could out of melamine so that it would not be at risk of breaking when driving.
- Melamine dinnerware : We purchased a set very similar to this one from Target.
- Melamine cups and wine glasses : I love these cups and also these wine glasses , because mama needs her wine!

Behind stove storage : This basket , with these metal and plastic containers + these wooden handle utensils + this ikea knife block (without the base) and a couple of faux cactus .

We hung so many things in the camper, and while for some of them (very few) we Did use screws with anchors, for all others we selected options that would not hurt our walls like:
- Poster hanging strips
- 3M hooks (with metal hook)
- 3M hooks (full white)
- Heavy duty Velcro (for frames)
- Museum putty (for thing on top of the shelves or counters)

I used this wall grid panel (spay painted in white) and re-assemble long-ways, so it would fit the space better.
I added some decor and pictures that I sealed by running them through my Minc machine and some lamination pouches , this way I have the margin to hand them with clips without ruining them.

I think that the most important point of renovating an Rv, is to add all the details that will make YOU feel not only comfortable but as if you are in an extension of your house.
In our case, I really wanted to add details that were hand-drawn by me. So on top of the door, I added a vinyl piece that reads “ home sweet camper ❤ ” and the great part is that cutting it is a pretty easy process, and installing that one was super simple. Just make sure you have a big enough transferring tape with a grid, or cut the bottom to align with the door.
In our bedroom, I also added a vinyl decal that has a US map with an “ Our next adventure is… ” This one was a little more complicated because I had to cut and also apply it in pieces because the size I wanted was too big, but I added separations in the map between States so that it could be easier to cut separately.
If you have a cutting machine and would like to use the same files, you can find them on my Studio Website:
- Home sweet camper ❤
- Our next adventure is … USA map
- Exit with arrows

I also created a print for the entryway that reads “Together is my favorite place to be”, you can get a copy of that print in the Barefoot Detour Teespring store here.

After many, many stays in our camper, there are only a few things that we’ve updated that we plan to upgrade.
I wanted to address them here one by one so that I can explain myself better =] so the very first thing is:
Couch area sconses
While I loved the look of the first ones we had , the boys pulled them down a bunch of times because they were a little low, this made them sag a little. So we upgraded them to these ones that have two sets of adapters, one in the bottom and one in the top, unlike the other ones that only had one at the top. I love the new ones, and now they sit much higher, so my boys don’t even touch them (other than for turning on and off, of course)

Shiplap wallpaper
I have to make a note about this because I am going to change the wallpaper (shelve liner) I used for our accent walls. We store our camper in my husband’s family ranch in the high desert, so it gets HOT.

The shelf liner has shrunk because of this, and I was so sad! I did not know that this can happen with the heat, and I plan to switch to a temperature-safe wallpaper, like Loomwell . I have this dotted pattern and this one in the realm of possibilities.
Hanging solutions
While I still love all the solutions that we selected for the camper, there are some things that we have switched from 3M foam hangers to regular screws for the basket next to our bed since it holds somewhat heavy items, we decided to just secure it that way Kenny will not wake up with a basket in his head.

Couch cover
Since it’s summer I decided to switch the super hairy couch cover that I made in Minky fabric, for something that does not get as hot.
I picked this one and used the same hooks I set up for my DIY cover to make sure the cover fits nice and tight.
I like that it’s so easy to switch, so I might get another color so I can change the look every once in a while.

What to know where I purchased all the things we used in our remodel? You can shop my pictures on this page I set up or check my list below, I’ve tried to include as many things as possible =]
- Prep : Liquid sander + orbital sander + wash walls
- Primer : This oil-based primer rocks!
- Paint : We used BEHR Night club for everything that was dark and BEHR Silent White for everything light
- Flooring : We used one from Home Depot, but I am not too happy with how it expanded. We are planning on using this one or this one for our next restoration.
- Spray paint : We used spray paint for plastic and regular Rustoleum all material for the hinges.
- Shiplap wallpaper : I used this one , but it shrank a little with the hot temperatures in the summer 🙁
- Bathroom wallpaper : For our accent wall I used this shelve liner from Target
- Peel and stick Backsplash : we used Smart tile subway Tiles in full white
- Kitchen Countertop + Table : We used this desk from Ikea
- Black sink : This is one of my favorite kitchen items!
- Oil-bronzed pulls : These ones fit the holes of our old ones perfectly, but measure before you buy!
- Light fixtures : We recently upgraded our couch are sconces to these ones , I love that they have integrated switches, just make sure you add 12V light bulbs .
- LED ceiling lights : These are the ones we use all around our camper , they are amazing, bright, safe, and they look way better than the old ones.
- Roll-blinds blackouts : We purchased the blackout blinds from Ikea, but they no longer carry those exact same ones. We were lucky to find them when there were going to be discontinuing, so they were about 40% off. I did find other options like these ones , and these ones that are very similar .
- Mattresses : We recommend to check Bear RV mattresses and RV Mattress by Brooklyn bedding for the best RV mattresses available!
- Wall mesh organizer : I used this wall grid panel (spay painted in white) and re-assemble long-ways so it would fit the space better.
- Bed-side basket : I used this one and attached it with 3M strips first then upgraded to screws.
- Window greenery garland : I got it from Ikea, but it was a seasonal item, this one is super similar , just a little shorter.
- Always and forever pillow : Find it here and you can also check all my other designs here , choose any color background you want!
- Master bedding : Ours is from Ikea, but I have not seen it anymore, this one is very similar (I bought it for our bricks and stick home)
- Bunk beds bedding : They are the same ones from Ikea (they have different patterns per side) but I found this one that is similar , and use it in our brick and stick home, along with the buffalo plaid one)
- Log pillow s: I love these , they took a super long time to arrive, but they are adorable!
- CMK letters : These are the boy’s initials (they all have the same initials) I just purchased cardboard letters from a craft store and painted them with black spray paint and hung with poster strips .
- Smart TV : We have this 28″ smart TV , it was a perfect size! And we mounted it with this thing , but bolted it through the wall (I used the backs to hold blankets) + We changed the plug cable to this white one .
- Entrance mesh organizer : We purchased ours in the same section of Target, and since then has been discontinued, but I found a similar one here .
- Entrance white cabinet : We purchased a combination from Ikea, is this Billy box and this Oxberg door together with one of these pulls .
- Together is my favorite place to be print : I drew this and you can buy a copy in different sizes via Zazzle
- Behind stove storage : This basket , with these metal and plastic containers + these wooden handle utensils + this Ikea knife block (without the base), and a couple of faux cactus .
- Melamine cups and wine glasses : I love these cups and also these wine glasses because mama needs her wine!
- Kitchen rug : I love this one because it washes so well!
- Refrigerator notepad : List-maker gonna list notepad from my shop
- Copper mugs and hanger : We purchased these ones and love it to make mescal mules, we u sed this Ikea rod to hang them, I also found this one at Target that is super similar.
- Hoop succulent DIY : I used regular embroidery hoops , placed them on top of a silicone placemat , and hot glued small rocks for the bottom and faux succulents in the middle
- Triangular planter set : I got these ones and added a few faux succulents .
- Bathroom towel holder : I used this one .
- Shower curtain : I selected this Boho inspired one from Amazon.
- Outdoor rug : I love this black and white pattern .

I hope this post encourages you to renovate your RV or to just tackle a small area in your camper. We are all for small steps, so if you feel overwhelmed, just start with one area and move from there on =]
And share this with anyone that you think could use help with a remodel! Contact us if you have any questions! We love staying in touch =]
Want to save this post for later? Just pin any of the images below =]

Happy remodeling!

Merri jones
Tuesday 1st of August 2023
This is amazing! We have a very similar camper and are wanting to Reno for our family travels. Thank you so much for taking the time to share all of the info, advice, links, etc! That is so helpful and I appreciate all the time it will save me as a mom who otherwise might not be able to have the time to embark on what is usually a very overwhelming project like this. Thank you!!!
Ps did you happen to find any covers for the banquet cushions that were already complete and did not require sewing? I am trying to avoid the sewing but have not been able to find other covers. Thanks.
Tuesday 22nd of August 2023
Hi Merri! It makes me so happy that this post helped you! =]
I actually bought covers for our 5th wheel and while the fabric is not as good as the fabric I purchased for our dinette, it's a solid option if you would rather not sew them! I used covers and made sure to add clips to keep tight in the covers. Here are the links: - covers: https://amzn.to/3sshBHD - clips: https://amzn.to/3Z0YqkN
I hope this helps!
Sunday 4th of December 2022
Hiya! Do you remember where you got the black s-hook holding the towel on the wall in the bedroom? Thanks!
Friday 31st of March 2023
Hi Beth! I purchased them from Target in 2020, they were on the sale rack, and I could not find them on their website, I'm sorry!
Wednesday 31st of August 2022
Hi! Your renovation has been an inspiration for my hubby and I. We have the exact same trailer and finally took the plunge to update it. One issue we have run into is changing the lights by the sofa. I chose similar farmhouse style sconce lights and LED 12v Edison bulbs. They came with cords but my Hubby hardwired them in for a cleaner look. When we turn them on they lit up then "burned out" immediately? Are we missing something obvious in the install? My hubby is a mechanic and has wired a lot of different lighting etc. but not in the camper. Any thoughts?
Thursday 7th of July 2022
Your camper looks awesome!! Do you have the info on the ikea tables you bought??
Monday 22nd of August 2022
Hi Doris! The exact desk that we purchased is not available anymore, but they have one that is supposed to be the updated version: https://www.ikea.com/us/en/p/anfallare-tabletop-bamboo-00465141/ for the bathroom, we used their cheapest desk tabletop =] I hope that helps!
Wednesday 27th of April 2022
Hi! Your remodel is amazing! I love everything about it. We are looking to buy a camper soon and I love what you’ve been able to fit in yours. Can you share the length/size of your camper? Thank you!
Monday 2nd of May 2022
@Sam, Thank you so much! I'm so happy you like our renovation. Our camper is about 29 feet long =]
- Home ⋅
- Trailers and Towing
How to Rebuild Travel Trailers

Explore America's Campgrounds

How to Replace Plywood in a Camper

How to Restore a Pop-Up Camper Trailer

Rebuilding a travel trailer is a time-consuming but rewarding project. From a cost perspective it is usually less expensive to rebuild than to replace the trailer. Rebuilding gives you the opportunity to upgrade countertops, cabinets and appliances.
Items you will need
Tape measure
Cordless drill
Reciprocating saw
Floor scraper
Peel and stick tiles
Putty knife
Wood screws
Replacement lenses
Replacement lights
Replacement cushions
Replacement window treatments
Cabinet hardware
Park the travel trailer in a space where you will work on it. Rebuilding a travel trailer can take months; the parking space should be a protected spot with access to electricity. Check for any leaks under the trailer.
Examine the interior of the travel trailer. Identify all places where water, insects and rodents have caused damage.
Work from the floor to the ceiling. Check the floor for soft spots. Remove all carpeting and tile; a floor scraper makes this job easier. If the cabinets are in the way, remove them. Strip the travel trailer to the sub-floor.
Replace all rotten and damaged subfloor with plywood. Cut out the damaged pieces with a reciprocating saw or a hammer and chisel. If you plan on using the travel trailer in the winter, remove the subfloor and add insulation.
Cut new wood to replace damaged flooring. Fasten the wood to the frame with wood screws.
Reinstall the cabinets unless you plan on purchasing new ones. You can spruce up old cabinets up by filling in dings, dents and scratches with wood putty and then painting the cabinets. Replace the cabinet hardware with designer hardware for an upscale remodel.
Measure the floor and purchase peel and stick tile. Mark a center line horizontally and vertically. The intersection of these lines is the starting point for the tile placement. Start at this point and work your way outward.
Check the ceiling for leaks. Replace any damaged ceiling panels with luan or fiberglass panels.
Check all of the exterior lights for cracks and damage. Replace any cracked or chipped lenses. If the light fixture is rusted, corroded or not working, replace the entire fixture.
Upgrade the interior by replacing curtains, mattresses and cushions. You can give the interior a designer feel by color coordinating the curtains and cushions.
- "Trailer Life's RV Repair & Maintenance Manual;" 4th Edition; Bob Livingston; 2002
- To calculate the correct amount of peel and stick tiles, measure the area's length and width. Multiply the two numbers to get the square footage. Add 10 percent to accommodate for errors and miscuts.
Lynda Altman started writing professionally in 2001, specializing in genealogy, home-schooling, gardening, animals and crafts. Her work has appeared in "Family Chronicle Magazine" and "Chihuahua Magazine." Altman holds a B.A. in marketing from Mercy College, a black belt in taekwondo, master gardener certification, a certificate in graphic arts and a certificate in genealogy.
Always On Liberty
"Live your life by a compass and not by a clock." -Always On Liberty

DIY Camper Restoration Guide – Restore Your RV Without Going Broke
Camper restoration is quite popular these days. DIYers are restoring RVs and campers to not only improve the look, but more importantly, extend their use. Regardless if your RV is 5 or 50 years old, all it takes is a little TLC and knowing how to restore your camper close to its’ original beauty. These easy DIY camper restoration projects are quite simple and won’t put a hole in your wallet.
RVs and campers require almost constant care to keep it looking great and functioning as it’s supposed to. There are components that need to inspected regularly and exterior parts that will deteriorate if you ignore them.
So, let’s see what simple ways on how to restore your camper as well as protect and preserve your RV.
We’ll also show you how you can improve the look of certain components on your trailer, fifth wheel or motorhome without having to spend a ton of money replacing them.

This blog article contains affiliate links. Full disclosure here .
✰ ✰ ✰ ✰ ✰ ✰ ✰ ✰ ✰ ✰ ✰ ✰ ✰
Simple DIY Camper Restoration Tips
How to Restore your RV Without Breaking Your Wallet or Your Back!

RV Exterior Wash & Wax
Just like owning a car, you should take constant care of your RV. While your camper may not be a $300,000 rockstar bus motorhome, you still worked hard to earn the money to buy your RV.
So, why not take care of your RV with frequent washings and at least , a yearly thorough wax to the outside of your RV? Your RV will need special care and protection anytime it’s parked in the harsh elements, hot sun and/or subject to coastal or road salt.
While some campgrounds don’t allow you to wash your RV at your campsite, you still can clean it using an alternative cleaning method .
It’s easy, takes absolutely no water. And, you can essentially do it a little at a time; leaving you more time to play.
But whatever you do, and I say this hesitantly, never power wash your RV . Power washing or pressure washing your RV can cause water intrusion and damage your RV components as well as the exterior finish of your motorhome or camper.
But, when you do wash your RV’s exterior, it’s the perfect time to give a thorough inspection of your RV from its’ roof, windows and door for cracks or degrading seals to your motorhome or trailers wheels and underbelly.
In between water washings, you can still keep your camper looking great by using a waterless RV wash .

If you’ve noticed black vertical streaks on your camper’s exterior walls, there are ways to remove the residue. You can either clean it with a Mr. Clean eraser or an adhesive remover made for RVs.
However, if using the magic eraser, don’t scrub too hard. Otherwise, you’ll end up stripping off the wax finish or even the gel coat.
Now, while we don’t use these solutions, I have read RV owners claiming that Simple Green and Awesome cleaner works wonders.
However, I highly recommend diluting any of these harsh cleaning solvents with water before spraying on the fiberglass. As well, make certain to immediately rinse your RV off after using these cleaning agents.
Whichever cleaner you use to clean the those black streaks or stubborn stains off of your motorhome or camper, test the solution on a less conspicuous location to make sure it doesn’t ruin the finish.
And, always use a soft cloth that won’t scratch or rub off the finishes.
A dead giveaway to aging RVs and campers is faded and peeled graphic decals. To give your motorhome or trailer an updated look, remove the old graphics and replace them with new ones.
We’ve heard of others using a heat gun to remove decals from their RV. Actually, we highly discourage using a heat gun or even a hair dryer.
Using high heat tools present potential of releasing the adhesive or glue bonding agent used between the fiberglass and wall structure. The heat will create pockets where moisture can build causing delamination .
So, it’s better to follow these steps in removing your old faded or peeling decals.
First, we recommend a gentle decal remover (made for RVs) which is safe to use on fiberglass painted surfaces.
- Spray decal remover on the edges of the decals. Allow to sit a couple minutes to work it’s way into the the decal’s edges.
- With a decal remover tool , slowly and gently scrape the decal edges towards the center of the peeling decal. Do not dig or scrape too hard. You want to scrape gently with very little pressure as to not damage the fiberglass or it’s finish. (NEVER use a metal putty knife!)
- Spray again, each time working your plastic putty knife a little at a time.
- Once you remove the entire decal, follow up with a good RV wash shampoo with conditioner and hot water. Then, Hand dry with their high quality, non-abrasive, soft absorbant drying towels .
If your RV is fairly new and you wish to replace the decals, contact your RV manufacturer with your RV’s VIN number, make and model for pricing.
If your RV is older or you’d like to go with a different color scheme or design, you could always seek a local company that wraps vehicles or makes large scale decals.
However, know that new decals, no matter where you get them, aren’t cheap. And if you go the route of getting an RV wrap, that alone can cost over $15,000 depending on the size, age and condition of your RV.
So, keep that in mind that taking on this project may put a big dent into your pocket depending on what you choose to do.
Repair Fiberglass Delamination
We’ve all seen it; those ugly bubbles on camper exterior sidewalls or slide out ends. Those so-called “bubbles”, known as delamination , or delam for short, are the result of water intrusion between the fiberglass panel and the wall structure of your motorhome or camper.
But, delamination is avoidable and can be caught early if you know how to prevent it.
If the delam is bad where the whole fiberglass sheet bows, you need to make an appointment with an RV body repair shop as this will take professional guidance and reinstallation if you don’t know what you’re doing.
If you feel confident in repairing your RV’s delam issue, check out RV Repair Club ‘s video below on how to repair RV delamination.
Door Window Frames & Vent Covers

RVs and campers that originally had white window frames or vent covers may have yellowed over the years.
You can make them look new without having to buy new ones using these easy, inexpensive steps:
- Carefully remove the frame just as we did when we replaced our RV door window with a stained glass window.
- Remove all old caulk from frame or vent cover. You may have to use an adhesive remover solvent to completely clear all excess caulk or debris.
- Thoroughly wash parts in hot soapy water, rinse and allow to dry completely.
- On a plastic tarp away from your RV (or others), spray both sides of the frame or vent cover with primer and spray paint in color of your choosing. I’d give at least two to three gently sweeping coats; allowing ample time to dry thoroughly between each coat of paint. Make certain to read manufacturers’ recommendations on when it’s okay to handle them.
- While your painted window frames and vent covers are drying, carefully remove all existing caulk and debris from where the frame or vent adheres to. Again, you may have to use a solvent to remove existing stickiness from the old putty or caulk.
- Wash and dry the area where the frame or cover is going to be reinstalled.
- Where the old putty (Butyl tape) or caulk used to be, you’ll need to apply new clear silicone caulk . It’s important to allow it set for tack about 3 minutes so it won’t be slippery and runny when remounting the window frame. You don’t want it dripping outside the frame or vent cover edge.
- If you don’t want to deal with the mess, you can apply Butyl tape instead
Slide Out Rubber Seals
If your motorhome or camper has slides, slide-outs or pop-outs, they will need special care to keep them from deteriorating, cracking and fading. Because, as with any seal , should they go bad, you’ll have bigger, more expensive problems.
If your RV slide seals just need a good cleaning and conditioning, that’s easy to do. When washing your coach, make certain to clean off any dust, dirt, road grime or grit from the slide seals.
After drying thoroughly with a clean, non-abrasive cloth, you’ll want to apply RV slide out rubber seal conditioner . But, make certain you don’t get any residue onto your RV’s fiberglass finish or other components.
The slide out rubber seal conditioner will provide UV protection while repelling water and keeping the rubber conditioned and supple.
This will help protect and extend the life of your RV slide out seals. It’s graphite and other special ingredients will also help slide out function.
Oh, and you can also use this same conditioner on your window and door seals as well.
RV Window Frames & Seals
You’re RV’s window frames and seals may consist of rubber or silicone. If they are not cracked or showing signs of serious degradation, simply clean them.
Old window caulk should be removed and new window caulk adhered.
If you have white window frames, you’ll want to use white Dicor window sealant. But, if your RV window frames are black, then you’ll need to get black Dicor window sealant.
For vertical surfaces like window and door frames, make certain you get non-sag lap sealant . Non-sag sealant will keep the caulk adhered right where you apply it with no dripping effect.
Be careful not to get any caulk on the rubber frame itself. After the window caulk is finished curing and drying, follow up with a good rubber frame conditioner that will help keep the rubber looking new.
RV Awning & Slide Toppers
You should be cleaning your awning at least annually and when you winterize your RV .
But, if you use your RV full-time or a lot, you’ll want to clean your awning more often; especially if your motorhome or camper is parked under trees with dripping sap.
Cleaning your awning is just showing dirt, mold and grime, this is a fairly easy and quick fix. Some RV owners claim using a Mr. Clean eraser works well.
But of course, you may need a tall ladder (and a spotter!). And, you may end up with a sore neck and arms at the end of your project.
But, if you’d rather just use your step stool and long handled brush, you can simply spray the awning consistently using a specialized awning cleaner .
Some RVers use Awesome cleaner to water with a 50/50 ration mixture that works equally well. However, again, when using Awesome, rinse your RV well after washing. Do not allow it to sit on the fiberglass.
Whatever product you use to clean the awning on your camper, make certain to avoid using products that are abrasive, corrosive, oil-based or caustic.
These will only degrade the awning fabric causing it to rip and tear.
Personally, I recommend not using bleach as well because it will degrade the fabric but may cause damage to your RV’s exterior finish, decals, metal finishings, etc.
To remove that sticky tree sap, my first recommendation is to spot treat using isopropyl alcohol .
If that doesn’t work, you can use turpentine or household cleaners such as Formula 409 or Clorox Clean-Up spray .
As with anytime we may recommend products to clean your RV with, we highly recommend you test the product on an inconspicuous location to make certain it won’t degrade or discolor the fabric.
Also, you should clean your awning only where you’re permitted to wash your RV.
That said, anytime you’re using chemicals or highly concentrated solutions, you need to be away from other RVs. I’m sure they won’t appreciate any overspray on their own motorhome or camper.
And lastly, since you may be spraying cleaning solutions, it would be a great safety precaution to wear eye protection and skin coverings such as an old long sleeve shirt you don’t care about should it get overspray or solution on it.
How to wash your RV awning
First deploy your awning all the way out. Rinse both top and bottom of your awning thoroughly with a hose with a spray nozzle to loosen debris and dirt.
Spray your cleaning solution liberally underneath; covering every inch of the awning fabric. Then, bring in your awning completely and allow to sit for about five to ten minutes. HOWEVER, make certain to rinse off any cleaning solvent overspray off of your fiberglass immediately.
Then, deploy your awning. With a long handled brush, wipe the awning on both sides to scrub off the dirt, mold, mildew and grime. Do not scrub hard as this may remove the UV protectant from the awning fabric.
Once you’ve wiped your awning down, you’ll thoroughly rinse your awning; both top and bottom; making certain to remove all soap or solutions.
If there are existing stains, simply repeat the process previously described.
Again, make certain you rinse your awning thoroughly not leaving any cleaning agent residue. After you’re satisfied with the results, leave your awning extended so it can dry completely.
To preserve and protect your awning after thorough cleaning and drying.
For vinyl awning fabric, use 303 Aerospace that provides UV protection as well as repels dirt.
But, for acrylic awning fabric, apply 303 Fabric Guard that repels water.
RV Exterior Lights
Over time, your exterior light covers will yellow, cloud or acquire moisture inside. You can use a headlight restoration kit to bring back their clear luster just like headlights on older cars.
And because they may be exposed to fluctuations in temperatures, they often crack and break. You can either replace the light covers themselves or upgrade and replace your exterior lights with newer models.
Since your RV’s roof will be the root of most water intrusion issues, it’s the most important part of your motorhome or camper that needs constant attention.
This is why it’s important to conduct proper RV roof maintenance .
For fifth wheels and travel trailers, pay strict attention to the rubber roof membrane; looking for splits, cracks, tears and wear.
And for motorhomes, make certain your fiberglass roof top shows no evidence of cracking or spidering fiberglass.
If your roof is not too far gone, making sure your roof is clean, simply apply high-adhesive roof tape over any discrepancies.
On all RVs, check all caulking around roof vents, roof edges, window and door seals. If caulk is dry, cracked or pulling away from any RV components, you’ll need to remove the old caulk and replace with new self-leveling RV roof caulk .
You’ll want to do this at least once a year; more frequent if you’re RV is exposed to extreme hot or cold temperatures or continuous direct sunlight.
RV Roof Vent & Covers
Your RV roof vent covers are treated similar to your motorhome or camper skylight. It’s important though to keep your RV vents and vent covers clean and free of debris.
As they are subject to harsh weather, sun and moisture causing chipping, corner and edge cracking and broken mechanisms, it may be easier just to replace your RV vent kit and/or vent cover.
If you do replace it, we highly recommend upgrading to a longer lasting UV-resistant roof vent.
Since there are several different RV vent kits out there, most are standard size and can be purchased at most RV parts stores. Or, you can order them from Amazon.
RV Roof Vent Replacements for motorhomes & trailers:
- RecPro 14″ RV Roof Vent Kit RV Vent Replacement
- HENG’S 14″ RV Roof Vent Kit RV Vent Replacement
- Heng’s Standard Mount Universal Vent – White
- 14″ Non-Powered RV Roof Vent with White Wedge Style Lid with Plastic Crank Handle
- Ventline RV Roof Vent – Smoke
- Ventline Birch White Ventadome
- Ventline Birch White 14″ 12V Radius Corner Vent with Pop Up Screen
- Camco Roof Vent Kit
- LBK 14″ Universal RV Roof Vent Cover Replacements
Now, if you want to be able to run your RV roof vent without having to worry about rain getting into your RV or wind ripping the vent off, you could get an RV roof vent cover .
In fact, we had them on our fifth wheel and loved them because they protected our roof vents from damage and the weather elements.
Plus, they allow us to be able to run our roof vents while going down the road without worrying about them being damaged.
RV Skylight
As part of your camper restoration, you’ll want to take a look at your RV skylight. It may already be or just beginning to show wear and yellowing.
To clean, use a mild solution such as 409 cleaner with a soft, non-abrasive cloth. Then rinse thoroughly with a bucket of warm water.
You’ll want to dry using another non-abrasive, absorbant soft cloth.
Make certain after cleaning to check the existing caulk sealant to insure it’s not cracked or degrading which could lead to leaks.
However, if your RV’s skylight polycarbonate surface is spidering and showing signs of cracking, you may want to replace it all together.
If you’re RV is fairly new, you could contact your RV manufacturer with your VIN # and make and model of your brand for a replacement (not warrantied). Or, you can take measurements and order a new RV skylight online.
You may want to check out the RV Geeks article and video on how to replace an RV skylight.
Propane Tanks

If your travel trailer’s propane tanks are exposed, they will show their age quickly and become unsightly. They will show rust, road grime, grease and dirt if you don’t keep up with simple cleaning and maintenance.
But also, the tank fittings will corrode and cause dangerous propane leaks.
You can exchange your old 20# tanks for new(er) ones at a propane tank distribution center at places like Walmart, farm supply stores like Tractor Supply or even some grocery stores.
However, you may have to pick through as those are used as propane refill tanks.
Or, you can purchase brand new propane tanks . But, since you’re going to get new tanks, it would be a good idea to replace your propane lines as well.
But, even after purchasing new propane tanks, to keep your new propane tanks looking new, you’ll want to invest in either, individual propane tank covers for your 20# propane tank(s), or a hard-shell propane tank cover that attaches to your camper’s trailer frame to accommodate two 20# or 30# propane tanks.
By changing out your propane tanks will help improve the exterior look of your RV but also stay in compliance with road safety regulations.
If you do keep your RV propane tanks exposed, perhaps have a little fun by painting them in in different motifs, characters, sports teams or other cool designs.
That said, know that you can’t paint your camper propane tank just any color, nor can you use just any paint.
You’ll need to choose a light color that reflects heat, such as silver white, yellow or any pastel color.

If you don’t have the cash to invest in new steps for your camper , you can always improve the appearance of your old RV steps by doing a little maintenance to bring back their luster.
- Using good quality painters tape that will adhere to your RV fiberglass and surround, tape up plastic sheeting completely all around where your steps to prevent overspray from getting onto your camper or RV.
- Using a heat gun and a metal paint scraper, remove existing adhesive grit treads. Be extremely cautious as the metal steps will get very hot.
- Follow up with removing existing adhesive residue with adhesive residue remover .
- Take a fine wire brush to the crevices and creases to remove rust and caked on dirt and grime.
- Follow up with a light sanding with a high quality sanding block made for metal. You want to sand off existing rust, bubbled and cracked paint.
- Scrub down your RV steps with hot soapy water to remove all of the excess dust, dirt and grime. Rinse and allow to dry thoroughly.
- Using spray primer specifically for metal and outdoors, in light sweeping motions, carefully prime the steps where you’re going to eventually paint. Make certain you spray your primer in all of the cracks, creases and crevices so the paint adheres properly. Allow to thoroughly dry.
- Using an exterior flat black spray paint for metal with rust inhibitor, in sweeping motions, spray even coats on your primed steps. Allow enough time between coats to thoroughly dry. After your final coat of spray paint, allow to dry 24 hours before using.
- If not already, adhere new high grit adhesive tread strips onto your steps for traction.
To protect your steps from the elements and to keep from burning your bare feet, we highly recommend wrap around RV step covers .
Fifth Wheel Pin Box or Trailer Frame

Your camper or trailer frame powder coat finish doesn’t withstand road use or weather well. Thus, you’ll almost immediately notice rusting and pitting.
But, you can restore your camper’s frame and improve the look of your fifth wheel pin box or trailer extension with a few simple steps.
First, before tackling this camper restoration project, we highly recommend wearing proper PPE (personal protective equipment). Protect yourself with safety glasses and a respirator because you will be creating dust and using paint that has chemicals in it.
You certainly don’t want debris or toxic fumes getting into your eyes or respiratory system.
A light wire brushing and sanding followed by priming and spray painting will make them look almost brand new. You can follow the same camper restoration process we posted above in the RV steps section.
After you’re finished, your frame will look practically brand new and ready for another camping season or more.
Chrome & Aluminum

Your motorhome or camper may have chrome rims and aluminum fixtures or trim pieces. Your toad or two vehicle may also have them as well.
Aluminum and chrome will quickly become pitted, tarnished or may incur a cloudy haze.
We highly recommend cleaning them with a good hot soapy wash and rinse. Then dry them thoroughly. This will allow you to see which areas you need to focus more elbow grease.
While there’s a bunch of different products out there, we swear by Mother’s mag and aluminum polish . We used it to polish the chrome and aluminum on our Harley Davidsons.
So, rest assured, if it’s safe for keeping the shine on expensive motorcycles, it’s safe for your aluminum and chrome pieces.
Simply put about a teaspoon onto a soft microfiber cloth and work it into the surface using that good old fashion elbow grease in circular motions.
After which, buff off using a clean, non-abrasive, soft cloth. If spots remain, repeat the polishing process until all or at least most the pitting or marring is gone.
But, if you insist on polishing your aluminum and metal with a small orbital polishing tool , be mindful not too concentrate on one area too long or polish too hard to remove the anodized finish that protects the metal components.

If your camper’s painted tire rims are rusting and peeling, don’t think you need to run right out to buy all new rims. You can follow the steps as we posted above in the RV steps section.
Just be extra careful to not get any abrasives on the rubber sidewalls or tire treads. And make certain you tape and tarp off areas where you don’t want paint to get onto.
This includes the ground where paint spray could damage, leave unsightly marks or leach into the ground.

If your RV’s tire rims are chrome or aluminum alloy, simple use the same technique we described in the above chrome and aluminum section.
You can follow up with a good automotive wax to preserve and protect the finish from road salt, grease and road grime.
Wheel Fenders

Unfortunately, if your fifth wheel or trailer has experienced a tire blowout, you’ve had to replace the wheel fenders.
However, if your fifth wheel or travel trailer has painted fenders to match the full body paint scheme, you know it’s going to cost you a pretty penny to get the new wheel fenders painted by the RV manufacturer or by a professional automotive body painter.
But, if you really don’t want to sink your hard-earned dollars into custom-painted fenders, you can just order new stock fenders from your RV manufacturer. However, they typically come in white or black.
If your RV is of a different color such as brown, tan or other color, you can actually paint them yourself with an outdoor all-in-one spray primer and paint.
First, you’ll need to scuff them a little with a fine sand paper and wipe completely clean to eliminate any dust particles. Then, lay them on a large tarp outside (away from your RV or others’ RVs and vehicles).
First, you’ll spray your outdoor spray paint (large color selection available) in even sweeping motions; allowing each coat to dry thoroughly as prescribed on the manufacturer’s directions. You’ll want to spray two to three coats as necessary for coverage.
For added UV protection, follow up with a couple coats of UV Protectorant polyurethane (satin finish) .
✰✰ PRO TIP ✰✰
Once your camper restoration is complete, it’s time to hit the road! Let RV Trip Wizard help will you plan the perfect RV adventure! Their RV GPS app turns your phone into an RV Safe GPS to get you to your destinations safely. Have a question about ANYTHING related to RVing, join the conversation at any of their awesome RV forum communities.
Learn more and sign up for the FREE 7-Day Trial .
Final Thoughts on Camper Restoration Tips
Taking care of your RV is an ongoing process. If you do you RV maintenance diligently, your motorhome, fifth wheel or travel trailer will provide you many years of life to make camping memories that will last a lifetime.
These simple camper restoration ideas should help bring your RV’s exterior back to life without breaking your wallet. And even possibly dodge that silly 10 year rule at some RV parks!
More Camper Restoration & RV Maintenance Tips
✰ Protect your RV from Salt Air and Sun Damage
✰ Why You Should Never Pressure Wash Your RV
✰ RV Roof Inspection, Cleaning and Maintenance
✰ RV Air Conditioner Cleaning and Maintenance
✰ RV Hot Water System Cleaning and Maintenance
✰ RV Black Tank Cleaning and Maintenance Tips

Share this:

3 Replies to “DIY Camper Restoration Guide – Restore Your RV Without Going Broke”
Great article. Thanks for the info.
I like that you talked about how RVs and campers require almost constant care to keep them looking great and functioning as it’s supposed to. We just bought a broken camper and we are planning to restore it to its original state. But before we could do that, we need to purchase some replacement camper parts.
Luke, have you checked out Bontrager’s Surplus? They have tons of replacement parts for practically every RV out there. They even have an Ebay store. Check out their website. Bontragers.com
Leave a Reply Cancel reply
Your email address will not be published. Required fields are marked *
Privacy Overview
- Remember me Not recommended on shared computers
Forgot your password?
- Oliver Blogs
Tips for Fixing Up an Old RV

By JWalmsley January 19, 2023 in Oliver Blogs
Recommended Posts
- Administrators
Share and Enjoy !
Renovating an old RV is a great way to give your recreational vehicle a new lease on life. With the right knowledge and planning, you can renovate your RV with minimal costs and create something that looks like it belongs in an interior design magazine. Whether you're looking to spruce up an older model or completely overhaul a vintage RV, there are a few key steps that will help you get the job done right.
In this article, we'll discuss the essential steps for renovating an old RV and provide tips to make sure your project goes smoothly. With the right amount of effort, you can transform your RV into a comfortable and stylish home away from home. So let's get started!

Planning, Assessing the Project, and Setting a Budget
Planning is an essential step when it comes to renovating an old RV. Before you begin any renovations, it's important to assess the condition of your RV and determine what type of work needs to be done. This assessment will help you set a realistic budget and timeline for the project. Additionally, it will also help you determine what upgrades and accessories you'll need for the renovation.
First, assess the condition of your RV. Look at both the interior and exterior to identify any damage or wear-and-tear that needs to be repaired or replaced. Make sure to check behind cabinets and furniture, as well as under carpets and rugs. If possible, have a professional look over the RV and provide an opinion on any necessary repairs.
Once you've identified what needs to be done, create a budget for your renovation project. Take into account labor costs, materials needed, and any new accessories or upgrades that you want to make. Make sure you factor in unexpected expenses, such as additional repairs that might be discovered during the renovation process. Don't forget to budget in time for yourself, as well.
Finally, determine what type of improvements you want to make and set a timeline for completion. Consider how these renovations will affect the aesthetic of your RV and decide which upgrades are most important. Make sure that your timeline is realistic; depending on the scope of the project, it could take weeks or even months to complete.
Once you've created a plan for your renovation project, the next step is to clean out and prep the interior of your RV. This involves removing all furniture, carpets, and clutter from the RV so that it can be thoroughly cleaned and prepped for renovations.
Start by removing any furniture and accessories from the RV. If possible, take pictures before you remove anything so that you can remember how it was arranged. As you're removing items, set aside any that are salvageable and may be used in the renovation.
Once everything has been removed from the RV, give it a thorough cleaning to remove any dirt or debris. Vacuum carpets and upholstery, and use an all-purpose cleaner to wipe down surfaces. It may be necessary to rent a steam cleaner or pressure washer for tougher jobs, such as removing mold or mildew.
Once the interior is clean and dry, you'll need to assess any damage that needs to be repaired. This may include fixing broken windows, replacing rotten wood, and patching holes in the walls. Depending on the severity of the damage, you may need to hire a professional contractor to do these repairs.

Choose Upgrades & Accessories
Now that the RV has been prepped and cleaned, it's time to choose any new upgrades and accessories you want to add. This is the fun part of renovating an old RV—you get to decide how you want your interior to look!
When selecting upgrades and accessories, think about what type of aesthetic you want for your RV. Determine the color palette, furnishings, and accessories that will help you achieve the look you're going for. It's important to keep your budget in mind when making these decisions; there are plenty of affordable upgrades and accessories out there that can help give your RV a unique touch.
Look at furniture stores and online retailers for inspiration. Consider the layout of your RV and decide which pieces will fit comfortably without crowding the space. When shopping for accessories, look for items that match the overall aesthetic of your RV, such as artwork, pillows, and rugs.
Finally, don't forget to also consider any necessary functional upgrades. This could include installing a new water heater, upgrading the electrical system, or replacing old appliances.
Start Renovating
Once you have all of your upgrades and accessories selected, it's time to start the renovation process. Depending on your experience level, this could involve anything from a simple paint job to a complete gut job.
If you're comfortable with DIY projects, there are plenty of ways that you can handle the renovations yourself. For example, if you want to give your RV a facelift, consider giving it a new paint job or installing new flooring.
If the renovations are more extensive and require specialized skills, it may be beneficial to hire professional contractors. Be sure to do your research when selecting contractors; look for professionals who have experience working on RVs and can provide references.
Once the renovations are complete, it's time to start putting your RV back together. Begin by moving the furniture and accessories back in and arrange them as you envision. Add the finishing touches—including artwork, rugs, and other accessories—and make sure everything is secure before you hit the road.
Renovating an old RV can seem like a daunting task, but when done correctly it can be an incredibly rewarding experience. By following these steps and having patience, you’ll have the RV of your dreams in no time! And if renovating an old RV seems like too much work and you don't want to put the time and money into it, contact Oliver Travel Trailers today. We'll help you find a great RV that meets your and your family's needs!
The post Tips for Fixing Up an Old RV appeared first on Oliver Travel Trailers .
Read the Full Article
Full Stack Developer/Marketing @ Oliver Companies
Oliver Forums Guidelines & Rules
Link to comment
Share on other sites.

Mike and Carol
Twenty years from now I will look like this guy sitting in the door of my 28 year old Oliver. Mike

Texas Hill Country | 2016 Elite II #135 | 2020 Ram 2500 6.7L

1 hour ago, Mike and Carol said: Twenty years from now I will look like this guy sitting in the door of my 28 year old Oliver. Mike
I'd say that could be me a couple of years ago...back when I was young :)
Oliver II #996 " Bessie ", 2019 Silverado LTZ 5.3, Veterans
https://wenandjohnsadventure.com/

The cool thing is, we get older, but the Oliver doesn't age much.

2008 Ram 1500 4 × 4
2008 Oliver Elite, Hull #12
Florida and Western North Carolina, or wherever the truck goes....
400 watts solar. DC compressor fridge. No inverter. 2 x 10⁵ ah agm batteries . Life is good.

The Oliver is truly the timeless “Tennessee Jewel”.
2020 OLEII - Hull #634 aka- “XPLOR”
2021 F350 6.7 liter Diesel Lariat Ultimate Tremor

Create an account or sign in to comment
You need to be a member in order to leave a comment
Create an account
Sign up for a new account in our community. It's easy!
Already have an account? Sign in here.
- Existing user? Sign In
- All Activity
- Leaderboard
- Online Users
- Travel Trailers
- Campers for Sale
- Create New...
Sign up to RVT’s Insight Weekly Newsletter to get blog posts and more
8 Quick Tips for Fixing Up an Old RV

Recreational vehicles are built for many years of enjoyment on the road, and that’s what they’ll provide so long as you keep up with regular RV maintenance . But what if your older motorhome needs a refresh, or you recently purchased a vintage camper with wear and tear? Whether you want to improve a RV to provide an elevated camping experience for yourself or you’re hoping to flip the rig for resale in order to turn a quick profit, RVT has eight easy tips for fixing up an older RV.
1. Wash and Wax
One of the first tips to fix up your Class A motorhome or other RV is to thoroughly wash the exterior. Use a cleaning solution strong enough to remove any difficult residue, along with a car-washing mitt or sponge. There are many green cleaning solutions available. Once your unit is sparkling clean, apply a fresh coat of wax suitable for recreational vehicles to give your camper a good-as-new shine. Don’t apply wax in direct sunlight and only do a small section at a time to prevent the wax from drying too quickly.
2. Deep Clean and Prep the Interior
As you will spend most of your time inside your renovated camper, it is important to deep clean your RV’s interior. Appliances should be moved for more accessibility to the hard-to-reach areas. Make touch-ups to all surfaces: wood surfaces should be re-sanded and apply caulk to any cracks in the walls or countertops.
3. Fresh Paint Job
Whether you have recently purchased an old RV, or you are restoring your well-loved Class C , fifth wheel , or travel trailer , all RVs at some point will need a new paint job. This is a simple, low-cost way to make your rig more aesthetically pleasing. Remove any decals, wallpaper borders, and necessary fixtures. Do not remove the textured wallpaper on the walls, however. It isn’t intended to be removed. Clean the walls with a degreaser, do any necessary patching, and apply a bonding primer before you paint. Then apply at least two coats of fresh color to create a more modern feel. When painting the outside of your rig, it is important to purchase the correct type of paint for your RV’s exterior. Check with your dealer or manufacturer for recommendations.
4. Clean Frames and Covers
As your RV has been exposed to numerous weather conditions over the years, it is likely that discoloration has formed along the frames of the windows and doors. Instead of purchasing new frames and covers, it may be more cost-effective to remove these parts and thoroughly wash each component in hot, soapy water. Apply a couple fresh coats of paint and re-install once dry.
5. Upgrade Furniture and Appliances
After years of use, it is likely that your RV’s furniture is worn, stained, and dirty. Replacing or reupholstering the furniture will enhance the overall aesthetic and give your RV a fresh look and smell. For a completely refreshed look, consider changing the fixtures and appliances as well.
6. Replace Flooring
Your RV’s floor has been subject to a lot of wear and tear. Replacing it is another great way to refresh your camper or motorhome. One cost-effective solution for an instant change is press-and-stick vinyl tiles. Other solutions may include vinyl plank or porcelain tile. Keep in mind that lighter flooring, such as laminate, is a better option than real hardwood, as adding weight will slow down your camper, leading to lower gas mileage. If your rig has water damage or major cracks and dents in the flooring, you will likely need a professional crew to fix it.
7. Electrical and Mechanical Repairs
Simple fixes, such as changing lightbulb fixtures or the RV’s battery, may be something you’re comfortable doing yourself, but overall it is best to consult with a licensed electrician or mechanic for electrical and mechanical repairs. It is crucial to get the inner workings of your RV up to speed so you don’t have any issues while you’re out on the road.
8. Replace Tires
If your RV has been idle for a long time, or if you’ve traveled a lot, your tires will likely need to be replaced. Here are some tips to look for when it’s time to replace new trailer tires . For safety, check your tires regularly.
Though fixing up your old RV may seem like a cumbersome task, following these tips will make updating your motorhome exciting. After all, if you plan to spend more time in the RV, you and your guests will feel much more comfortable cruising and exploring in a rig that is well equipped with newer, updated fixtures. If you’re wondering whether to renovate or buy a newer unit, these 12 key considerations may help you decide. When you are ready to purchase a newer RV, check out the current listings on the RVT marketplace.
By Alex Hoyes

Share this article:
Leave a Comment
Your Comment
XHTML: You can use these tags: <a href="" title=""> <abbr title=""> <acronym title=""> <b> <blockquote cite=""> <cite> <code> <del datetime=""> <em> <i> <q cite=""> <s> <strike> <strong>
Sign me up for the newsletter!
Recently Listed RVs

- Buying & Selling
RVT.com Quick Links
- Sign Up RVT
- Press Releases
Find us on Facebook
Copyright 2024 Insight RV Blog from RVT.com /" title=" Theme by DesignerThemes.com"> Theme by DesignerThemes.com
How to Repair and Remodel an RV

Every home needs maintenance and repair; it’s one of life’s great consistencies. Once that’s under control, we sometimes feel the urge to “spruce the place up.” These are mostly cosmetic or minor adjustments that don’t require a huge amount of time or money.
Then there’s remodeling. We’re talking structural changes of the floor plan. Moving walls, replacing furniture, changing out appliances.
We have all the information you need for every one of these projects. This page offers sections on on maintenance/repair, remodeling , and structural changes . Within each section you may find links to some of our other pages for more information. As with every project, the key to success is GOOD PLANNING. We’ve got you covered!
Maintenance and Repair
RV’s, travel trailers, and motor homes need constant maintenance. The warranty period will fly by and many normal maintenance issues aren’t covered. Even if something is in warranty it could end up in “the shop” for months right during peak camping season. You really need to know how to repair and remodel an RV on your own.
You’ll want to replace the mattresses almost immediately.
The tires will need replacement within three to five years.
The roof… the roof will leak at some point so you’ll be patching or resurfacing it.
Paying someone for these repairs and maintenance issues is crazy expensive and frequently not done correctly. You can do it. See the Fix-It Yourself Course below.
Repairing and Remodeling
Updating your RV’s look can be fairly easy and inexpensive, and you’ll find several helpful suggestions in this section. Enlarging the bathroom, moving the walls, or changing the kitchen’s location is more difficult and costly, and are covered in the next section under Crossing That Line : From Minor Adjustments to Structural Changes.
It would be almost impossible for me to give you blanket instructions for the repair or remodel you want to do so I will point you in the right direction with YouTube videos and helpful products you will need to begin your learning journey.

Fix It Yourself is an eight part online course that gives you the knowledge you need to fix or repair your RV and travel trailer with confidence. Click on image to see more details.
For more E-Courses, Workshops, and Boot-Camps , see this page:

There are some easy things you can do to freshen up your aging RV

Replace the lighting fixtures with new LED fixtures and still maintain the original look. LED lights are brighter, create less heat, and use a lot less power. This 5-pack is just $47.99
- Paint the cabinets (remember to use primer first as you may be painting a plastic veneer)
- Replace the flooring (Look at wood composites to replace worn and stained carpeting)
- Add a backsplash to the kitchen .
- Replace or recover worn out furniture (replace the foam covering too).
- Make new curtains and add matching pillows, bedspread, and afghan.
- Replace old lighting with new LED light fixtures. If your fixtures are still in good shape you can replace just the bulbs .

Energy efficiency class of A+, energy draw is only 4 Watt per bulb, equivalent to a 20 watt halogen bulb. Instant on, Mercury-free and UV-free. The reduction on power consumption will help extend your battery life.
Learn all you can first. These books will be valuable resources:

Bob’s RV repair manual is know in the industry as the RV repairman’s bible. It has been revised and updated many times
The RV Handbook: Essential How-To Guide for the RV Owner
Designed to be used as a fast-reference guide or a generously illustrated textbook, the guide contains helpful checklists, photos, schematics and charts, as well as valuable information on avoiding towing errors, correct hitching techniques, crowd-free camping, electrical systems, improving fuel economy, and the latest tech trends in RV.
Replace mattresses and bedding

Mattresses lose their support after just a few years. The original mattresses only last a few seasons at best and because they usually lie on plywood there is no air movement underneath to remove the moisture.
All mattresses and bedding should be replaced
Imagine looking forward to a great night’s rest while camping.
Mattress Insider sells all common RV bed sizes including the popular 60 x 75 short queen. They can make camper beds in any size or shape! Even those odd shaped Airstream size mattress replacements and the short pop up camper mattress.
All mattresses include a 121 night trial period .
The Tochta Anti-Moisture Underlay
The Tochta Anti-Moisture Underlay will keep moisture from being trapped under the mattress. It is essential for preventing mold growth.
Tochta also makes custom RV Mattresses that are so comfortable you’ll drift off to sleep in seconds and wake up refreshed. These mattresses are so good you’ll want one for your home. Shop custom mattresses, sheets, and mattress pads at Tochta!
Resurfacing your RV’s countertops with Stone Coat Epoxy Countertops

Take 10% off your StoneCoat Countertop order using this coupon code: TINY10 .
See more details about versatile epoxy countertops, floors, even walls on this page: Saving Weight On Tiny House and RV Tile
Easy and lightweight kitchen tile and backsplash
Refer to this page for lightweight tile and backsplash products and ideas.
Painting your RV cabinets

A gallon of this Zinsser Primer is currently just $53.05* from Amazon. “Priming isn’t just an extra step in the painting process – it ensures that the work and money spent painting surfaces isn’t wasted. Use primer as a buffer between what you need to paint and the top coat you want to use to make sure that nothing interferes with the final appearance of your work.” Zinsser also makes a primer to kill mold an issue most RVers deal with.
B-I-N Advanced Synthetic Shellac Primer is a synthetic shellac-based primer sealer that provides excellent stain blocking for whole-surface interior priming and exterior spot priming. It combines fast dry time, low odor, excellent hide and stain blocking for new construction, remodeling and fire and water restoration.
B-I-N Advanced Synthetic Shellac High Hiding Bright White Primer Sealer: water-based fast-dry ultimate stain blocking for water stains, rust stains, graffiti, crayon, grease. Superior odor blocking for smoke, cigar, cigarette, pets, food. Low odor Nationally VOC compliant.
If the original plastic veneer is broken off use Peel Stop, Triple Thick, Zinsser Primer to raise the broken area to the same level as the good area.
DO NOT USE ZINSSER UNDER PeelNStick tiles. Here’s more on self stick back splashes .

Heirloom Traditions, All-In-One Paint has become a leader in developing a paint product designed for the novice painter that gives them beautiful results, even if they have never painted before. They combined what once was multiple steps into one product and took the guesswork out of choosing the right products.
All-In-One has paint designed for every surface of your RV. Even the furniture. Leather, faux leather, and vinyl can be painted. It will look better than new. See the Painted Leather or Vinyl Chair Bundle that includes everything you need to get professional results.
Replacing old windows

The windows on your RV can make a big difference in your RV experience. For your RV, you need great quality windows to make that difference. That’s where RECPRO comes in. With their line of RV windows , you can be sure to find a product that matches your RV style and needs.
RV windows are actually fairly easy to replace. Mine had about thirty screw on the inside but once removed the window came right out. I removed the old rope caulk and put down a new layer then pressed the new window into place. My wife held it steady while I climbed inside and screwed it into place.
You might think about replacing a window with an exit window just to give you an extra exit option in an emergency like a fire . If your egress window isn’t in the best condition or is not easy to use, investing in a new working model that is easy to use is vital to safety while on the road.
Use this coupon code at checkout to get 5% off your order: TINYLIFE

Windows that match your “vintage” trailer
Vintage Trailer Supply offers gently rescued windows, window hardware, and seals as well as other salvageable parts from trailers that have been totaled by insurance companies . They have a huge selection to match the windows in older travel trailers and RV’s.
If you need parts to repair your windows, check out the Mobile Home Parts Store . They have a large section of RV replacement parts. The Mobile Home Parts Store has replacement crank mechanism for the roof vents.
Blackout Window Shades and Window Coverings

Custom NitePro Blackout Nighttime RV Roller Shades are durable and blocks light from making its way into your RV and sleeping quarters. The shades are solid vinyl sheets that are specifically constructed to resist sun rays up to 99% in most applications. They also feature an internal mechanism that keeps the shade from retracting too rapidly.
See more window covering option on this page: Tiny House Window Treatments

Take 10% off your order using TINYLIFE10 coupon code at checkout.
Crossing That Line: From Minor Adjustments to Structural Changes.
Good planning is essential, remodeling and/or changing the interior layout of your rv or travel trailer can be a huge project.
There are four basic RV construction methods:
- Wood supports with tin
- Stick and tin
- Fiberglass laminate
- Then there’s Airstreams .
If you can, determine the construction method of your RV before demo. Look for a YouTube® video of your make and model. It’s great to have the visual to see exactly what you’ll be working with. I can pretty much guarantee you will find water damage, dry rot, bug and rodent damage and mold.
You might get a little overwhelmed by the mess during the demo process. The key thing is to complete the demo them clean it all up. Once clean take a few breaths, access the damage, and come up with a plan to move forward.
Repair and restoration of “Vintage” Travel trailers
This YouTube® video is a great illustration of a “vintage” stick and tin RV trailer construction method. These old beasties are comparatively easy to work with because they have wood paneling and wood framing. Air Stream trailers are so different we will cover them on a separate page.

Are you stuck on a repair project? Professionals at the RV Repair Club will help you.
You can see easily that travel trailers, motor homes, and RV’s are very flimsily made, unlike a tiny home. The walls, even on modern ones are at most only 1.5″ thick. Some RV’s use 1×2 wood sideways so the wall is only 3/4″ thick. There’s just no way to insulate properly with that thickness.
Remember, the RV frame is designed to just handle the weight of the trailer as it was built. If you add a bunch of building material you might compromise the ability of the RV frame to safely hold the load. You might also change the weighting required to tow the trailer safely.
Here is a good YouTube® video of a guy redoing the bathroom of a really old RV.
Rosie: scratch-building a vintage camper trailer

Rosie:Scratch-Building a Vintage Camper Trailer brings a wealth of problem-solving tricks of the trade, offering new ways of thinking about old practices and techniques. Author Joe Mirenna brings a fresh look at doing things better, smarter, and less expensive by questioning everything from basic construction methods to choices of materials. Let these clear descriptions and hundreds of photographs become an inspiration for anyone contemplating joining this expanding world of interest.
This is an excellent resource complete with photos and diagrams. It’s available in Kindle and paperback . I like the paperback version so I can keep it on the job site without worrying about breaking my E-Reader.
The Kindle version is only $7.99 and has a hundred pages of additional content. Click here to order Rosie from Amazon.
See more information about Kindle E-Readers and Pads on this page: The Best Tiny House Bookstore
At RecPro we develop, manufacture, and import our own products in addition to selling Atwood, Suburban, SHURflo, and other quality name brand products.
Newer travel trailers and motor homes are much harder to work with
Here is a YouTube® video showing the construction of a Flagstaff by Forest River in a factory. You will see many construction methods that you can not duplicate without a huge factory backing you up.
- The walls are highly engineered, one piece SIPS .
- The nose cone in one huge molded fiberglass construct.
- Plumbing and wiring harnesses are very difficult to reach for repairs after construction.
But, it’s good to see how one is constructed so you can decide how to proceed with repairs and remodels. You might even find a video showing your exact make and model of RV so you can see what the walls and ceiling are made of.
Replacing RV and Travel Trailer Furniture
Your woodworking skills will be put to the test building lightweight but durable cabinets, drawers, shelving, and storage areas. If you need matching hardware and trim you can find it at Vintage Trailer Supply, Inc. Many times the cabinets are actually structural components so removing them weakens the trailer.
Specialized RV & camping trailer furniture
Specialized furniture, like Jackknife Sofa Beds are just easier to replace. You’ll get a modern product that should hold up well.

RecPro has an excellent selection of sturdy RV furniture that is comfortable and will last for years. Click on image to see their great selection.
This 62″ Jackknife Sofa Bed comes in several colors.
- Supportive high-density foam covered in low-maintenance PolyHyde upholstery with contrasting top stitching.
- Lightweight and versatile to conserve interior space; fastens to the coach wall, allowing for additional storage space underneath.
- Converts to a bed in one easy motion.
- Sofa Size: 72″ x 28″ x 23″
- Sleeping Surface: 72″ x 42″ x 8. 5″
- Overall depth in bed position: 42″
For more furniture specifically for RV’s and travel trailers visit this page.
As Part of Your Repair and Remodel Don’t Forget the Trailer Itself
Look underneath your RV. Whether it’s a travel trailer or a motor home the undercarriage will need some work.

Click on Image to order RV plumbing parts from Amazon.com
At the very least there will be rust that needs to be dealt with. You may also find cracks that need welding and wiring that needs replacing.
The waste drain valves may be leaking or corroded shut. Those are easily replaced.
RV Repair Club is a great resource to get your remodel or repair done
Whether you’re already on the road or planning your next RV trip, turn to the RV Repair Club for step-by-step videos on RV repair, maintenance and upgrades.
The videos and classes cover all aspects of RV repair, remodeling, and maintenance. Videos cover topics like, heating and cooling, gas systems, plumbing, appliance repair, and more.
They also have an informative blog you’ll find most interesting. Want to learn how to repair your brakes or repack the wheel bearings? You’ll save a ton of money doing it yourself.
Lots of videos and information for free. Take a look at their website.
Other pages of this website you will get good information from:

Replacing the electrical Power Center. Click on image to see details.
Ideas for new or renewed countertops.
Best Off-Grid Energy Sources ,
How to Heat Your RV or Tiny Home ,
Best products for flooring.
Replacing Your Water Heater
Dealing with moisture and mold damage
Replacement RV Appliances and Parts
Adding storage for the “Stinky Slinky”
How to Drain and Maintain Your Holding Tanks
RV Shore Power, Surge Protectors, 50 amp, 30 amp hookups.
Generators or Portable Power Centers, Which one is right for you?
Most Important:
How to repair or refinish your RV roof.
Additional vintage parts sources I have used
GetRVParts These folks got me parts for my 30 year old NorCold refrigerator quickly.
Young Farts RV Parts
RV Parts Country
- Get Plans Here
How to Restore an Old Trailer

by Pete Sveen
October 26, 2013

I love fixing up old trailers and when I came across this “FREE” 4×8 Utility trailer on Craigslist I had to grab it! Within 5 minutes of it being listed I was on my way to pick it up. Lucky me, I beat someone else to it by about 20 minutes.

Step 1 – Remove old wood
Step 2 – prep for paint.
Sweep and scrape all the dirt and gunk out of the trailer frame.
Step 3 – Paint!
Step 4 – attach new boards.
Shop DIY Project plans!
Instant PDF Download
Session expired
Please log in again. The login page will open in a new tab. After logging in you can close it and return to this page.

How to Fix Up Old Trailer Homes

Older trailers built before 1976 conform to different building codes than those built later. Because of this, many of these older homes require repair and remodeling to be brought up to local building codes.
While repairing mobile homes is possible, determining the cost and time of repair depends on the age and condition of the mobile home.
Things You Will Need
- Bottle jacks
- Cinder blocks
- Claw hammer
- Roof sealant
- R-19 insulation
- Weatherstripping
- Drywall tape and screws
- Paintbrushes
- Paint rollers
- Motion-detection lighting
Create a schedule for every phase of the project, and develop a budget both for each individual phase and for the project as a whole. You should end up with both a time line and an estimate for any financing needed for the project. Compare the repair costs with the estimated value of the trailer. If the trailer will be worth less, once repaired, than the cost of the repairs, it's time to decide if the trailer is worth repairing, and, if so, whether you can repair the trailer sufficiently for less money than your estimated budget.
Inspect the trailer, both inside and outside. Look for holes, gaps or hanging pieces. Inspect any discolorations, warping or separation in seams and joints.Write the location and description of each problem down on paper.
Level the trailer by setting bottle jacks underneath the joists. Set the jacks on blocks so they don’t sink into the ground. Raise the jacks until they come into contact with the trailer. Use a level to adjust the height of the jacks so the trailer is evenly seated. Stop here if you cannot level the trailer.
Inspect the windows and doors. Open and close each one. Look for sticking or looseness. Identify gaps between the walls and window or door. If the trailer is level, there should be no gaps, and the windows or doors should open and close easily.
Tear up one corner of the floor in each room. Note how easy or difficult it is to remove the flooring. If the floor comes up easily, inspect the subfloor for rot. Dark patches indicate wet wood. Discoloration of the wood and flaking wood or wood splitting into thin layers indicate rotting wood. Set the weight of your foot on the floor against the walls all around the room. If the floor feels soft or gives, you have more rotting wood. Stop here and inspect the underbelly of the trailer.
Obtain prices from local home centers for materials needed. Use these prices as a guideline to calculate repair costs.
Seal any cracks or holes. Use patch cement for ¼-inch wide or smaller areas. Put the cement into the crack and allow to dry. Use melted plastic for larger areas. Use hot plastic around gaps where pipes extend through the roof.
Apply roof sealant over the entire roof in a clockwise rotation (to the right). Apply enough coats to thoroughly cover the roof. Let each coat dry for 12 hours before applying the next coat.
Apply the finish coat. Use rollers to apply silvercoat to create a long-term roof sealant.
Replace the windows and doors with regular home windows and doors. This improves both the lighting and energy-efficiency of the home.
Apply weather stripping around the doors and windows to help insulate the home. Apply caulking around the seams where the window and door frames meet the walls to prevent moisture from entering the house.
Replace the metal siding with house siding. This will reduce heat loss and keep the trailer cooler during warm days, and will last longer because it is made from vinyl instead of metal.
Exchange the outside lighting with motion-activated lights. This saves energy and acts as a cheap security system.
Upgrade the kitchen and bathroom. Replace all fixtures with energy-efficient house units. Replace any boilers or furnaces. Use wall-mounted heating units for easier cleaning and maintenance.
Remove the flooring. Cut out damaged areas of the subfloor and walls. Replace with new wood cut to size. Install tile or carpeting over the finished subflooring.
Replace the walls and ceilings with drywall. Add insulation between the exterior walls and the drywall. Install wood trim and molding along the edges of the drywall to create a finished look.
Paint the walls and ceiling with light colors to add the appearance of space to the trailer.
Replace old countertops and flooring. You may want to replace the cabinets if they are the original units. Construct built-in units for corners to increase storage within the rooms.
The Drip Cap
- Older trailers built before 1976 conform to different building codes than those built later.
- Look for holes, gaps or hanging pieces.
- Level the trailer by setting bottle jacks underneath the joists.
- Set the jacks on blocks so they don’t sink into the ground.
- Inspect the windows and doors.
- Use hot plastic around gaps where pipes extend through the roof.
- Replace the windows and doors with regular home windows and doors.
- This improves both the lighting and energy-efficiency of the home.
- Apply weather stripping around the doors and windows to help insulate the home.
- Replace any boilers or furnaces.
- Cut out damaged areas of the subfloor and walls.
- You may want to replace the cabinets if they are the original units.
- Free Mobile Home Info: Mobile Home Renovation or Replacement
More Articles
- How to Build Living Quarters Inside Metal Buildings
- How to Add a Master Bedroom to a Mobile Home
- Install a Window on a Metal Shed
- How to Rebuild Fire Damaged Homes
- How to Build Roof Returns
- How to Repair a Leaky Roof From Inside the House
People are reading
- How to Seal Your Garage Door & Build a Wall
- Advantages and Disadvantes of Metal Roofs for Ranch Style Houses
- How to Remodel a Mobile Home Bathroom
You may also like
- How to Remodel a Park Model Trailer
- How to Remodel Your Mobile Home to Look Like a House
- How to Attach a Detached Garage
- Accessibility
- Privacy Notice
- Cookie Notice
- California Notice of Collection
- Manage Preferences
- Terms of Use
- Copyright Policy

Speaker Among Presses for Expedited Repair On Karuma Bridge
P arliament has urged the Uganda National Roads Authority (UNRA) to prioritise and expedite the repair work on Karuma Bridge to minimize delays faced by road users during the ongoing maintenance.
Last week, the Uganda National Roads Authority (UNRA) temporarily closed Karuma Bridge in Kiryandongo district to heavy vehicles such as buses, lorries, and trailers. Only passenger vehicles carrying up to 28 passengers were permitted to use the bridge.
Upon assessment, UNRA identified significant deterioration in the bridge structure, particularly on the Kampala approach lane, specifically highlighting the concrete deck.
UNRA stated on Friday, "The sustained exposure of the bridge to increasingly heavy traffic is likely to accelerate its deterioration and affect its functionality if not addressed promptly."
Given the urgent need for intervention, UNRA has initiated the process of identifying a competent contractor to swiftly restore the bridge structure.
"Effective Monday, May 6, 2024, Karuma Bridge will be closed to all lorries, trailers, and buses. Only passenger vehicles carrying up to 28 passengers will be allowed to use the bridge. We anticipate completing these repairs within three months," announced UNRA.
Speaker of Parliament, Anita Among, expressed concerns regarding the financial implications resulting from the bridge closure. She urged UNRA to expedite the repair process, stating, "The work is currently underway, and I encourage them to prioritize the road repairs."
Jonathan Odur, MP for Erute South, blamed the government for disregarding expert warnings about the impact of the Karuma Dam on the Karuma Bridge. He claimed that neglecting these warnings has significantly reduced the bridge's lifespan.
"The construction of the new dam at Karuma overlooked a crucial element. Feasibility studies should have considered the bridge's vulnerability, as it deteriorated rapidly. Although this issue was brought to the government's attention during the 10th Parliament, no action was taken," explained Odur.
Allan Ssempebwa, spokesperson for UNRA, clarified that no visible cracks were found on the Karuma Bridge.
However, their inspection teams discovered compromised reinforcements beneath the bridge, necessitating immediate action.
"We have dedicated teams located throughout the country, ready to respond to all road emergencies," assured Ssempebwa.
"Our inspection teams identified issues with the Karuma Bridge, but we have the necessary resources to address the situation promptly," he added.
IMAGES
VIDEO
COMMENTS
When restoring a vintage trailer, some interior elements will need repairing. For example, if you don't have sewing skills, replacing beat up foam cushions can run upward of $500. Flooring is usually easier to tackle because it's easy enough to put a new layer over the old one.
Replace Broken Parts. Before you make your vintage trailer your own with design, make sure to fix what is broken. Check on the electrical system, brakes, propane lines, plumbing, and appliances. Repairing or replacing such things, as previously mentioned, will take the biggest chunk out of your budget; however, finding the parts necessary ...
Today, April's passion for buying and selling vintage trailers is what she's dubbed "Aluminitis"-an addiction to fixing up the aluminum trailers of yesterday. "Some of the wood and craftsmanship in certain trailers is amazing. These trailers were built by good hard working Americans and have a historic charm," she says.
Learn how to restore a vintage travel trailer camper with this detailed repair manual. Watch the video and get tips from an expert.
Vintage Camper Restoration. I've spent the last five years obsessing over finding, buying, updating, decorating, and enjoying my "fleet" of vintage travel trailers: a 1963 Shasta Compact, a 1958 Shasta 16-foot travel trailer, and a 1994 Ford Econoline van. In this article, I will share my tips and tricks on how to restore a trailer of your own.
The steps to renovate an R V. 1 - Find an old camper. 2 - Plan the RV renovation. 3 - Shop for the RV renovation. 4 - Repair any damages. 5 - Demo the inside of the RV. 6 - Prep the different surfaces. 7 - Add inner shelves or separations for organization. 8 - Prime and Paint.
Come see our $1000 early 90s RV renovation on a budget from start to finish! Learn how to paint oak cupboards, reupholster camper cushions and seating, refinish an RV bathroom, and more to get you started on your journey of updating an old travel trailer. With a little hard work, you can make such a huge difference in the look of your old RV.
Renovating an old RV is a great way to give your recreational vehicle a new lease on life. With the right knowledge and planning, you can renovate your RV with minimal costs and create something that looks like it belongs in an interior design magazine. Whether you're looking to spruce up an older model or completely overhaul a vintage RV, there are a few key steps that will help you get the ...
Cut out the damaged pieces with a reciprocating saw or a hammer and chisel. If you plan on using the travel trailer in the winter, remove the subfloor and add insulation. Cut new wood to replace damaged flooring. Fasten the wood to the frame with wood screws. Reinstall the cabinets unless you plan on purchasing new ones.
One super easy way to go about this is to replace the hardware. Older hardware can look super dated, so replacing it with something shiny and new is a huge improvement alone. Of course, you could also sand and paint the cabinets for an extra clean look. Again, if you do paint, make sure to use a good primer.
Learn more and sign up for the FREE 7-Day Trial. Final Thoughts on Camper Restoration Tips. Taking care of your RV is an ongoing process. If you do you RV maintenance diligently, your motorhome, fifth wheel or travel trailer will provide you many years of life to make camping memories that will last a lifetime.
One of the most common hazards in campers is carbon monoxide (CO). Although this may not be an issue during the restoration process, it can be deadly while camping. Each year, at least 500 people ...
Flooring. Flooring is often the most intensive task in restoring an older camper. If a vintage camper has sustained water damage, you may need to replace the subflooring and even the framing underneath. You should also keep in mind the relative cost of flooring materials versus the weight of the materials.
Whether you're looking to spruce up an older model or completely overhaul a vintage RV, there are a few key steps that will help you get the job done right. In this article, we'll discuss the essential steps for renovating an old RV and provide tips to make sure your project goes smoothly.
1. Wash and Wax. One of the first tips to fix up your Class A motorhome or other RV is to thoroughly wash the exterior. Use a cleaning solution strong enough to remove any difficult residue, along with a car-washing mitt or sponge. There are many green cleaning solutions available. Once your unit is sparkling clean, apply a fresh coat of wax ...
Repair and restoration of "Vintage" Travel trailers. This YouTube® video is a great illustration of a "vintage" stick and tin RV trailer construction method. These old beasties are comparatively easy to work with because they have wood paneling and wood framing. Air Stream trailers are so different we will cover them on a separate page.
Trailer Restoration - Repair and Restoration of my old TrailerIf you want more of these videos and support our project, then you can become my Patreon:https:...
Step 1. Find an old trailer that needs some work. Check for broken welds, bent axels, loose bearings, and any other defects. Many of the trailers I've found simply have old boards, rust, and a sometimes a broken weld or two. Don't forget to check if the lights work as well. Trailer I picked up for $350.
Step 1 - Remove old wood. The majority of the wood was connected to the trailer with old rusty bolts. I used a socket wrench and crescent wrench for this step. You can see in the photo below that the old plywood needed to be replaced. It was attached with bolts and screws. I ended up using a pry bar to remove the wood.
Here is our old single wide trailer undergoing complete renovation. Wayne is very happy when I call him "My helper." Hee hee. A good look at the construction...
Use melted plastic for larger areas. Use hot plastic around gaps where pipes extend through the roof. Apply roof sealant over the entire roof in a clockwise rotation (to the right). Apply enough coats to thoroughly cover the roof. Let each coat dry for 12 hours before applying the next coat. Apply the finish coat.
"Effective Monday, May 6, 2024, Karuma Bridge will be closed to all lorries, trailers, and buses. Only passenger vehicles carrying up to 28 passengers will be allowed to use the bridge.
Vintage footage of Jerry Lewis captures his evolution from a rebellious rocker who shook up the music world in the 1950s to a country and gospel artist. Watch trailers & learn more.