Voyage of Despair
Voyage of Despair is the first Zombies map featured in Call of Duty: Black Ops 4 , and the twenty-fifth map overall. Chronologically, it is the second map in the Chaos story. The map is set on the RMS Titanic , after an attempt to steal an ancient artifact known as the Sentinel Artifact goes wrong. This map also introduces three new enemies; the Catalyst, Stoker, and Blightfather.
- 2.1 Free Doors
- 2.2 Weapons
- 3.1 Main Quest
- 3.2 Weaponry Easter Eggs
- 4.1 Intro Cutscene
- 4.2 Outro Cutscene
- 5 Phonographs
- 6 Achievements/Trophies

Overview [ ]
Voyage of Despair is a large map, set mostly on the upper decks and a few lower decks aboard the RMS Titanic. When players spawn in on the ship's forecastle, the ship will be in the process of striking a large iceberg, causing the ship to eventually stop moving and begin to slightly tip forward. Players will then be able to navigate to the stern of the ship, where the Sentinel Artifact can be found. Interacting with it will summon the four Pack-a-Punch altars and open up more areas within the ship that were previously inaccessible. Areas such as the Cargo Hold and the Engine/Turbine/Boiler Rooms will be flooded with water, although the water in those areas can be drained by interacting with a valve found in the rooms.
Similarly to Shadows of Evil from Call of Duty: Black Ops III , this map includes several portals in which allow the player to warp to certain points on the map. In this case, from the bow of the ship all the way to the stern of the ship. For a brief moment while using this portal, while the scripted animation is playing, the player can choose to land on the center of the ship.
Features [ ]
Free doors [ ].
Upon completion of Abandon Ship or Venerated Warrior , the player will be able to open doors on any map (except Alpha Omega and Tag der Toten ) for free for the remainder of the game session. This ability persists until the player closes the game. In a co-op Private Match, only the party host will gain this ability, and the ability will extend to other players as long as they are playing in the same lobby with said host.
Weapons [ ]
Easter eggs [ ], main quest [ ].
The main easter egg for Voyage of Despair is Abandon Ship , where you must secure and cleanse the Sentinel Artifact .
Weaponry Easter Eggs [ ]
- A free Kraken can be obtained by getting the Stoker's Key and filling up chests.
Cutscenes [ ]
Intro cutscene [ ], outro cutscene [ ], phonographs [ ], achievements/trophies [ ], gallery [ ].
- The captain of the RMS Titanic , Edward Smith , can be seen being transformed into a zombie during the intro cutscene.
- Call of Duty
- 1 Call of Duty (series)
- 2 Simon "Ghost" Riley
- 3 Call of Duty: Future Warfare

Call of Duty Black Ops 4: Voyage of Despair Map
October 11, 2018 by PowerPyx Leave a Comment
This page contains a map of the Voyage of Despair Zombies map in Call of Duty Black Ops 4 (COD BO4), also known as Titanic Ship Map. Instead of running back and forth in the game to take a look at the map (and being chased away by zombies), you can refer to the full area map overview below.

You start out at the Forecastle on the right side of the Voyage of Despair map. Do note that the red dot on the map shows the mystery box location (this is randomized in each game). Search for the map in your game in the Forecastle starting area to see where the mystery box is for you.
There are the following areas for The White Star Atlantic Mail Steamer “Titanic”:
- Officer’s Cabin
- Grand Staircase
- Millionaire Suite
- Dining Hall
- Engine Room
Leave a Reply Cancel reply
Your email address will not be published. Required fields are marked *
- Terms of Service
- Privacy Policy
- Cookie Policy
- World of Warcraft
- Baldur's Gate
- League of Legends
- Counter-Strike
- Ethics Policy
- Ownership Policy
- Fact Checking Policy
- Corrections Policy
- Affiliate Policy

What you need to survive in CoD: Black Ops 4 Zombies map, Voyage of Despair
Have you ever wondered what it’d look like to see people fighting off hordes of the living dead on the Titanic? That’s exactly what you get the chance to experience on the Call of Duty: Black Ops 4 Zombies map, Voyage of Despair.
Voyage of Despair is a fun map with a lot of twists and turns throughout the ship. But it’ll definitely take some time for you to get used to all of the different areas around the map.
Related: What you need to survive in CoD: Black Ops 4 Zombies map, IX
You’ll face off against unique zombies and get the chance to try out a brand-new wonder weapon on this map. And there’s also some of the traditional Zombies features that are there to help players aspiring to make it to high rounds. Here’s what you’ll need to acquire or unlock to survive in Voyage of Despair.
Ballistic Shield
As with most Zombies maps, the shield is an important buildable object that helps protect your back from zombie attacks. Similar to IX, this Ballistic Shield is pretty easy to make, too. You’ll just want to make sure to activate the Sentinel Artifact in order to open up all of the areas of the map.
The first shield part only has two spawn locations, both of which happen to be on chairs in the State Rooms area of the map. If you run into State Rooms from Forecastle, the first spawn point is on a chair down the hallway and to the right. The other location is on a chair in a room on the left—you can get there from the first spawn point by running through a connecting closet.
The next shield part can be found in three separate spots in the area at the top of the ship called Bridge. The possible spawn locations are on a wall left of the captain’s steering wheel, on top of a crate in a room down the hall, and on the back wall closest to the Upper Grand Staircase.
The third and final shield part is located at the bottom of the ship. It can spawn in two spots in an area called Provisions—it’ll either be on some boxes near the ICR-7 wall buy or down the left hallway on the wall in a dark room. If the part isn’t in either of those two locations, then the last place it can be is one story above Provisions, on a wall in a location known as Third Class Berths.
The Ballistic Shield also comes with a pistol that you can shoot while holding the shield, which is useful in case you get trapped in a corner or stuck in any tricky situations. We definitely recommend building this shield as soon as you can on Voyage of Despair.
Pack-a-Punch
The Pack-a-Punch machine is another essential aspect of most Zombies maps since it allows you to upgrade your guns. And just like on IX, it’s relatively easy to get the Pack-a-Punch up and running on Voyage of Despair.
Essentially, there will be four ritual symbols scattered around the map that you’ll need to collect. These symbols won’t become available until you’ve activated the Sentinel Artifact, however. And the order in which you collect these parts matters because the Pack-a-Punch will spawn at the pedestal where you pick up the fourth and final symbol.
If you head down toward the bottom of the ship in an area called Mail Rooms, go for a swim in the Cargo Hold. You’ll find one Pack-a-Punch pedestal and symbol at the back of Cargo Hold. Another pedestal can be found at the very bottom of the Lower Grand Staircase.
You’ll also need to go for a swim to get another ritual symbol. Head to the Provisions area where you looked for the third piece of the Ballistic Shield. Go into the Engine Room and dive underwater near the big red door. The pedestal will be in a separate area called Turbine Room.
The final Pack-a-Punch pedestal is on the Poop Deck, right near the area where you activate the Sentinel Artifact. We suggest activating this pedestal last so the Pack-a-Punch machine initially spawns here, giving you easier access to the machine and a safer place to upgrade your guns.
The Kraken is a unique wonder weapon available in Voyage of Despair—and it’s a lot of fun to use. Unlike the Death of Orion from IX, however, you don’t have to go through an extremely-lengthy process to unlock the Kraken.
This wonder weapon is more comparable to the Blundergat from Blood of the Dead because you can get the Kraken from the Mystery Box or you can complete a short process to get a free version of the gun.
To get a free Kraken, you’ll need to obtain the Stoker’s Key, which you get from killing one of the Stoker boss zombies. You’ll then need to take this key to a wooden chest that will randomly spawn into your game in one of the following locations:
- Turbine Room
- State Rooms
After you’ve opened the chest, you’ll need to fill it with souls by killing zombies in that specific location. Once it has received enough souls, the chest will move to another spot on the list above, and you’ll need to kill more zombies at this new location. Repeat this process three times to make a new item appear in the chest.
Five potential items can be found in the chest. You’ll need to head to the top of the ship and find a crate with the corresponding item that was in your chest. Once you do this, a giant tentacle will show up and put a free Kraken on that crate for you.
If you upgrade the Kraken in the Pack-a-Punch machine, you can also go through a separate process of further improving this wonder weapon. There are four elemental upgrades for the Kraken, each with their own unique way of dishing out a ton of damage. If you want to make it far in Voyage of Despair, we definitely recommend adding an upgraded Kraken to your arsenal.

- Skip to main content
- Skip to header right navigation
- Skip to site footer
Video Game News, Lists & Guides
Black Ops 4 Zombies: Voyage of Despair – How To Complete The Main Easter Egg | ‘Abandon Ship’ Guide
Turn dials, blast Catalyst zombies, and complete trials — here’s how to “Abandon Ship” and complete the Main Easter Egg Quest on “Voyage of Despair”.

Earn the Abandon Ship achievement / trophy and complete the main Easter egg quest on “Voyage of Despair” — here’s how to do all the secret steps in this Titanic-themed Black Ops 4: Zombies map. On every Zombies map, there’s a huge, optional quest that’s very, very tricky to complete. Usually it requires the entire Zombies community to join together to figure out every complex puzzle.
And “Voyage of Despair” is pretty complex. After unlocking the Pack-a-Punch, you’ll need to locate clocks that have changed times. Using the clocks as your guide, you’ll need to input minutes / hours into special dials. There’s more too — later, you’ll have to lead special elemental zombies to power outlets. Blasting an elemental zombie near the proper outlet summons a ritual symbol. And it just keeps going.

Table of Contents – Black Ops 4: Zombies Guides
- Black Ops 4 Zombies: Blood Of The Dead – How To Turn On Power
- Black Ops 4 Zombies: Blood Of The Dead – How To Pack-A-Punch | Upgrade Guide
- Black Ops 4 Zombies: Blood Of The Dead – Main Easter Egg Guide | ‘Most Escape Alive’
- Black Ops 4 Zombies: Blood Of The Dead – How To Get Acidgat & Magmagat Wonder Weapons
- Black Ops 4 Zombies: Blood Of The Dead – How To Get Hell’s Retriever | Wonder Weapon Guide
- Black Ops 4 Zombies: Blood Of The Dead – How To Get Hell’s Redeemer | Upgrade Retriever Guide
- Black Ops 4 Zombies: Blood Of The Dead – How To Get The Gold Spork | 1-Hit Kill Melee Weapon
- Black Ops 4 Zombies: How To Build The Zombie Shield | All Maps [Blood, IX & More]
- Black Ops 4 Zombies: How To Unlock Every Secret Song Easter Egg [Blood, IX & More]
- Black Ops 4 Zombies: Where To Find Every Jumpscare Easter Egg [Blood & Classified]
- Black Ops 4 Zombies: Voyage Of Despair – Elemental Kraken Wonder Weapon Guide
- Black Ops 4 Zombies: Voyage Of Despair – Main Easter Egg Completion Guide | ‘Abandon Ship’
- Black Ops 4 Zombies: IX – How To Pack-A-Punch | Upgrade Guide
- Black Ops 4 Zombies: IX – How To Get The Death of Orion | Wonder Weapon Guide
- Black Ops 4 Zombies: IX – How To Complete The Main Easter Egg | ‘Venerated Warrior’ Guide
- Black Ops 4 Zombies: Classified – How To Pack-A-Punch | Upgrade Guide
- Black Ops 4 Zombies: Classified – How To Unlock The “Shockwave” Easter Egg Song
- Black Ops 4 Zombies: Classified – How To Get The Winter’s Howl | Wonder Weapon Guide
Voyage of Despair – Main Easter Egg Guide
[ Work-in-Progress : The community is working on solutions right now! Check back soon for more steps. ]
Before starting the Main Easter Egg quest, you’ll need to activate the Sentinel Artifact and unlock the Pack-a-Punch machine . Check the ‘Voyage of Despair’ Pack-a-Punch guide above for details.
Step #1: Align The Dials
After using the Pack-a-Punch once, the 4 clocks will change across the ship. PaP symbols will appear near the clocks that have changed. Your goal for this step is:
- Find the 4 Clocks that have changed .
- Find the Symbol near each clock.
- Find the Dials , and move the Dials to match the corresponding Clocks .
For the first step, you’ll need to actually locate all the clocks. The clocks spawn in random locations. Check the following locations to find the clocks, and learn what symbol corresponds to that clock.
- Symbol : Under a desk on the opposite wall from the clock.
- Symbol : Above a door, up the right steps from the clock.
- Symbol : Look behind luggage, near the stairs leading up.
- Symbol : Left of the Mystery Box spawn.
- Symbol: Under the stairs in the Mailroom.
- Symbol : On the cabinets, left of the clock.
Once you’ve found the four random clocks and symbols , it’s time to input the codes on Dials . The Dials are located in the Captain’s Bridge (control the minutes) and the Engine Room / Poop Deck (control the hours) — the Captain’s Bridge dials can be altered to match the minute hands , and the Engine Room / Poop Deck dials can be altered to match the hour hands .
The minute-hand dials can be adjusted in 5-minute increments . The hour-hand dials can be adjusted by the hour .
Match the symbols to the dials (the same symbol will appear on both) — the dials will make a sound when aligned correctly and lock into place.
Step #2: Charge The Outlets
After successfully locking-in all the dials, electrical outlets will begin to spark in four random locations . The outlets will spark in one of four different colors — you need to lead an Elemental Special Zombie to the outlet and kill it. The Elemental Special Zombie must match the elemental color of the outlet sparks .
- Grand Staircase (Top)
- 3rd Class Berths
- State Rooms
- More locations. I’ll list more here as they’re discovered.
After charging the outlets with the correct elemental power, a ritual symbol will appear on the ground nearby.
Step #3: Complete The Ritual Trial
All four players need to stand on a Ritual symbol that appeared in the previous step. When all four players are standing on one of the symbols, the symbol will glow . Hold [ Interact ] at the same time to teleport into the trial.
- Defeat enemies until the area is clear, and you can collect a fake Sentinel Artifact .
Complete all four rituals (Fire, Acid, Ice, Lightning) to collect the true Sentinel Artifact .
Step #4: Solve The Solar System Puzzle
Complete all four rituals, then travel to the Boiler Room . For this step, you’ll need the Acid Ammo for the Kraken . Kill an acid special zombie to swap out acid ammo on the Kraken.
- Shoot leaking pipes around the Boiler Room with the Acid Kraken until the room floods. The fires will go out.
After that, you’ll be able to place the true Sentinel Artifact into the Pack-a-Punch .
Travel to the Cargo Hold and locate the solar system puzzle . [ Interact ] with the solar system model, and the planets will flash in a specific order . This is the order you need to shoot the symbols around the map — each symbol corresponds to a planet .
Find the symbols and shoot them in the order shown by the solar system model . After shooting the symbols, collect the nearby orbs that spawn .
- Determine the planet order with the solar system puzzle, then shoot the planet-symbols in order. Shoot one symbol, collect the nearby orb, then shoot the next symbol in sequence. The last symbol is for the Sun.
Interact with the final Sun Essence in the Forecastle / Spawn — when all players [Interact] at the same time, you’ll enter the final trial.
Step #5: The Sun Trial
From the Forecastle , you must fight your way to the Poop Deck . Hordes of zombies will spawn, and ice has blocked the doors. Shoot the ice to break through. Fight all the way to the original Sentinel Artifact spawn . Break the ice and a portal will appear.
Step #6: The Final Boss
Interact with the portal that appears after completing the Sun Trial. All players must [ Interact ] with the portal at the same time.
[ Work-in-Progress : Check back soon for more locations and details! ]
More Call of Duty: Black Ops 4 guides on Gameranx:
- Black Ops 4: 16 Things You Should Know About Blackout Mode | Beta Beginner’s Guide
- Black Ops 4: Blackout Is Full Of Zombies Mode Secrets & Easter Eggs
- Black Ops 4: Blackout – The Secret Song Returns In Asylum | Easter Egg Guide
- Black Ops 4: Blackout – Check Out All 14 Areas & What They’re Based On | Map Guide
- Black Ops 4: Blackout – 10 Insane Tips & Tricks You Probably Didn’t Know About
- Black Ops 4: Blackout – The Best Weapons To Use In Any Situation | Greatest Guns Guide
About Kevin Thielenhaus
- Black Ops 6
- Modern Warfare III
Modern Warfare II
- COD: Warzone
- COD: Warzone Mobile
- Call of Duty Mobile
Black Ops 6 Beta
- Patch Notes
- Call of Duty League
- Call of Duty Mobile World Championship
- World Series of Warzone
- Linked Accounts
- Preferences
- United States
Selected region: United States
Close Menu +
- United Kingdom
- English Canada
- Canada Français
- Deutschland
- Call of Duty
- Call of Duty: Modern Warfare III
- Call of Duty: Modern Warfare II
- Call of Duty: Vanguard
- Call of Duty: Black Ops Cold War
- Call of Duty: Warzone
- Call of Duty: Warzone Mobile
- Login | Sign Up
- Profile | Sign Out

October 12, 2018
by Call of Duty Staff
All Aboard for Chaos, it’s Voyage of Despair!
Forget everything you know about the Titanic …
On the heels of Scarlett’s missing father, Alistair Rhodes, the Chaos heroes embark upon the doomed maiden voyage of the RMS Titanic. It is here where a precious artifact from a mysterious society is the hidden link between our heroes and Alistair Rhodes’ whereabouts. Scarlett, Diego, Bruno and Stanton must now fight from bow to hull, winding through luxury dining rooms, secret passageways and even the Millionaire Suite – now torn to shreds by zombies.
But What About the Iceberg? In “Voyage of Despair,” glaciers are the least of our concerns. It appears that everyone aboard the RMS Titanic – guests, servants, staff – have been mutated into red-eyed, groaning and powerful zombies.
These zombies are quick and bloodthirsty, which makes them difficult to defeat in the narrow corners and passages of the Titanic, especially in higher rounds. Take advantage of shortcuts between rooms for a quick escape: look for where fallen debris creates ramps between dining rooms, hallways and lounges.
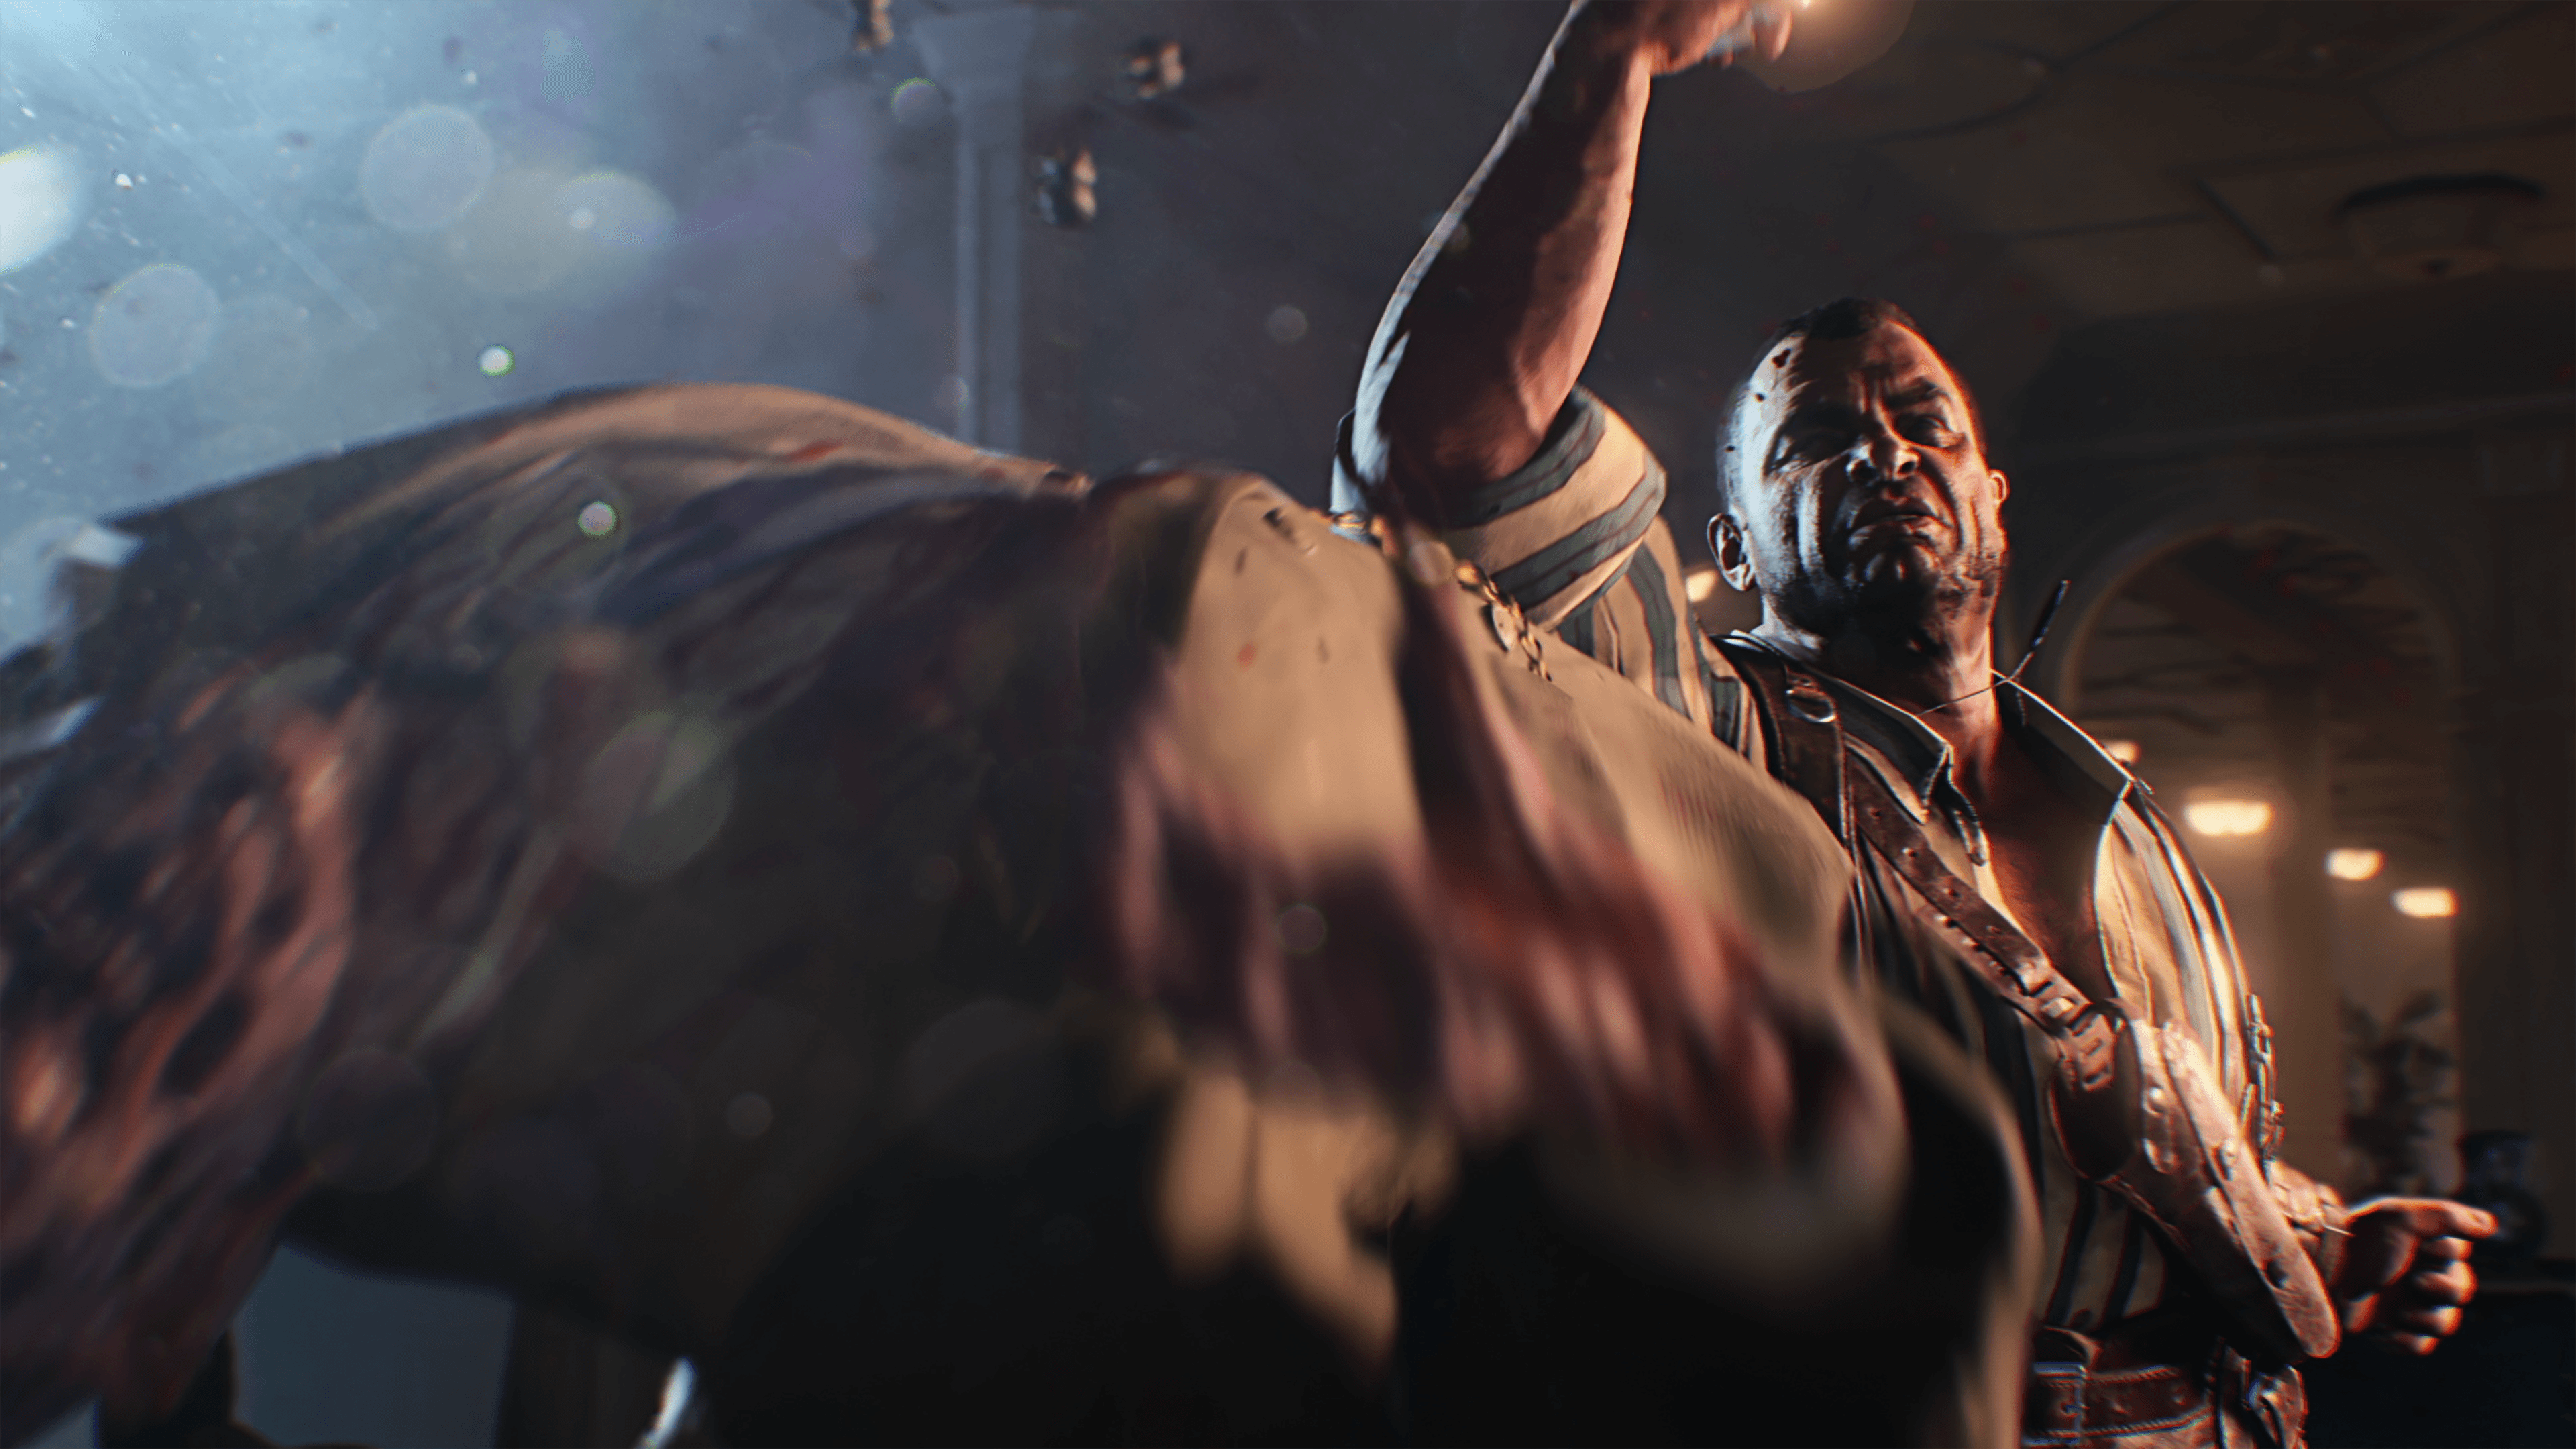
However, it’s not only the zombie staff and undead diners you must avoid. As you progress through the rounds, special zombies like Stoker, the gigantic, mace-wielding mini-boss, prove tougher and tougher to beat. His mutated flesh absorbs bullets with ease, requiring teamwork to take him down.
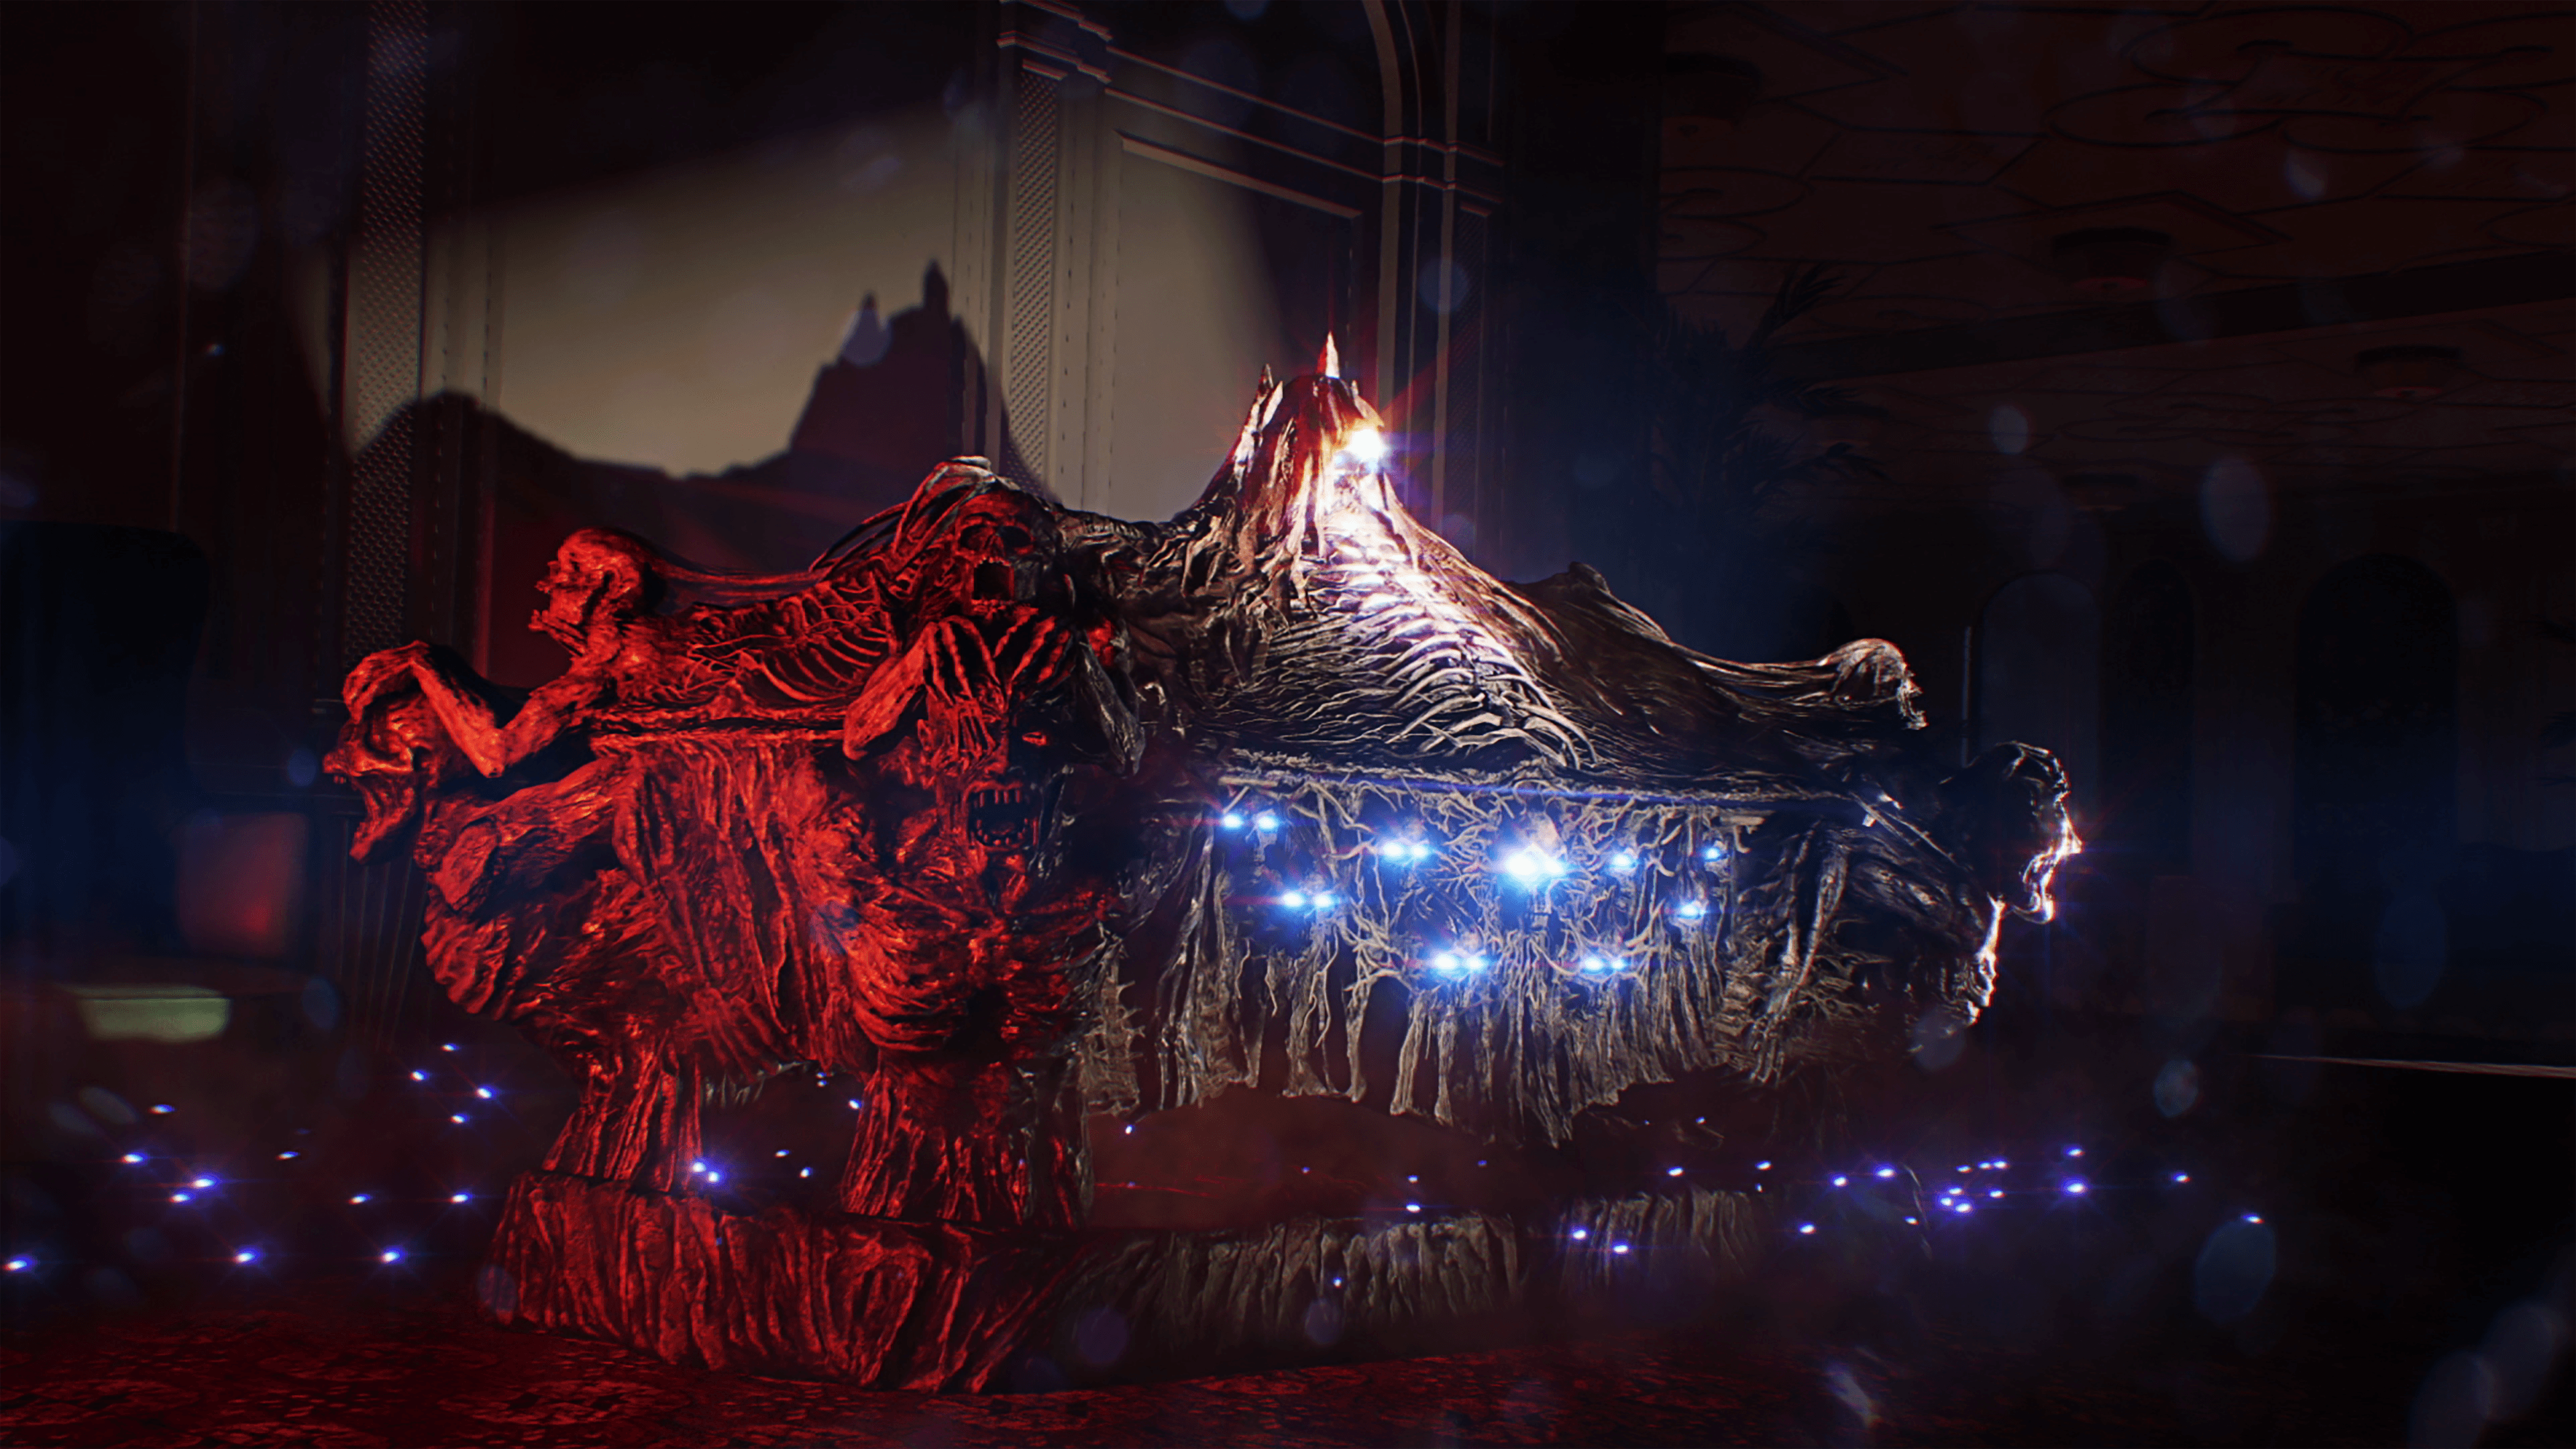
But these are not the only adversaries you’ll need to beat. Say hello to the Blightfather, a spiked monstrosity that’s half-spider and half-nightmare, which appears to thwart Scarlett’s team if they progress too far. This scourge of the Chaos storyline must be carefully and strategically taken down if Scarlett is to succeed in her quest – but luckily, a little strategy and a good loadout goes a long way.
Doors, Weapons & Talismans To unlock the secrets of their mission, the Chaos heroes must not only defeat special zombies as they spawn, but also physically unlock doors throughout the ship – done by trading points from zombie kills for access into the deep center of the Titanic. This requires a bit of budgeting when it comes to points, since Weapon Wall-Buys and Mystery Boxes also cost you.
To maximize your points, you can rebuild barriers around the map for extra points, which will also slow down entering zombies. But also, try experimenting with different Talisman consumables which can help give you an upper hand in battle. Talismans like “Dimensional Pocket” give the user an extra frag grenade. Or, try the Talisman “Major Token of Superiority,” which lets you start the match with an Assault Rifle for added firepower right away.
Plus, each Chaos character can choose a Special Weapon to wield for the whole match. The Special Weapons available to the Chaos heroes are the Chakrams of Vengeance, Viper & Dragon, Scepter of Ra and Hammer of Valhalla. Each Weapon has 3 levels of devastating power, which players can reach simply by racking up enough zombie kills. For more information on Special Weapons, check out our Call of Duty®: Black Ops 4 Zombies Overview on the Call of Duty® Blog. And don’t forget to try ‘em all to see which one suits your playstyle best!
Get Playing! Black Ops 4 packs even more ways to interact with Zombies maps than ever before, with the introduction of the Rush Mode. In the "Voyage of Despair" Rush Mode, players can jump in and jump out for a thrilling game of plain survival, with no Easter Eggs and no fluff – just sweet, sweet zombie killin' action that makes for a great way to practice your knowledge of the map and reap exclusive rewards.
“Voyage of Despair” is only the first stop on the Chaos heroes’ journey, with even more to discover in the Ancient Egyptian map, “IX.” No matter which map you play first, expect more mysteries, more puzzles and deep, well-hidden Easter Eggs – perfect for Treyarch Zombies pros who have been waiting to take a crack at this new storyline. However, “Voyage of Despair” can also be enjoyed at any level of Zombies skill -- with stunning visuals, enticing mechanics, alternate history and a thrilling race for survival.
Now, pick your weapons, Elixirs and Talismans. It’s time to get to the bottom of this Titanic terror and save Alistair Rhodes … before it’s too late.
bo4 | October 12, 2018
Blackout cheat sheet, bo4 | november 2, 2018, special orders. special gear..

We're Hiring
Check Out Job Opportunities At Our Studios
- Game Design
- Art & Animation
- Brand Management
- Quality Assurance
- Customer Support
- Studio Operations
- Programming
- Finance & Accounting
- Human Resources
The Software License and Service Agreement will be updated. Please follow this link [ https://www.activision.com/legal/ap-eula ] in order to see these changes.
Call of Duty: Black Ops 4 Zombies Voyage of Despair Easter eggs
How to find and unlock the Zombies Voyage of Despair map's hidden secrets

The Black Ops 4 Zombies Voyage of Despair Easter eggs see the Chaos crew right in the thick of it as the undead clamber aboard the Titanic on its infamous maiden voyage. Like all the Black Ops 4 Zombies maps – and all previous zombies modes in the franchise – there are plenty of Voyage of Despair Easter eggs to complete and they are not easy. This is our full Black Ops 4 Zombies Voyage of Despair guide which lists how to complete all the Easter eggs, find the Pack a Punch and Wonder Weapon, and much more.
- Black Ops 4 Zombies IX Easter eggs
- Black Ops 4 Zombies Blood of the Dead Easter eggs
- Black Ops 4 Blackout Character Missions - unlock all Zombies characters
Draining the water

The very first thing you’ll want to do, at the same time as you go through the motions of unlocking Pack a Punch, is drain the water from the Cargo Hold and the Engine/Turbine Room. Follow the steps below in the Pack a Punch section to activate the Sentinel Artefact then, when you return to the Forecastle side and go down into the Cargo Hold, make sure you do this at the same time as the Pack a Punch pedestal.
When you reach the Cargo Hold Pack a Punch, look to your right-hand side. Against the wall should be a red handle attached to some pipes. Go up to it and interact with it to slowly drain the water from the room. By the time you come back, the water should all be gone.
When you make your way to the Turbine Room for the third Pack a Punch pedestal, swim past the pedestal to the Boiler Room. There’s an identical red handle underneath a light on the right-hand side, next to some blue pipes. Do the same thing again and the room will gradually drain all the water. Once both are complete, you no longer have to swim!
- Black Ops 4 Blackout Challenges
- Black Out 4 Dark Ops Challenges guide and how to complete them
How to unlock Pack a Punch

Unlocking Pack a Punch needs to be your first main aim in Voyage of Despair. It’s not particularly difficult, you just need to get from the Forecastle end of the boat to the Poop Deck. Unlock the bottom door in the Forecastle to go through the State Rooms, then keep unlocking the doors in front of you to get to the opposite end of the ship.
When you open up onto the Poop Deck, you’ll be able to see a blue light on a raised platform in the distance. That’s the Sentinel Artefact - head toward it and interact with it. When you do, an explosion will happen in the distance and you’ll see the artefact shoot a red light to the pedestal on the ground below.
This is a Pack a Punch pedestal. There’s four of them around the map. To unlock the Pack a Punch machine, you need to interact with all four, but be aware that the final pedestal you interact with is where the machine will spawn. Unlike other maps, the Pack a Punch machine on Voyage of Despair rotates between all four points but for the early rounds, the Poop Deck is actually the ideal place to have it. We’d recommend taking the fast travel from the Poop Deck back to the Forecastle then interacting with the pedestals in the following order:

- Cargo Hold - Head to the Mail Room beneath the Forecastle and unlock the door to the Cargo Hold. Swim underwater to the very back of the Cargo Hold to find the first Pack a Punch pedestal.
- Lower Grand Staircase - The huge staircase in the middle of the ship is a great way to access each level of the boat. Head to it down the same path you travelled to reach the Poop Deck at the start, then when you reach the staircase, keep going down until you can’t go down any further. The Pack a Punch pedestal should be in front of you, shrouded in darkness.
- Turbine Room - Head to the Poop Deck again but rather than going up the stairs to the very back, there should be a doorway that leads down underneath the Poop Deck. This will take you to Provisions. Open the unlocked door just past the room full of slaughtered animals and you’ll be in the Engine Room. Jump into the water and swim down to the back of the Engine Room to find the Turbine Room, with the Pack a Punch pedestal underwater next to the red turbine.
- Poop Deck - Finally, go back up to the Poop Deck and interact with the pedestal. This will cause the Pack a Punch machine to spawn there on the Poop Deck - the most accessible location of the four. It will eventually rotate to one of the other spawn points, though approaching a pedestal it isn’t at will tell you where it is.
Obtaining the Kraken Wonder Weapon

There are two ways to get the Kraken, though one is far more reliable than the other unless you’re particularly lucky.
The first method is via the Mystery Box. Of course, there’s a plethora of weapons it could give you instead so you might be there for 10 rounds wasting 950 points each time, or you could get the gun on your first try. If you’d rather obtain it for definite, you need to follow a much more complex series of steps.
First, you need to kill a Stoker by shooting its weak spots, indicated by the glowing areas. Stokers are the big fiery chaps that use shovels to fling hot coals at you, and we’ve found they don’t tend to appear until about round 10, so this method isn’t the quickest. When you kill one by shooting the weak spots, it will drop the Stoker’s Key.
Now you need to find a treasure chest on the map that can spawn in one of five locations:

- Mail Room - The room below the Forecastle - the chest can spawn to the right of the staircase.
- Turbine Room - Take the fast travel portal from the Cargo Hold to the Boiler Room, then head into the Engine Room and back to the Turbine Room. The chest can spawn to the right of the Pack a Punch pedestal at the end of the path.
- Provisions - Head back up the stairs, the same way you unlocked the room at first to get to the Pack a Punch pedestal - the chest can spawn in the slaughter room/freezer.
- Galley - Through the Dining Hall and into the Galley, the chest may spawn in the back left corner.
- State Rooms - The final potential spawn locations is at the very back of the ground floor State Rooms, next to the door to the Millionaire Suites.
When you find the chest, you need to use the Stoker’s Key on it. You then need to feed zombies to it by killing in them nearby. It will absorb the zombie souls then, when it’s satisfied, it will vanish and teleport to one of the other four locations. Do this twice more and eventually, an item will appear in the chest.

Depending on which item you got, these are the locations you need to go to:
- Binoculars - Forecastle - At the very back of the spawn area, a wooden box on the right hand side will have some binoculars on.
- Compass - Boat Deck - At the top of the Grand Staircase, take a left onto the Boat Deck and the wooden crate on the left will have a compass.
- Globe - Mid Deck - On the right-hand side of the Mid Deck, a globe will be on the wooden crate.
- Tool - Aft Decks - The Aft Decks are right next to the Poop Deck. When facing the Poop Deck, head to the left-hand side and there’s a small tool on another wooden crate.
- Telescope - Poop Deck - Finally, head to the very back of the Poop Deck to find a telescope on another crate.

When you approach the right crate for your item, an enormous tentacle will explode out of the water and drop the Kraken Wonder Weapon on to the crate. Pretty nifty, right?
Upgrading the Kraken

Now the Kraken Wonder Weapon can be placed into the Pack a Punch machine for a standard upgrade called the Cirein-Croin Crasher, but you can also add one of four elemental effects to the gun to turn it into one of the following: Jormungandr’s Fang, Grip of Akkorokamui, Inkanyamba’s Roar, or Breath of Leviathan.
To upgrade the Kraken or Cirein-Croin Crasher, you need to obtain four parts. Three of these parts can be found in the following areas:

- Cargo Hold - When you’re at the Pack a Punch pedestal, turn around and the part can spawn on some crates to the left-hand side.
- Cargo Hold - Or it can also spawn toward the middle of the same area, on some other luggage.
- Galley - At the back of the galley, on the table blocking off the fiery area.
- Galley - Head down the corridor to the opposite end, with some shelves. The part can also spawn on the left-most shelf, next to some rolled up pieces of paper.
- 1st Class Lounge - Head to the A Deck part of the Grand Staircase. Go through the door on your right - next to the Mystery Box - then up the wooden plank used as a ramp. The part can spawn on the first table to your right.
- 1st Class Lounge - From the first spawn point, look round the corner to your left and it may spawn on another table in the room.

Now to get one of the four elemental upgrades, you need to kill the elemental zombies. Each time you kill one of the mutated ones, they have a chance to drop some plasma corresponding to their type - fire, ice, poison, or electric. Once you’ve got the plasma for the type of Kraken you want, head down to the Engine Room and approach the crafting table to the side of the room.
Interacting with the table with all four parts will create a Distillation Kit. It costs 6,000 points to upgrade, but you can then interact with the kit and upgrade your Kraken. You can do this multiple times, as long as you pick up the plasma each time, and it refills your Kraken with ammo. Bear in mind that later on in the main Black Ops 4 Zombies Voyage of Despair easter egg, you will need the Jormungandr’s Fang (Poison) version of the Kraken.
Building the Ballistic Shield

You don’t necessarily need to get the Ballistic Shield to complete the main Voyage of Despair easter egg, but it’s a great tool to have to help you survive, as it can block zombie hits and comes equipped with a very powerful automatic pistol. In order to craft the Ballistic Shield, you’re going to need to find three parts:

- State Rooms - On the ground floor, approach from the Forecastle and stick to the right-hand side. It can spawn on a rocking chair through some gaping holes in the walls.
- State Rooms - Cross over to the left-hand side and go into the laundry room. The part can spawn on a shelf next to some towels.
- State Rooms - Go into the next room in front of you with another gaping hole in the wall. It may spawn on an armchair next to a single bed.
- Bridge - Go up the right-hand side stairs from the Forecastle and the first part can be on the left when you turn around, next to the smashed window looking in to the four dials and the wheel.
- Bridge - Turn around and go to the right-hand side door at the back of the bridge. A part can spawn just inside the second door, on a wooden crate on some metal beams.
- Bridge - Turn and keep going further into the Bridge. This one is impossible to miss, as it’s just sat on a handrail in the middle.
- Provisions - From the slaughter room/freezer, head toward the door to the Engine Room but look left, and the part can spawn on the other side of a stack of boxes near the door.
- Provisions - Go to the left-hand side and to the end of the hallway. The part can spawn right at the back, in front of the inaccessible area on fire.
- 3rd Class Berths - It can also spawn in the 3rd Class Berths, right above the Provisions area. Head up the stairs and like the second part, it can spawn atop a handrail through an enormous hole in the wall.
To craft the shield, you’re going to want to head out to the Poop Deck. Just down from the Pack a Punch pedestal is a crafting bench. Build it there and, voila, you have the Ballistic Shield.
Matching the clocks and the symbols

Now it’s finally time to get to the main easter egg. This is the stage you’ll need a pen and paper for, so make sure you have those - or a similar note taking apparatus - nearby.
The gist of this is that there are six clocks throughout the map, and four of them will be displaying a time that isn’t 11:40. If you see a clock that has any other time on it, you need to find the nearby symbol. When you find the clock displaying a time other than the default 11:40, take note of the time, then look for the nearby symbol and note that down. The symbols are four triangles - there will be two standing up, one with a line through and one without, along with two upside down, one with a line through and one without. If you’re taking notes on your phone, an easy way to do this is to record “TIME - UP/LINE”, “TIME - DOWN/NO LINE”, etc.

- Clock - On the right-hand side of the doorway leading to the Cargo Hold.
- Symbol - Underneath the metal stairs leading down to the Mail Room, by the Vapr wall-buy.
- Clock - Right above the steering wheel in the room behind the four dials.
- Symbol - Underneath the desk behind the steering wheel and to the left.
Upper Grand Staircase
- Clock - At the top of the staircase is a clock engraved into the wall.
- Symbol - Turn around and look above a closed door to the left for the symbol.
1st Class Lounge
- Clock - Above the fireplace is a small mantelpiece clock.
- Symbol - To the left of the Mystery Box spawn, the symbol is on the wall underneath a three-piece candle holder.
- Clock - On the wall opposite the hanging corpse.
- Symbol - On the side of the cabinet to the left of the clock.
3rd Class Berths
- Clock - At the foot of the stairs from the Poop Deck.
- Symbol - Turn around when looking at the clock and check underneath the stairs, behind the crates and luggage.

When you’ve found all four clocks and symbols, you need to go to the Bridge. At the front of the Bridge you’ll see four dials by the steering wheel. Look closely at each one, and you’ll see each of the four symbols engraved into the dials.
You need to interact with the arrow on the dials to make them point to the respective minute for each of the times. For example, if you found the UP + LINE triangle symbol by a clock that displayed the time 12:10, you need to move the arrow two notches to the right to represent the 10th minute (it moves in increments of five). Once you have correctly done that with all four times, it should lock into place.

Next, head to the far end of the Poop Deck, where you interacted with the Sentinel Artefact for the first time. Next to the wheel should be two similar dials but without markings. The one on the left is for the UP + LINE symbol, while the one on the right is the DOWN + LINE symbol. You’re going to want to input the respective hours into these dials. The time starts at 12/midnight, so interact with it left to turn it down to 11, 10, 9 etc. while going right will make the time 1, 2, 3, and so on.
For the other two symbols (down + up with no lines) you need to go to the Engine Room. Go down to the lower walkways, which should no longer be flooded if you drained the water, and you’ll see four dials on the sides of a pole. When looking at all four, you want to ignore the bottom right and top left ones as they’re visibly busted. Interact with the bottom left dial for the UP symbol, and the top right done for the DOWN symbol. Treat them the same as the ones on the Poop Deck, and when they’re done, you’ve completed this stage.
Finding the outlets

Your next job is to find four electrical outlets around the ship that will be sparking different colours. There are six spawn locations in total, so check all of these six, and four should be emitting red, green, blue, or yellow sparks.
- 3rd Class Berths - Down the first set of stairs from the Poop Deck, take a left and the outlet is on the right-hand wall.
- Aft Decks - Up the stairs from the Poop Deck and through a central zombie window.
- 1st Class Lounge - Next to the Zeus Perk Statue.
- Upper Grand Staircase - Near where the symbol spawns, to the right of the clock and along the wall.
- Dining Hall - While facing the Ra Perk Statue, turn around and walk to the right. It’s behind one of the white wooden panels segregating the room.
- State Rooms - From the Forecastle, go into the ground floor left State Rooms entrance and go left into the first room. The outlet is on the wall next to two painting.

When you’ve found the four outlets sparking different colours, you need to find the respective elemental zombie for that colour and lead it there. Kill it right next to the outlet and a ritual symbol will appear on the floor. Do this for all four zombies and voila! Four ritual symbols will appear.
Now we can’t stress enough that this part needs to be done in the following order: Poison > Water > Electric > Fire. Remember which ritual symbol corresponds to each element because you need to have everyone in the game go to the Poison symbol and interact with it first. This will take you to a mini-boss fight where you simply need to survive and kill all of the incoming enemies. If you do them in the wrong order you will have to start over. When you’ve done it, you’ll be able to pick up a fake Sentinel Artefact. Do all four symbols in the above order and you’ll eventually receive the real Sentinel Artefact.
When I’ve been doing this stage of the Black Ops 4 Zombies Voyage of Despair Easter egg, it’s been slightly finicky. Sometimes the ritual symbol won’t appear on the floor for a second outlet if there’s already one ritual symbol somewhere else. For the least hassle, and to avoid running into this problem, I’d strongly recommend killing the Poison elemental, interacting with the ritual symbol, completing that wave of enemies, then moving on to the Water one, and so on.
Plugging the leaks

By now, you need to ensure you have the Decayed Kraken, or the upgraded version, Jormungandr’s Fang. Head down to the Turbine Room, and along the walls you’ll see leaking pipes with steam coming out. Shoot all of the burst pipes with the Poison elemental Kraken and it will fix them. You’ll know you’ve done it correctly because a kill hitmarker will show up for each one. There are nine points you need to shoot in total.
When you’ve completed all nine, the water level in the room will start to rise again (so much for draining it all earlier!). If the Pack a Punch machine was already in the room during the process, approach it and it will allow you to Pack a Punch the Sentinel Artefact. If the Pack a Punch machine isn’t in the Turbine Room, you’ll need to finish the current round, and at the end of the round the Pack a Punch machine should teleport back to the Turbine Room. Thankfully, it doesn’t cost anything to Pack a Punch the Sentinel Artefact so go ahead and do that, then make your way back outside to the Forecastle.
Finding the planet symbols

Once again, you’re looking for more symbols around the map. You may have spotted some of these markings already just through playing, but what you won’t have realised is that they each correspond to a planet. You need to find all nine symbols and interact with them in the following order. Here is where you can find all nine symbols:
- Sun - Forecastle - Right where you spawn, the Sun symbol will be at the back, on the side of the curved funnel next to the fast travel portal.
- Mercury - Mail Room - Go down the stairs to the Mail Room and the Mercury symbol is at the bottom of the second flight of stairs on your left.
- Venus - Millionaire Suites - From the Lower Grand Staircase, go into the Millionaire Suites and you’ll see the Venus symbol under the bedside table.
- Moon - Lower Grand Staircase - On a closed white door to the right of the staircase.
- Mars - Boiler Room - Approach the fast travel portal, turn around then go prone. The Mars symbol is below the floor, on the wall where the wall sticks out slightly next to a red pipe.
- Saturn - Bridge - When facing the Forecastle direction, walk past the room with the metal beams for a floor (the same room one of the Ballistic Shield parts can spawn in) and go into the next room on the right. The Saturn symbol is on the side of a cabinet next to the zombie window.
- Jupiter - Engine Room - Approach the Odin Perk Statue, turn around, and the symbol is on the floor near the stairs leading down.
- Uranus - State Rooms - Hilariously, you can find the Uranus symbol in one of the bathrooms. Opposite the MOG-12 wall-buy, go into the bathroom and the symbol is right behind a potted plant in the corner.
- Neptune - Aft Decks - Near the top of the suspended lifeboat, the Neptune symbol is inside the ring buoy marked RMS Titanic - Liverpool.
Interacting with the solar system model

Now we need to make abundantly clear that once you start this next step, it will spawn an endless wave of zombies . Your current round will not come to an end until you either complete or fail the step. So make sure you’ve got everything you need ready, then go down to the Cargo Hold.
Look for the model of the solar system with all seven planets, the Moon, and the Sun. Interact with it, and the planets will start flashing in a random order. Make note of this order because failing this will mean you need to restart it all over again .

Head outside and look to the sky. You’ll see all of the planets, including the Sun and the enormous Moon, except for Neptune. That’s because Neptune is actually in the water, floating around and periodically appearing. You need to shoot each planet in the sky, then go to where you found the original symbol as quickly as possible. A timer starts as soon as you shoot it, so if you don’t make it in time, you have to wait another full round before you can give it another shot. Interact with each orb as soon as you can after shooting the respective planet, then your final one will always be the Sun. Before you shoot the Sun, make sure you have enough ammo and Pack a Punch weapons because you’re nearing the final boss fight.
Race against time

Make your way to the Forecastle and shoot the Sun from there. The orb will come and rest by the original symbol. When you have all players interact with it, the screen will flash white and a timer will begin.
Your goal is to make it to the Poop Deck as quickly as possible. The fastest route we’ve found is to take the staircase to the right - make sure you’re breaking as many of the ice blocks as quickly as possible. Once you reach the opposite end of the ship, near where you grabbed the Sentinel Artefact at the start of the game, a red symbol will appear on the floor. This is the portal to the final boss fight, so spend enough time making sure you have everything you could possibly need before you activate it. We recommend having at least one person with a Pack a Punched Hellion Salvo for the immense damage and splash radius it deals.
Eye of Odin boss fight

As soon as everyone interacts with the red symbol, you’ll be teleported into the water. Swim as fast as you can to the nearby tree and interact with the Sentinel Artefact found nearby to teleport back to the boat. When you get to the boat, the Eye of Odin will appear.
Don’t shoot at the Eye yet because you can’t deal any damage to it. Instead, kill all the enemies that appear; Stokers, Elemental Zombies, Blightfathers, the lot of them. When you’ve survived the first wave, you’ll be teleported to the Engine Room.
Do the same thing again in the Engine Room - shoot at all the enemies that appear, but don’t bother shooting at the Eye because it’s still invulnerable. Once again, as soon as you’ve killed all the enemies, you’ll get teleported to the State Rooms.
Now, in this third phase, only normal zombies and Stokers should spawn. The Eye of Odin will also start firing a bright blue beam at you which will freeze you if you get caught in it. The only way to escape the ice is to melee out of it. When the Eye is firing its laser, shoot it in the pupil to deal damage. This is where the Hellion Salvo comes in handy, because of how much hurt it deals.
Once you’ve dealt enough damage to the eye, you’ll be teleported out again, this time to the Promenade Starboard Deck. The Eye of Odin will be flying around the ship in the water - keep shooting it with the Hellion Salvo again to deal as much damage as possible.
The final place you’ll be teleported to is the Poop Deck, and for this phase you need someone with the Kraken. Keep shooting the eye with the Hellion Salvo at first, then, eventually, it will go to the very back of the Poop Deck and start a charging animation. In order to get it to stop charging, shoot it with the Kraken. The Ice upgraded version is more effective than the other elemental types for this, but it’s still doable without. If you fail to stop it charging, the Eye of Odin’s resulting attack will down every single player that isn’t using the Dying Wish perk. You need to stop if from unleashing its charge attack three times. Once you’ve done it the third time, the Eye of Odin will be defeated and the final cutscene will commence. Congratulations - you’ve completed the Black Ops 4 Zombies Voyage of Despair easter egg!
If you're done with Zombies after all of that, why not check out our Black Ops 4 Blackout tips ?
Sign up to the GamesRadar+ Newsletter
Weekly digests, tales from the communities you love, and more
Give me a game and I will write every "how to" I possibly can or die trying. When I'm not knee-deep in a game to write guides on, you'll find me hurtling round the track in F1, flinging balls on my phone in Pokemon Go, pretending to know what I'm doing in Football Manager, or clicking on heads in Valorant.
The best Black Ops 6 SVD build and loadout
The best Ames 85 build for Black Ops 6
2023's most slept-on RPG finally hits consoles, and at $5 million in sales it's a big win for a cute series that's quietly been ticking along for nearly 10 years
Most Popular
- 2 Astro Bot review: "Soars above and beyond to serve up a near-perfect platformer"
- 3 Warhammer 40,000: Space Marine 2 review: "Raises the bar for all Warhammer adaptations"
- 4 World of Warcraft: The War Within review – "One of the strongest WoW expansions in recent memory"
- 5 Concord review: "Plenty of characters and little personality"
- 2 Joker: Folie à Deux review – "An unconventional musical sequel that fails to hit the high notes"
- 3 Wolfs review: "George Clooney and Brad Pitt riff on their Ocean’s Eleven charisma in this fun frolic"
- 4 Starve Acre review: "Morfydd Clark and Matt Smith headline a chilling and unnerving horror movie"
- 5 Sing Sing review: "Colman Domingo’s soulful performance keeps this prison story gripping and gritty"
- 2 The Lord of the Rings: The Rings of Power season 2 review: "A bleak, oppressive ode to Middle-earth anchored by one of the year's best performances"
- 3 Slow Horses season 4 review: "Apple TV's masterful spy drama remains one of the best shows on right now"
- 4 The Umbrella Academy season 4 review: "Like any good family reunion, most frustrations can be waved away, at least in the moment"
- 5 House of the Dragon season 2 episode 8 review: "Excellent sequences can’t save a finale that’s all set-up and no conclusion"

Voyage of Despair
Four intrepid adventurers board the RMS Titanic to pull off a daring heist involving a mysterious artifact. Little do Scarlett Rhodes, Diego Necalli, Bruno Delacroix and Stanton Shaw suspect that a giant iceberg will be the least of their problems… – Voyage of Despair
Chakrams of Vengeance – AMMO: Infinite – Fire mode: Melee Hammer of Valhalla – AMMO: Infinite – Fire mode: Melee Scepter of Ra – AMMO: Infinite – Fire mode: Melee / Automatic Viper and Dragon – AMMO: Infinite – Fire mode: Melee / Automatic Kraken – AMMO: 54 Shots – Pack-A-Punched: 108 Shots – Fire mode: Automatic Homunculus – AMMO: 2 Tactical – Fire mode: Thrown Wraith Fire – AMMO: 2 Tactical – Fire mode: Thrown Acid Bomb – AMMO: 3 Tactical – Fire mode: Thrown
The perks include Quick Revive, Stamin-Up, Mule Kick and many new parks like Timeslip, Death Perception, Ethereal Razor, Electric Burst, Dying Wish, Stone Cold Stronghold, Victorious Tortoise, Deadshot Dealer, Bandolier Bandit, Winter’s Wail, PHD Slider, Zombshell, Blood Wolf Bite, Blaze Phase and Secret Sauce: Receive a random Perk not assigned to another slot. View all details on our Perk Page.
Power Ups include Insta-Kill: Allows all players to insta-kill all normal zombies, Max Ammo: Refills the ammo reserve of all held weapons for every player, Double Points: Players receive double the number of points for the duration of 30-seconds, Nuke: kills all zombies that have spawned onto the map, Bonus Points: Gives all players 500 extra points, Carpenter: Repairs all barricades around the map and refills the players shield, Fire Sale: Causes all box locations to be active and changes the cost to 10 points, Full Power: Gives the player that picked it up a refill on the specialist weapon meter.
Wall Weapons on Voyage of Despair includes the fan-favorite Bowie Knife and many others that include the Strife, Essex Model 07, RK 7 Garrison, RK 7 Garrison, Saug 9mm, Escargot, Mog 12 Spitfire, Swordfish, MX9, GKS, M1897 Trebuchet, Maddox RFB, KN-57, ICR-7, Vapr-XKG, Auger DMR, Titan and the Koshka.
Mystery Box Weapons include the new Kraken and Homunculus Wonder Weapons and many other weapons like the Reaver C8^, Ballistic Knife, Hellion, Argus, Rampage, M1897 Trebuchet, Mog-12, SG12, KAP 45, RK 7 Garrison, Mozu, Havelina AA50, Locus, Vendetta, Outlaw, Koshka, Paladin HB50, SDM, Tigershark, Zweihänder, VKM 750, Hades, Titan, M16, S6 Stingray, Auger DMR, ABR 223, Essex Model 07, Swordfish, MicroMG 9mm, VMP, Switchblade X9, Daemon 3XB, MP-40, Cordite, GK5, Saug 9mm, Spitfire, MX9, Escargot, Echohawk Dual Bore, AN-94, Peacekeeper, Swat RFT, Grav, Vapr-XKG, Rampart 17, Hitchcock M9, KN-57, Maddox RFB, and the ICR-7.
To turn the Power On , you’ll need to go to one of the far sides of the ship and find the blue, glowing light in the sky on the deck. Interact with this Sentinel Artifact, and you will be able to use any powered machines and teleporters.
The power should be on to activate the Pack-A-Punch machine on Voyage of Despair. You will need to activate four pedestals around the map. Pedestals are stone altars with four circular slots and a red glowing triangle lit up above them. Each of the altars is located in the; Poop Deck, Cargo Hold, Turbine Room, and the Lower Grand staircase. The Pack-A-Punch machine will form where you activated the last altar. After a few uses, the Pack-A-Punch machine will move around through these four locations.
Stokers are large zombie crewmen who carry a shovel weapon and attack players by throwing fireballs and meleeing them. Stokers can be distinguished by their molten lava crust body. You should shoot their body to remove this crust armor and shoot these exposed points to Kill them. They spawn like regular zombies but make their debut with a roar. Stokers drop the Stoken Key upon death.
Blightfathers are enemies on Voyage of Despair that transform from regular zombies and spawn around round 15. Usually attacking players with a melee attack, a vomit attack, and a long tongue that brings players towards them. To kill Blightfathers, you should aim for the yellow sacs on their body. You can stop the zombie from turning into a Blightfather with a Nuclear power-up during the transformation or kill all zombies on time. Their vomit also blocks machines and utilities around the map from time to time and will need to be unlocked again by spending 500 points.
The Kraken Wonder Weapon is an explosive weapon. It can be obtained from the mystery box of Voyage of Despair or by completing an Easter egg quest. To complete the quest, you will need the Stoker key dropped from a Stoker enemy. Use the key to unlock a large chest either in the; Mailroom, State Rooms, Galley, Provisions, or the Turbine room. By opening a chest, you will need to kill zombies near it and let it collect the zombie souls. Once it’s received enough souls, it will disappear and move to another location. Repeat this three times. After which, one of five items will spawn in the box. Depending on the item, you will need to find the same corresponding item on the ship’s deck placed on a wooden box. When you find the item, a large Kraken tentacle will spawn from the waters and place the Kraken weapon onto the box. The corresponding items locations: Telescope on the Poop Deck, Binoculars in the Forecastle area, Compass on the Boat deck, Globe on the Mid deck, and a long metal tool on the Aft decks
To build the Shield at a workbench, you will need to collect three parts around the map. 1. The Handles part can spawn in either three locations in the State Rooms area; On a shelf in the laundry room, on a wooden chair near the buyable wall weapon, or on an armchair. 2. The Visor part is located in the Bridge area; sitting on the floor against a wall on the deck, in the corridors on the handrail near the door leading to the Upper Grand Staircase, or placed on some wooden crates in the same corridors. 3. The shield part can be located around the Provisions area or the 3rd Class Berths area either; on a handrail in the 3rd Class Berths area, placed on a crate in a corner in the Provisions area, or next to some wooden crates near the wall weapon ICR-7.
The Homunculus is a wonder weapon that can be obtained from the mystery box for 950 points. With only 2 charges, only one player in the lobby can have it equipped at a time. The Homunculus can be thrown, which will start yelling and attach itself to zombies while mashing their heads, killing them for about 20 seconds before vanishing.
To unlock Low Gravity and make all zombies float around in low gravity. You need to throw grenades to collect three parts and place them on the bloodied body stuck on the wall in the Galley. To obtain the mask, you’ll need to shoot explosives at a mini fan on a shelf in the Promenade Starboard Deck area around the ingrown vines. The crown can be located at the top of the chimney’s staircase platform, which can be shot from the bridge, falling down onto the ledge and shooting again for it to drop onto the bench to be picked up. The Trident part can be located by going to the Odin Statue and looking directly above in the lit-up area, and shooting at the ceiling. Keep throwing explosives until you hear a clang. It will then drop to be picked up.
To play the Drowning Musical Easter Egg of Voyage of Despair, players will need to locate and shoot four different colored coins. The first green coin is under one of the staircases in the Forecastle area behind a burning box; this can be accessed from the spawn area, The next light purple coin is located on the deck under the Sentinel Artifact (Power) next to some rope and a barrel in one of the deck’s corners on a box, the red coin is on the escape boat in the Sun Deck area, between some luggage on the wooden table and lastly, the light blue coin can be found by going all the way to the bottom of the Lower Grand Staircase in front of the pack-a-punch area and looking up at the ceiling.
To start the Eye of Odin Boss fight , every player needs to interact with a red symbol and then be teleported into the water. Once in the water, every player should swim to and interact with the Sentinel Artifact. All players will then be teleported to the Poop Deck. In this first phase, zombie enemies will spawn, and you will need to kill all enemies. The next step teleports players to the Engine Room, and again you will need to destroy all zombies. Again, you will be teleported to the State Rooms with zombie enemies. However, when the Odin Eye starts shooting a beam down the corridor, shoot its exposed eye. After you have shot the Eye enough times. Players will be teleported to the Promenade Starboard Deck, and again you need to shoot its eye when it starts beaming its laser. The last phase teleports the lobby to the Poop Deck, where you will need to reshoot the eye when it starts shooting its laser. After enough damage, the eye will begin to transform into its final form. You will have to shoot and stop this transformation another two times. After the last failed transformation, the Eye of Odin will be defeated, and a cutscene will play. you have now completed the Boss Fight on Voyage of Despair.
Abandon Ship is the Main Easter Egg on Voyage of Despair. Step 1: The first steps are to turn the power on by interacting with the Sentinel Artifact on the Poop Deck and activate all four pedestals for the Pack-A-Punch machine to then Pack-A-Punch the Sentinel Artifact. Now build the Shield and Collect the three Kraken Distillation kit parts and build them at the workbench located in the Engine Room. Step 2: Find four chalk symbols on walls and their corresponding clock. And then go the bridge to the four levers. Each lever will have a unique triangular symbol. Depending on their corresponding clock, you will move the levers to the minute’s position. The possible locations of these symbols and clocks are as follow: 1. In the Mail Room area, the symbol will be under a staircase and clock opposite the stairs on a wall. 2. In the bridge area, the symbol will be on a desk and clock on a wall near the Captains wheel. 3. In the 3rd Class Berths area, the symbol at the bottom of a wooden staircase and the clock in front of the staircase 4. The Galley area, the symbol on a cabinet, and Clock to the north-west of the Cabinet 5. The 1st Class Lounge, the symbol under some candles on a wall and the clock above the fireplace 6. The Upper Grand Staircase, the symbol on top of a door facing a clock, the clock on the top level of the Grand Staircase. Step 3: Go to the Poopdeck and repeat step 3 but in hours positions. After the 8 levers are correctly positioned, you will hear an audio cue. Now find four Electrical outlets which can be distinguished by sparking or leaking. Each outlet will be leaking either water, poison, fire or electricity. Each outlet can be in one of the following spots: 1. First left the room in the State Rooms area when coming from the Forecastle area. 2. Upper Grand Staircase in front of the clock. 3. 3rd Class Berths near a staircase. 4. The Aft Decks in front of the Mystery Box location. 5. In the Dining Hall next to the statue. Step 4: Escort and kill a Catalyst Zombie next to the outlet, creating a teleporting symbol on the floor. You can only do this once per round per outlet after this you will need to activate all symbol teleporters in the order of; Poison, Water, Electric, and Fire. Step 5: Teleport by having all players stand on the symbol and interact with the symbol and complete each of the four phases using the symbols created to teleport to different areas and kill all zombie waves. After killing the zombies, you will need to collect the White Sentinel Artifact that will float down in each area. Step 6: Kill a Poison Zombie using the Kraken weapon that will drop a poison heart and collect it. Use the upgraded Kraken elementally to the decayed Kraken at a Distillation kit workbench. Use the weapon to shoot the 9 blue pipes located in the Turbine Room in which you should hear an audio cue, and the room should fill with water. Now Pack-A-Punch the Sentinel Artifact if not already done so. Step 7: Find and activate 9 symbols around the map. After activating each symbol, a voice will say the element corresponding to that symbol. The symbol locations are: 1. In the Boiler room: Go prone to see the symbol under a pipe by going up a staircase near the Odin Statue onto a ledge. 2. In the Engine Room: In front of the Odin Statue on the floor. 3. Aft decks area: Next to the lifeboats on the ground. 4. Lower Grand Staircase: In a corner near an open window. 5. Millionaire suites: Under a table. 6. State Rooms: In a room behind a plant. 7. Bridge: Near some wooden furniture. 8. Mail Rooms: Next to the Clock near the staircase. 9. Forecastle: At the back of the ship Step 8: If you haven’t drained the water in the Cargo Hold. Drain it by using a wheel near the Pack-A-Punch area. Next to the Portal, there will be a crate. It will prop open to a solar system model once the water has drained. Interact with the model and take note of the order in which each planet is lit up. Be sure to kill the zombies whilst this is happening. Step 9: Use a weapon to shoot the planets in the sky by going to the ship’s roof. Neptune will be floating in the water. Shoot each planet in the order that you saw when looking at the solar system model. Activate each planet orb as it falls onto the ship. Protect the orbs from zombies. You must collect each orb within a time limit. If you fail the order, you can repeat the previous step next round. Activate the sun with every player simultaneously, and you will be teleported to another area. Step 10: Complete the following challenge as quickly as possible. Melt the ice around the map using the Kraken weapon and the light beam from the Scepter of Ra. Eventually making your way to the Poop Deck. Once completed, you will see a white flash of light and a teleporter symbol on the floor near the last ice block melted. Step 11: Use the teleporter symbol, once teleported to the inside of an iceberg, swim towards the center. Everyone will need to interact at this center and insert the Sentinel Artifact into the iceberg, you will now be teleported back to the Titanic. Step 12: Complete the Eye of Odin Boss Fight (Steps are written above). The main Easter Egg on Voyage of Despair is now completed.
Call of Duty has been going strong since 2003, thanks to the fans for keeping it strong.
Donate, Help Us Grow!
- Join The Team!
- Privacy Policy
- Sign The Wall
- Real Map Locations
- Drop Your Vote!
- Infinity Ward
CallofDutyMaps · Copyright © 2024 · Created by Call of Duty Fans
- Modern Warfare III
- Modern Warfare II
- Black Ops Cold War
- Modern Warfare
- Call of Duty Mobile
- Black Ops 4
- World War 2
- Modern Warfare Remastered
- Infinite Warfare
- Black Ops 3
- Advanced Warfare
- Black Ops 2
- Modern Warfare 3
- Modern Warfare 2
- World at War
- COD 4: Modern Warfare
- Call of Duty 3
- Call of Duty 2
- Call of Duty 1
- Winter Crash
- Firing Range
- Battle Royale
- Battle Maps
- Multiplayer
- Killstreaks
Trusted Reviews is supported by its audience. If you purchase through links on our site, we may earn a commission. Learn more.
Call of Duty Black Ops 4 Zombies Guide – Voyage of Despair Tips and Tricks
Call of Duty: Black Ops 4 has proven to be an enjoyable outing for the blockbuster shooter series thanks to three, distinct multiplayer modes. Despite lacking a solo campaign, there’s plenty here for veterans and newcomers alike to enjoy.
That’s especially true for Zombies, which has grown from a humble horde mode into a massive effort spanning three different stages. Having covered IX and Blood of the Dead in our previous guides, it’s time to tips and tricks for the utterly titanic Voyage of Despair.
Trusted Reviews has compiled a handy variety of guides for Black Ops 4’s Voyage of Despair alongside an essential list of tips and tricks to keep you alive against the undead.
Black Ops 4: Voyage of Despair Guide – Where to find the artifact
This important object can be found in the early stages in Voyage of Despair, and to find it you’ll need to head to the Poop Deck. Located on the opposite side of the ship where you spawn, it can be found on a raised platform after climbing some stairs.
If you’re really having trouble, characters will remark on the artifact’s whereabouts in dialogue once it comes into your field of vision. Once collected, it will spawn all of the pedestals you’ll need to activate to acquire the Pack a Punch Machine. Speaking of…
Related: Upcoming Nintendo Switch Games

Black Ops 4: Voyage of Despair Guide – How to unlock the Pack a Punch Machine
To activate the Pack a Punch Machine you’ll need to activate four individual symbols which appear as soon as the artifact is found. We’ve listed the locations of all four of them below to make things easier.
First Symbol – The first one can be found on Poop Deck shortly after collecting the artifact. It’s difficult to miss, especially since you’ll need to walk right past it to leave the area.
Second Symbol – This can be found at the Grand Staircase. More specifically, head right to the bottom and it will be right in your sights.
Third Symbol – Make your way to the Cargo Hold and head underwater just past the Mail Rooms, which is behind a door right where you spawn. Venture through the water-ridden room and you’ll find it waiting for you.
Fourth Symbol – The fourth and final pedestal is located in the Turbine Room. For this you’ll need to briefly venture underwater before coming across a large, metallic turbine.
Related: Best PS4 Games

Black Ops 4: Voyage of Despair Guide – How to activate the Pack a Punch Machine
Now all of the pedestals have been activated you will have transformed the Poop Deck where the original artifact was found. Now, you’ll be staring at a ready and waiting Pack a Punch Machine, although you’ll need to surrender 5000 points to upgrade any of your weapons.
Black Ops 4: Voyage of Despair Guide – How to unlock the Kraken Weapon
This particular weapon can be unlocked through the mystery box, but some players won’t want to leave such a supremely powerful tool to chance if they’re hoping to reach the higher rounds in Voyage of Despair. So, we’ve compiled a quick guide below to help you out.
Kraken – Step 1: Once Stoker enemies begin spawning, concentrate fire on their glowing spots until it is defeated. If done right, they’ll drop a key.
Kraken – Step 2: Next up you’ll need to go on a journey across the Titanic in search of four unique chests. Their locations are as follows: Provisions Room, Mail Room, Galley, Turbine Room.
Kraken – Step 3: Upon finding a chest, use the key to open it and begin butchering the undead to fill them with required souls. Just make sure you’re standing close enough!
Kraken – Step 4: The location of the chest will change with each subsequent collection of souls, so keep that in mind and split up your team accordingly.
Kraken – Step 5: Once you’ve done this three times, one of two items will spawn out of the chest. Which is it will determine the spawn location of the Kraken. A compass means the Top Deck, while a Telescope takes you down to the Poop Deck.
Related: Upcoming Xbox One Games

Black Ops 4: Voyage of Despair Guide – General Tips and Tricks
Be wary of tight spaces
The Titanic is a massive ship, but the Voyage of Despair has accurately depicted it as one with an assortment of tight, complicated spaces that zombies will have no problem getting the jump on you inside. So be careful, watch your corners, and perhaps keep a shotgun handy for close encounters.
Opening areas in this map are a maze of winding staircases and labyrinthine corridors each hiding their own secrets. Sadly, these are complimented by threats that can down you in seconds if you’re not careful. Depend on your teammates and don’t venture too far on your own, otherwise you’re toast.
Don’t be ashamed of bots
If you’re playing alone or don’t have any friends jumping on the Zombies bandwagon, the new implementation of bots in Call of Duty: Black Ops 4 is a genuine saving grace. They’re shockingly intelligent, and won’t hesitate to open doors and seek out things you might not even be aware of.
You can determine how many bots you play with if you’re afraid of feeling overpowered or would rather fend for yourself, but they offer a helpful sense of co-operation that, despite the name, doesn’t feel entirely robotic. That, and reaching later rounds on your lonesome isn’t exactly easy.
Use your teleporters.
Much like in Blood of the Dead, once you’ve collected certain items you’ll gain access to a series of teleportation methods locations across the map. These become increasingly invaluable as the zombie hordes grow in size and capabilities. At times you’ll have dozens chasing after you, and teleporters are the get out of jail free cards you’ll need.
Transporting yourself from one end of the map to another in a few short seconds provides you with moments of breathing room you might need to heal yourself or purchase weapons and ammunition. However, the undead are on their way, so don’t think you’re safe for too long.
How far have you gotten in Voyage of Despair? Let us know on Facebook and Twitter @trustedreviews.

Jade is the Gaming Editor at Trusted Reviews. She handles all things gaming whether it be news, reviews, events or silly features. Seen at outlets such as MTV UK, Kotaku and Trusted Reviews (obviously…
Why trust our journalism?
Founded in 2003, Trusted Reviews exists to give our readers thorough, unbiased and independent advice on what to buy.
Today, we have millions of users a month from around the world, and assess more than 1,000 products a year.
Editorial independence
Editorial independence means being able to give an unbiased verdict about a product or company, with the avoidance of conflicts of interest. To ensure this is possible, every member of the editorial staff follows a clear code of conduct.
Professional conduct
We also expect our journalists to follow clear ethical standards in their work. Our staff members must strive for honesty and accuracy in everything they do. We follow the IPSO Editors’ code of practice to underpin these standards.
Sign up to our newsletter
Get the best of Trusted Reviews delivered right to your inbox.
- Black Ops 4
- Black Ops 3
- Resident Evil 2
- Mortal Kombat

Voyage of Despair - All Easter Egg Steps
About the easter egg, all easter egg steps, 1. collect the sentinel artifact, 2. activate the sentinel artifact, 3. activate pack-a-punch pedestals.
- Cargo Hold (Water)
- Lower Grand Staircase (Air)
- Boiler Room (Fire)
- Poop Deck (Earth)
4. Get the Kraken and understand upgrades
5. drain the flooded water, 6. match the bridge dials to the clocks.
- Clock: on the wall, near the door leading down to Cargo Hold
- Symbol: under the stairs leading up to the Mail Room, near the Vapr wall buy
- Clock: small room behind the four dials, above the steering wheel
- Symbol: directly opposite the steering wheel, under a desk
- Clock: top of the staircase, on the wall
- Symbol: face the clock, turn to the right and go up the small steps, turn right again and you'll see a symbol above the door
- Clock: fire place in middle of room
- Symbol: to the left of the mystery box, on the wall
- Clock: in the room with the hanging body on the wall. Face the body on the wall, turn 180 degrees and there is a clock on the wall to the left
- Symbol: face the body on the wall, turn 180 degrees, the symbol is on the cabinet to the left
- Clock: when heading towards the turbine, at the end of the wooden stairs the clock is on the wall to the left
- Symbol: behind luggage next to the wooden stairs leading up
7. Find electrical outlets and complete challenges
- States Room, 1st on left, near gramophone and golden painting frames on floor
- Upper Grand Staircase, at the top of Grand Stairway, to the right of green couch
- 3rd Class main stairway, near the brown suitcase on floor
- Aft Decks, middle room, with red valve on ceiling
- Dinner Hall on left facing Ra
- 1st Class Lounge - On a pillar left of Zeus
8. Shoot the leaking engine room pipes
8. shoot the planets.
- Sun: Forecastle - on metal beam, near barrels
- Mercury: Mail Rooms - on metal beam, side wall
- Venus: Millionaire Suites - under bedside table
- Moon: Lower Grand Staircase - on the white wall, clearly visible
- Mars: Boiler Room - halfway up stairs on pipe
- Saturn: Bridge - on side of wooden cupboard, in room with lampshade and maps on the wall
- Jupiter: Engine Room - up the staircase, on the floor
- ?: Aft Decks - on the floor, in the middle of a lifebuoy
- Uranus: State Rooms - in room with black and white floor tiles, behind the green plant by mirrors
9. Frozen door challenge
10. boss fight.
- Phase 1: Outside ship - fight off the general horde
- Phase 2: Engine Room - take care of the blightfathers as a priority
- Phase 3: State Rooms - focus on hitting the eye ball
- Phase 4: Promenade Starboard Deck - focus on hitting the eye ball
- Phase 5: Poop Deck - focus on eye ball when sparking red, use melee to escape ice blast if trapped
More Black Ops 4

Popular Posts
- Black Ops 2
- Red Dead Redemption 2
Other Games
More call of duty: black ops 4, ancient evil zombies - all easter egg steps, ancient evil trailer confirms gaia gauntlet wonder weapon, pegasus horse and boss zombie, "ancient evil" dlc 2 zombies map confirmed for black ops 4, dead of the night zombies - side easter eggs, dead of the night zombies - all easter egg steps, "dead of the night" confirmed as black ops 4 dlc 1 zombies map, zombies ix - all easter egg steps (black ops 4), zombies classified - all easter egg steps (black ops 4), you might also like, zombies chronicles - all new easter eggs (black ops 3 remastered), origins lightning staff upgrade steps - zombies chronicles (dlc 5), origins wind staff upgrade steps - zombies chronicles (dlc 5), origins fire staff upgrade steps - zombies chronicles (dlc 5), origins ice staff upgrade steps - zombies chronicles (dlc 5).
Black Ops 4 Zombies: Voyage Of Despair Easter Egg Guide
Find out what hides in the depths of Titanic.

Voyage of Despair is a Zombies map in Call of Duty Black Ops 4, based on the RMS Titanic ship and like the majority of the Zombies maps, comes with its own Easter Egg for you to solve.
The Easter Egg goes by the name of “Abandon Ship” and you will be rewarded with it for completing the trial. The Easter Egg is fairly long but we have tried to simplify it by breaking it down into simple steps that you can follow.
This is one of the lengthiest and hardest easter eggs to solve in all of Black Ops Zombies and we do not recommend you to try it solo. It is best attempted with 2 or 3 players since the final boss fight can be incredibly hard.
Step #1: Collect the Sentinel Artifact
The first step that you need to do is to collect the Sentinel Artifact. In order to do that, you need to search the rooms beside the spawn. The Artifact is not that hard to find and should be somewhere on the floor in those rooms.
There should be a prompt to collect part when it is near you, so stay vigilant.
Step #2: Activate the Artifact
Having obtained the Sentinel Artifact, you need to activate it. Go through the inner rooms onto the first floor so that you can get to the top of the ship. Once there, make your way to the end of the ship where you can find the Poop Deck. There should be a glowing blue item on top of the stairs towards the end of the ship. Four red balls will fly into the air and then spread themselves onto the different parts of the ship.
Step #3: Activate the Pack-a-Punch
Hunt down and interact with all four of the glowing red balls. You can find the first orb in front of the Sentinel Artifact. It will be on the Poop Deck.
For the next orb head into the Turbine Room. Find the new path leading downstairs from the Poop Deck. This path is unlocked from the Sentinel Artifact. Follow this path downstairs and you will find the pedestal underwater, in the Turbine Room. Reach this pedestal and interact with it to activate it.
The third orb is in the Lower Grand Staircase area. When you reach the Grand Staircase, follow the stairs downstairs. Just follow the stairs until you reach the lowest floor you can go. The pedestal will be in front of you.
The final orb is in the area of the Cargo Hold. Follow the red marker on the map until you reach a room that is filled with water. You will find a switch right near the entrance to remove the water in the room. Press it and wait until the water is gone. Proceed into the room and in front of you will be the final pedestal. Reach this pedestal and interact with it to activate it.
After you activate all 4 pedestals of the Pack-a-Punch machine, the machine will appear in front of you, replacing the final pedestal you interacted with. This whole process can take some time as you will need to acquire enough points to unlock certain areas in the Voyage of Despair map but you need to bear with it for the sake of solving the easter egg.
Step #4: Find the Clocks
After you activate the Pack-a-Punch machine, a few clocks and alchemy symbols will spawn on the map. Go to clocks scattered in the area and note down the elemental symbols from there. These clocks will have changed their time and the clocks themselves are randomized. You need to note down the time shown on each clock and the symbol near it.

You can find the clocks and symbols in the following locations:
Mailroom: Clock: Near the door heading towards the Cargo Hold Symbol: Underneath the stairs leading to the room with the Vapr Wallbuy
Grand Staircase: Clock: Near the staircase Symbol: Head up the stairs from the clock followed by another set of stairs to find it
Captains Bridge: Clock: Above the steering wheel Symbol: Underneath the desk opposite to the steering wheel
Gallery: Clock: In the room with a body, in the cabinets Symbol: On the cabinet in the same room as the clock
3rd Class: Clock: Near the wooden stairs, on the left wall Symbol: Near the staircase, right next to the luggage
1st Class Lounge: Clock: Near the fireplace Symbol: Left-side of the Mystery Box
Once you have done that, you need to go to Captain’s Wheel on the bridge and take note of the 4 dials. you must align the dials to the minutes of the clocks which have the same element as the one on the dial.
It is important to note that the dials only move left/right in 5-minute intervals while the dials at the Engine Room and Poop Deck change the hour of the dials. Once they are properly aligned, you will not be able to change the dials anymore followed by an audio clue.
Step #5: Acquire and upgrade Kraken
You need to acquire the Wonder Weapon Kraken to complete this easter egg. The Kraken can be acquired from one of the mystery boxes on the map. Simply keep opening the mystery boxes until you receive the Kraken. This is the simplest way to acquire this weapon.
Now for the upgrade, you need to collect the following parts
- The Tubing – found in the Galley – on the left side of the shelves with the pots and pans.
- The Barrel – found in the Cargo Hold, underwater, on one of the wooden boxes near the net.
- The Chamber – found in the 1st Class Lounge, on one of the white tables, near the window and a green plant.
- Special Part – found by killing an elemental Zombie wandering around the map.
Now take all these parts to the crafting table in the Engine Room and use the crafting table to upgrade the Kraken.
Step 6 – Find the Power Outlets and complete Elemental Trials
There are a total of 6 possible power outlets in Voyage of Despair out of which any 4 can be related to this easter egg. You can determine which one is relevant to the easter egg by checking if it is spewing out any elemental effects. You need to kill an elemental catalyst next to each of the 4 power outlets that have the same elemental effect. The 6 possible outlets are found in
- 3rd Class Staircase
- First left State Room
- On the left pillar of the Zeus Statue
- Top of the Grand Staircase
- Near the Aft Decks Window
You must kill an Element Catalyst of the same element as the outlet near the power outlet. Doing so will spawn a ritualistic symbol on the floor.
You need to stand on the ritual symbol and have every player hold the interact button while standing on the symbols together. You will teleport to a trial where you need to kill every enemy before getting the Sentinel Artifact.
You must do the elemental trials in the following order:
- Acid > Water > Electric > Fire
Step #7: Shoot the Leaking Pipes
Now head to the Engine Room and shoot each of the leaking blue pipes around the Boiler using Decay Kraken shots. This will flood the room and put out the fire.
Step #8: Pack-a-Punch the Artifact
With the fire being put out you can now interact with the Pack-a-Punch machine in the boiler room and place the true Sentinel Artifact that you got from completing the trials in the machine to Pack-a-Punch it.
Step #9: Shoot the Planets
Now you must locate and shoot the constellation symbols of the planets on the ship. The location of each planet symbol in Voyage of Despair is given below. You need to memorize all of them for the next step:
- Mercury ☿ – Can be found in the Mailroom beneath the Forecastle. Head into the room and you will see the symbol right
- Venus ♀ – Can be found in the Millionaire Suite. Enter the room with the suitcase on the bed and you will find the constellation beneath the desk.
- Moon ☽︎ – Can be found in the Lower Grand Staircase on one of the white doors.
- Mars ♂ – Can be found in the Boiler Room. Head towards the furnace and crawl try to crawl beneath it. You will find the constellation.
- Saturn ⚳ (rotate this upside down) – Can be found on the Bridge in one of the rooms.
- Jupiter ♃ – Can be found in the Engine Room when climbing up the stairs. When you climb the first set of stairs, you will see a cardboard laid on your current floor. You will find the constellation there.
- Neptune ♆ – Head for the outer Aft Decks. Look into all the ring-shaped lifebuoys and you will find the constellation in one of the rings.
- Uranus ♅ – Head into the State Rooms, the one with the yellow basket in front of the door. Enter the room and you will find the constellation symbol behind the pot.
- Sun ☉ – Can be found in the Forecastle room, on the deck, in the middle. You must face the two steel beams in such a way that you can see the moon directly behind the beams.
Step #10: Interact with the Solar System Model
Head to the Cargo Hold, and look for a Solar System model. Interact with the Solar System model and you will see the heavenly bodies flashing up in a particular order. This is the order in which you need to shoot the planets. The final symbol will always be the Sun ☉.
Do note that once you shoot the first lit-up planetary symbol on the Solar System model, a timer will start. You must enter the assigned room and find the blue orb in that time period. Bring the blue orb before the timer hits 0:00. Repeat this procedure until you are done with all the planets and the Sun.
Step #11: Defeat the final boss
Near the climax of Voyage of Despair Easter Egg, you will have to follow the last blue orb to the spawn. Interacting with it will spawn some blocks of ice in your path and start a timer.
Now, you must rush to the Poop Deck while destroying the ice blocks on the way. The fastest way is the staircase on the right. Destroying all the ice blocks will spawn a Portal on the Poop Deck near the Sentinel Artifact’s location. Enter the portal and you will be led to the Voyage of Despair boss fight. There are multiple stages to your fight with the boss.
Stage 1: After being spawned underwater swim to a tree and activate an artifact. This will teleport you to the deck, here shoot at the newly spawned eye until you are teleported again. Fight waves of zombies of all types until another portal opens.
Stage 2: Survive another wave of zombies in the engine room
Stage 3: You will have to fend off more zombies and attack the eye too and this time the eye will also attack you. The eye will only take damage during its beam attack, keep damaging it until you are teleported.
Stage 4: Repeat the same strategy as step 3, this time on the side of the ship.
Stage 5: You do pretty much the same stuff here as well. This time you can only attack the eye while it’s crying and its attacks are instant kills so avoid them at all costs. Once you have dealt enough damage, the final cutscene will play out to complete the Voyage of Despair easter egg in Black Ops 4 Zombies.
- " class="share-link facebook">
- " class="share-link twitter">
- &title= " class="share-link redit">
- &title= " class="share-link linkdin">

Attabik is an extroverted introvert who seeks to escape into the alternate realities of video games, anime, manga, and manhwa. He has been called by many names: traveler, unkindled one, tarnished, hunter, but his favorite ...
- Baldur's Gate 3
- Dreamlight Valley
- Lethal Company
- Monopoly Go
- Jujutsu Chronicles
- UGC Limited
- Call of Duty
- Legend of Zelda
- Ethics Policy
- Review Policy
- Privacy Policy

CoD Black Ops 4: How to Get the Sentinel Artifact (Voyage of Despair)
How to Get the Sentinel Artifact (Voyage of Despair) in CoD Black Ops 4
If you’re after the ‘ Trialling Experience ‘ trophy and achievement in Black Ops 4 , you’ll need to get the Sentinel Artifact on the Voyage of Despair Zombies map in Black Ops 4 . Here’s what you need to know to get it.
The Zombies in Black Ops 4 is known for its cryptic easter eggs and Voyage of Despair is no different. Set on the infamous Titanic players will find themselves fighting hordes of zombies after an attempt to steal an ancient artifact goes wrong. The Sentinel Artifact is a key component for creating the Pack-A-Punch in Voyage of Despair that players will be hunting for. Here’s how to get it.
To get the Sentinel Artifact in Black Ops 4’s Voyage of Despair you will first need to make your way to the bow of the ship, which is opposite of your starting location. Head up the right side staircase and unlock the first set of debris blocking your path. This will cost 750 points, so it may take a round or two in order to make some progress towards the Sentinel Artifact. Continue up the staircase and make a left inside once you’ve reached the bridge of the ship.
From here you will keep going straight until you reach a door that costs 1000 points to open. Once you can open that door, continue on past it and head down the grand staircase. On the right side of the first floor you will have to open another door to continue. This time you will need 1250 points to push forward. Remember to fix up windows whenever you’ve got a chance in between killing zombies, should you need some additional points in Black Ops 4’s Voyage of Despair .
After opening this door you will be in the first class lounge, from here you will need to make your way to the promenade port deck. Follow up the right side of the lounge and take a left past a giant hole in the wall. Sharply turn right once inside and you’ll see the door for the port deck. This door will cost 1500 points, so make sure someone on your team has been saving their points for this one.
Don’t worry, you’re nearly at the end of your mission to get the Sentinel Artifact in Black Ops 4’s Voyage of Despair zombies map.
In similar fashion continue to follow up the right side and follow the broken edge of the ship up to the upper deck. Here lies the final piece of debris you will need to clear to make it to the Sentinel artifact. Pay 1750 points and make your way to the poop deck.
All the way on the back of the deck is the steering wheel for the ship on a lifted platform. Follow the staircase around the back to reach the wheel and get the Sentinel Artifact .
This will open up all locked doors that were glowing red. These are different from the doors you were unlocking previously. This is the first step in trying to get the Pack-A-Punch.
That’s all you need to know to get the Sentinel Artifact in Voyage of Despair , and unlock the Trialling Experience trophy or achievement for Black Ops 4 .
For more tips, tricks, and guides be sure to check out our Black Ops 4 wiki guide .

- Call of Duty: Black Ops 4 Achievements
- Call of Duty: Black Ops 4 News
- Walkthrough *
11. Call of Duty: Black Ops 4 Zombies - Voyage of Despair Easter Egg
Voyage of despair easter egg:.
(Some pictures in this section provided by YouTube channels: Glitch, MRoflWaffles, NoahJ456, and Laggin24X).
Once again, the Easter Egg needs to be done on normal difficulty with no modifiers. The Easter Egg will not work if you are on a lower difficulty, or if you turn on modifiers.
This Easter Egg unfortunately steps up the difficulty from IX, and is also considered to be the hardest Easter Egg to complete in the game alongside Blood of the Dead. If you can finish Blood of the Dead's and Voyage of Despair's Easter Eggs, you'll be able to finish the rest of the game's Easter Eggs easily.
Throughout your game, at least one person needs the Kraken wonder weapon to finish the Easter Egg. I'd recommend multiple people get it due to its utility and power. You can get it randomly out of the box, or I've written a detailed way you can get the Kraken for free on the previous page. I'd also recommend at least one person try to get the Hellion Salvo too and fully Pack-A-Punch it before the boss fight, as it is incredibly helpful later on. I would also recommend you pick the Sceptre of Ra as your special weapon, and for perks, I'd recommend Dying Wish in the Zeus slot, Deadshot Dealer for Odin, Quick Revive as your Danu perk, Stamin-Up as your Ra perk, and for whoever's taking the rocket launcher, PHD Slider in the Odin slot instead of Deadshot. I'd also recommend one person try to have Homunculuses, as they are the new monkey bombs for Chaos maps.
The first step to start the Easter egg is to collect the Sentinel Artifact at the Poop Deck area of the ship. If you don't know where that is, go back a page and I have written out how to find it.
After that, you'll want to drain the water in the Engine Room and the Cargo Hold. Once again, see the previous page if you need a refresher.
CLOCKS/CODES
Now, here's where the Easter Egg truly begins. After activating Pack-A-Punch, around the map there are now going to be four symbols that have spawned somewhere, alongside a clock that is nearby your symbol. Here are all the clock and symbol locations. There will only be four pairs of clocks/symbols that spawned, so if you don't see the symbol in a location, ignore the clock as well. One good way to see if you have the symbol at a location is to first check the clock. If the clock shows 11:40 on it, that means the symbol did not spawn at that location, so you can ignore that clock.
The symbols look like this:

- Clock: near the door leading down to Cargo Hold on the wall

- Symbol: under the stairs leading up to the Mail Room, near the VAPR wall buy
Captains Bridge
- Clock: small room behind the four dials, above the steering wheel

- Symbol: directly opposite the steering wheel in a small room, under a desk
Grand Staircase
- Clock: top of the staircase, on the wall

- Symbol: face the clock, turn to the right and go up the small steps, turn right again and you'll see a symbol above the door

1st Class Lounge
- Clock: fireplace in the middle of the room, on the mantle

- Symbol: to the left of the mystery box, on the back wall
Galley (Kitchen)
- Clock: in the room with the hanging body on the wall. Face the body on the wall, turn 180 degrees and there is a clock on the wall to the left

- Symbol: face the body on the wall, turn 180 degrees, the symbol is on the cabinet to the left
- Clock: heading towards the turbine, at the end of the wooden stairs, the clock is on the wall to the left

- Symbol: behind some luggage next to the wooden stairs leading up
Once you have found all four symbol/clock pairings, you'll want to write down the four symbols and the times on the clocks that were nearby. So for my screenshots above, in the Grand Staircase, I would write down "triangle up, 9:05." Once you have your four pairings written down, you're going to need to start entering them in three separate places on the map. One set of dials is in the Captain's Bridge area, another is over on the Poop Deck where you grab the Sentinel Artifact, and the last two are down in the Engine Room. On each one, there should be a symbol matching the four symbols you wrote down.
We'll start with the Captain's Bridge. First look at the four dials.

Now, we have to match the times we found, but only enter the MINUTES portion on the dials. To do this we are going to look at the dials, and move the lever toward the location it would need to be to match the time. For the dials, the leftmost one is activated from the right-hand side, whereas the other three are activated from their left-hand side.

Each lever movement represents five-minute increments on a clock, so if you have 20 as your minutes, move your lever four turns to the right past north, 45 would be three turns to the left past north, etc. So, for my previous example, I said "triangle up, 9:05." To enter this, I will go to the dial with the triangle up symbol and move the lever to the right once past north. Do this for all the minute hands until they match.
Now move towards the Poop Deck. There should only be two handles to move, and you're going to do the same thing you did at the Bridge, but with the hours now. The left dial should correspond to the upward-pointing triangle with a dash through it, and the one on the right should correspond to the down-pointing triangle with a dash going through it. Once again, for these dials, think of north as 12:00. Move it left or right to match the hours, so for my Grand Staircase pairing again, the lever will get moved three to the left past north when I do these.

Finally, go down to the Engine Room and do the same thing you did to the Poop Deck dials, but this time the left-side dial corresponds to the upward-pointing triangle without a dash, and the right-side dials correspond to the downward-pointing triangle without a dash.

If done correctly, you'll hear some eerie chanting and a loud activation noise to signify completion.
ELECTRICAL OUTLETS/TIME TRIALS
Now, we move on to the next step, which is the electrical outlets step. Throughout the map, there are going to be multiple electrical outlets, with four of them randomly sparking a certain element. These elements correspond to the four special catalyst zombies that can spawn in the middle of the rounds.

In the picture above, the left plug means it correlates to an acid zombie, the second plug means it correlates to a water zombie, the third plug means it correlates to an electric zombie, and the fourth plug means it correlates to a fire zombie. You will have to go to all the plug locations below and see if your plug is sparking. Just like the clocks, there are six plugs total in the map, but only four will be sparking. Wait about 15-20 seconds to see if your plug sparks, and if it doesn't the plug is not needed. The plug locations are as follows:
- States Room, 1st on left, near gramophone and golden painting frames on floor

- Upper Grand Staircase - at the top of Grand Staircase, to the right of a green couch

- 3rd Class main stairway - near the brown suitcase on the floor

- Aft Decks - inside a barricaded room with a red valve on the ceiling

- Dining Hall - on the left-side wall, facing Ra perk

- 1st Class Lounge - On a pillar, to the left of the Zeus perk

Once you've checked all the plugs, I would once again write down what you found somewhere. So for my plugs, I would write "3rd Class, Electric," and "Aft Decks, Acid," etc. until I have all four plugs written down.
You'll have to repeat this process four separate times for each plug. You have to kill the catalysts at the plugs and then complete the arenas in this order to progress:
For the Fire zombie, do not get too close, because he will detonate himself if you get too close, and it will not count. You need to lure him near the plug, then shoot him enough to kill him from a short distance. Do not try to complete all four catalysts at once, just do one plug/arena at a time until you finish all four plugs. I would also recommend, for the water portal, do not start until you have some really strong weapons, as you are going to be stuck in a flooded version of the mail room, and the strongest boss zombies will be spawning down there.
SHOOTING THE PIPES/PACK-A-PUNCHING THE SENTINEL ARTIFACT
With those arenas completed, we now move on to the next step, which requires you to have the Kraken and the Acid upgrade for it. Once again, for a refresher, go back to the previous page where I've detailed that information. Take your Kraken with the Acid upgrade downstairs to the Turbine Room area where the Pack-A-Punch pedestal is. There are going to be blue pipes all around the room that are going to be shooting out steam from them. Shoot all these pipes with your Kraken. You'll know a pipe has been shot when the pipe shoots out water droplets with the steam. There should be nine pipes in total.

BOTH STEAM LOCATIONS BELOW NEED TO BE SHOT

THE PLANETS
Sun - Forecastle, where you first spawn on the map

Saturn - Bridge, across from the steering wheel on the side of a cabinet

Mercury - Mail Room, just down the stairs from the Forecastle on a wall

Uranus - State Rooms, hidden behind a plant in one of the bathrooms

Venus - Millionaire Suites, inside one of the bedrooms underneath a small table

Moon - Lower Grand Staircase, on a wall outside of the dining room area

Neptune - Aft Decks, near the lifeboats, in the middle of a life preserver on the ground

Jupiter - Engine Room, on a plank of wood on the ground in front of the Odin perk machine
When you go to grab this planet, you'll have to jump in the air to grab it.

Mars - Boiler Room, under the floor. You have to go prone to activate this one.

Here are all the planets labeled on the model:

(Credit goes to MrRoflWaffles for the labeling here)
All the planets are in the sky, except for Neptune, which will be in the water circling the ship on the horizon. Look for a glowing blue ball dipping in and out of the water.

To figure out which planets are which in the sky, here's what they all look like:

https://www.trueachievements.com/customimages/131872.jpg&...
When you start, your screen will flash white for a moment and you'll be back on the map, but now the map is going to be littered with ice chunks blocking your path. To finish the time trial, you'll have to use your Scepters, Krakens, and whatever else you have to break the blocks to keep moving towards the Poop Deck at the other end of the ship. Make sure you are outfitted with pretty powerful weapons and that you have a decent amount of ammo, because this step can get really chaotic really fast. If you fail the step at this point or any other point, you'll have to progress the round to try it all over again, so it's best to keep mistakes to an absolute minimum.
Here's a video detailing this one specific step a little further, since it can be a little confusing to understand at first. This step is a good one to have a bit of a visual on, so I'd watch the video first to just familiarize yourself with the step before starting it.
(Credit to Heartless Gamer for this video)
If you manage to complete this in one go, when you make it to the Poop Deck, there will be one more iceberg on the very end of the ship for you to melt, which will end the trial, and give you the portal to teleport to the boss fight of this map. Do not enter the boss fight until you have all the weapons you want, you have all your perks, your shield is at full health, and your guns are fully Pack-A-Punched, with full ammo.

The first stage takes place on the Poop Deck, and like I said, it's pretty simple. Just train the zombies around and kill whatever is coming after you. The second stage is in the Engine Room, and is the same thing as the first. This area is a bit tighter as the corridors are a lot more narrow, but it is still manageable if you use the different floors to train around. Here's a video of what my friend and I did to train around the area, you can see him on the lower floor:
Once stage two is finished, stage three is where things get tricky. You'll be teleported to the State Rooms area of the map, and this area is even more narrow than before. Not only that, but the boss will be looking down each of the two main hallways and firing a laser beam every so often. Now, to finish this stage you'll have to shoot the boss when it's firing down the hall. When he's taken enough damage the stage will end. I recommend sitting in the front area of the hallways near where the carpenter and max ammo powerups spawn in, and every so often clearing the hallways behind you, and shooting the boss whenever he shoots down the hall. Use the rocket launcher as it does a ton of damage to the boss.

Once stage three is done, you'll be teleported to the fourth stage which is at the Promenade Starboard Deck area. T his is where things can get really tough if you're not careful. This stage is now going to have all the different zombie types coming after you to kill you, but now you have to contend with the boss trying to kill you as well. To end the stage, you have to damage the eyeball enough to move on. This can get tricky as managing the zombies and the boss can be really difficult. Try to run a train around the icebergs in the area and try to get far away from the zombies when the boss is trying to shoot and is vulnerable to damage. You'll know you're doing a good amount of damage when the boss starts to crack and glow red.

Once the eyeball has been shot enough, you'll be teleported to the final stage of the fight. Now, this stage is easier than the last one since there's more maneuvering space here, but the problem is the boss has a new attack that can instantly kill you and your whole team if you're not paying attention. You can damage the eyeball when it's trying to use its laser beam attack from before, or when it is using the new attack that wipes the team. Dodge the bosses and enemies on the map until you hear a scream-like sound effect and the eyeball is shaking at the end of the ship. Your character should say something about the eye charging up.
(Clip from MrRoflWaffles' EE guide)
When this happens, try to throw a Homunculus and focus on shooting the eyeball full of as much damage as possible. I would recommend the rocket launcher like before. If done correctly, the eyeball will not kill you and will take a huge amount of damage before repeating the cycle over again. If you have Dying Wish and you fail to deal enough damage to the eyeball, it will take your Dying Wish perk and you will live, but this can only work once, so don't rely on it. When you've done the process of shooting it multiple times, eventually the boss will die, and you will have completed the Voyage of Despair easter egg, also unlocking:
In Voyage of Despair, complete the Trial
Multiple screenshots and videos in this guide come from MrRoflWaffles, NoahJ456, and Heartless Gamer on YouTube. Thanks to all of them for their amazing guides.
If you've completed this, give yourself a pat on the back because this is a long and arduous journey to go through. Now, on to the true test of your skills, Blood of the Dead.
- svg]:fill-accent-900">
The improbable voyage of Starship Titanic, the 1998 Douglas Adams video game filled with ‘unhinged’ chatbots
By Andrew Paul
Posted on Sep 9, 2024 10:00 AM EDT

Credit: Courtesy of Emma Westecotte
Douglas Adams originally devoted just half a page to eulogizing Starship Titanic in the tenth chapter of Life, The Universe, and Everything . A “sensationally beautiful, staggeringly huge” cruise liner resembling a “silver Arcturan Megavoidwhale,” the luxury ship did not even complete its first radio message—an SOS—before its “Improbability Field” engine prototype triggered a “sudden and gratuitous total existence failure” shortly after launching.
It was one of many in-world anecdotes scattered through the third part of the late sci-fi author’s revered “trilogy in five parts,” The Hitchhiker’s Guide to the Galaxy . Over 17 years after its publication, most readers had probably forgotten about Starship Titanic . In 1998, however, the ill-fated intergalactic cruise liner’s tale suddenly expanded to include a video game featuring tens of thousands of lines of scripted dialogue, hours of vocal performance recordings, and a standalone 223-page novel written by Monty Python’s Terry Jones. But Starship didn’t just become an immersive puzzle game—like its “majestic” literary inspiration, its underlying prototype software is now both the stuff of legend and a premonition of our surreal, AI-saturated present.

An ambitious, if not impossible, project
“We knew that what we were doing was impossible,” software engineer Jason Williams admits to Popular Science .
It’s hard to imagine a time when a major literary publishing house felt confident shelling out $2 million for an experimental video game based on a bit of nerd novel trivia. But in 1996, Adams somehow convinced Simon & Schuster this was the future of entertainment. By that point, the writer was no stranger to embracing various mediums and technology to tell his stories—his 1978 Hitchhiker’s Guide BBC radio series adaptation was the first comedy program to ever be produced in stereo, and he helped craft a text-based video game from the original novel in 1984. Adams remained interested in the potential for “new media” storytelling throughout the next decade until the 1994 release of the now classic puzzle-based video game, Myst .
Although intrigued by the gameplay mechanics and puzzles, Adams ultimately felt Myst ’s world was too empty due to its lack of characters and storyline. He soon envisioned a similar game taken a step further. Or, as Willaims explains, a gargantuan leap into uncharted waters.
“We had to build 14-and-a-half hours of responses to be able to have even basic conversations with people, because you had to anticipate everything they might ever ask,” Williams says.
Designed within Adams’ newly launched multimedia studio, Digital Village, Starship Titanic ’s plot hinges on the eponymous cruise liner crashing into your house after undergoing a “Spontaneous Massive Existence Failure.” After being essentially kidnapped, a player must beat the game’s already maddeningly difficult point-and-click puzzles through help and hints from a diverse cast of robot crewmembers (and one loudmouthed parrot). But you don’t receive these tips and clues by selecting from a set of predetermined, multiple choice dialogue options like so many of Starship Titanic ’s many contemporaries. Instead, you need to actually “talk” to the characters through a messaging portal. Type out a question, and bots provide one of the over 10,000 lines of pre-scripted, fully voiced answers with almost no lag time.

“It was a very complex piece of software, very ambitious” Williams admits.
Williams’ department logged hundreds of hours creating a completely new natural language parsing engine from scratch, dubbed SpookiTalk. Unlike the recent explosion of modern large language model chatbots, parsers such as SpookiTalk aren’t probabilistic. Programs such as ChatGPT devote massive computing power to analyzing a human’s text input, then calculating the most likely response composed of a string of letters and spaces that a user reads as a complete statement. Parsers like SpookiTalk, on the other hand, flag any discernible keywords in a user’s input, then match them to a (hopefully) applicable, pre-written response. In Starship Titanic ’s case, it managed this across a three CD-ROM set totalling just 2 GB. While an unheard-of size for video games in 1998, that’s nothing compared to today’s titles—or what Google AI Overview requires to come up with a ( glue-tainted ) pizza recipe.

At the end of the day, SpookiTalk’s smoke-and-mirrors often fell short of approximating actual artificial intelligence.But in some ways that matched the game’s overall tone, especially when attempting to chat with the Starship Titanic ’s unwieldy crew. That’s because Adams—not one to ever keep ideas simple—didn’t want in-game conversations to follow what most sensible people might consider normal logical trains of thought.
Starship Titanic ’s plot involves solving the mystery of who sabotaged its sentient navigation system named Titania. So, it made sense that the saboteur went the extra mile by also frying every other robot’s cognitive settings. This, as one bot tells the player in the beginning of the game, means everyone on the ship has gone “a little doolally,” resulting in sudden shifts in mood, cognitive capabilities, and functionality.
“Even looking back now and having worked on a lot more games, the craziest idea was that each of the bots had five different levels of response,” remembers co-writer Neil Richards. “I’m not sure anybody really appreciated that instead of having [around] seven bots, this was now a game with 35 bots in it… it just sort of spiraled.”
“I’d actually forgotten about that,” Williams says with a grin.
“It wasn’t even really a gaming industry project. It was a bunch of TV execs and [similar] folks who wanted to explore the internet and interactivity in gameplay,” says Emma Westecott. “I think all of us across the whole team were naive about what [would be] involved.”
An uncanny experience
Starship Titanic was one of Westecott’s first professional projects after graduating college. Now an associate professor of game design and undergraduate department chair at Ontario College of Art and Design University (OCAD), she says her time working on the release’s gameplay was one of her favorite career experiences because of the freedom to experiment with completely new gaming frameworks and ideas.
“One of the things I realize [now] is that we didn’t consider the players at all, really. I would say I don’t think we could get away with that these days, right?” she laughs.
While Westecott’s team toiled on crafting the ship’s wholly unique animations and artwork, Williams’ department continued with SpookiTalk. After over two years of work and numerous release delays, a much-hyped Starship Titanic finally made it to store shelves—hilarious, smart, and packed with top-tier voice performances from the likes of Monty Python alumni, John Cleese and Terry Jones.
And yet the critics and players of 1998 were, to put it mildly, confused. Initial reviews were largely lukewarm, and sales numbers reflected similarly. “[A]n exercise in tedium and frustration for all but the most tolerant adventurers,” IGN said in its 4.9/10 review. CNN conceded the game to be a “zany, fun ride” while opining “it would be nice if the AI’s gave you more clues and remembered previous conversations,” betraying a fundamental misunderstanding of SpookiTalk’s capabilities.
In hindsight, Starship Titanic is arguably one of the most delightfully absurd, yet notoriously difficult and obtuse, video games of all time. It’s true that, despite being lovingly designed, SpookiTalk simply can’t hold up to a human player’s inputs beyond the most basic questions and instructions. Even then, the unhinged robots’ reactions would quickly deteriorate into nonsense thanks to their predesignated “Fuck Off Point,” as Richards coined it.
The “DoorBot extraordinaire,” Edmund Lucy Fentible, for example, would invariably exclaim “Memory failure! Memory failure!” after a handful of interactions. From there, Fentible remained terse, morose, and essentially useless until the player readjusted his “Cellpoint Settings” in the robot control room. Krage Koyotoal IV, your concierge BellBot, frequently would respond to questions with “I’m not going to answer that. Don’t feel like it,” even with allegedly healthy Cellpoint Settings. The talking parrot, with a distinct lack of Cellpoint Settings, generally either berated you and squawked.

Such experiences were so frustrating to players that later copies of the game would include a 120-page walkthrough strategy guide. Without it, as one writer warned in 2006 , could result in “ripping out half your hair because you didn’t know that a… parrot enjoys eating brazil nuts instead of walnuts.” (For the record, the parrot prefers pistachios, not brazil nuts).
The main problem, like so many of today’s AI sales pitches, came down to overpromises. Starship Titanic ’s official (still somewhat functional) website called the experience “truly revolutionary” and “uncanny,” while claiming that players “have not encountered anything like this before in any kind of game.” Some of the more patient players may have taken the time to experiment with SpookiTalk’s parameters and learn its conversational limitations. But for many others, they came away confused, if not annoyed.

“The way [ Starship Titanic ] was promoted, it was, ‘Hey! You’ve got robots! You can talk to them and you can say anything you like,’” Williams remembers. “Techie people might have gone, ‘I know what the technology is capable of, and what they’ve done is amazing. But you also know the average person on the street is going to say, ‘[But] they said I could talk to a robot…’ They had to really understand the restrictions that were there just because of the technology of the day.” But according to Digital Village alumni, the general public’s lackluster response didn’t phase them at all. Instead, they were thrilled at how much they managed to accomplish in such a comparatively short time.
“We knew we were trying to do something that actually wasn’t possible at the time,” Williams says. “We were trying to get as close to that as we could with the time and capabilities that we had.”
“I don’t remember any disappointment,” Richards says, while Williams remembers that, if anything, he came away “incredibly excited about the future.” Westecott, meanwhile, calls her time at Digital Village the “first really inspiring experience” of her career.
‘There is nothing like her in the universe…’
Over 25 years after its release, there is now a satisfyingly Adams-eque irony in Starship Titanic ’s legacy. We live in an era when seemingly every major Silicon Valley company promises increasingly wild and wondrous AI-powered products. But even with exponentially massive amounts of computing power, many offerings continue to spout absolute nonsense that makes Starship Titanic bots sound well-adjusted. Nearly every month features yet another CEO debuting an AI “Ship That Cannot Possibly Go Wrong,” only to have it almost instantaneously succumb to a new version of “Sudden Massive Existence Failure.”
Meanwhile, Starship Titanic has not only avoided the dustbin of video game history; replays now offer a new and emotional experience thanks to the fundamental humanity and joy within every aspect of its design—the beautiful 3D art deco environment designs overseen by Academy Award-winning husband-and-wife, Oscar Chichoni and Isabel Molina, the joyous voice acting from comedy legends, and the relationships borne from building the game itself. Even decades later, Richards repeatedly describes the Digital Village team as an adopted family, and regularly keeps in touch with many of them, including Williams and Westecott. For years, some of the game’s most diehard apologists even continued an in-world online roleplaying campaign on the game’s official website forum—a portion of which is still live today.

The very end of a player’s misadventure through Starship Titanic sees them successfully return to their (still ruined) house. Once there, they receive a video transmission from the cruise liner’s architect, Leovinus, played by none other than Douglas Adams himself, whose brief monologue is all the more poignant now—the author suffered a fatal heart attack in 2001, barely three years after his game’s debut.
“Building this ship was my dream and now that dream is over… Thank you for restoring Titania. I know she isn’t real. Well, she’s ‘real,’ which is not ‘really real,’ if you see what I mean,” he deadpans before revealing that, by the galactic laws of salvage, the ship—its mercurial robots, its ambitious design, and its many endearing quirks—now belongs to you.
“There is nothing like her in the universe. I wish you joy…,” Starship Titanic ’s creator tells you.
Latest in Internet
How to create custom ai chatbots in google gemini how to create custom ai chatbots in google gemini.
By David Nield
Google Tasks is the best Google tool you’re not using Google Tasks is the best Google tool you’re not using
IMAGES
VIDEO
COMMENTS
The Complete Voyage of Despair Easter Egg Walkthrough. ... Set on the R.M.S Titanic, you will first spawn on the Forecastle with the task of finding and unlocking the Sentinel Artifact, ...
Voyage of Despair is the first Zombies map featured in Call of Duty: Black Ops 4, and the twenty-fifth map overall. Chronologically, it is the second map in the Chaos story. The map is set on the RMS Titanic, after an attempt to steal an ancient artifact known as the Sentinel Artifact goes wrong. This map also introduces three new enemies; the ...
1. After walking up the stairs on the right, still in the outside area leaning against a railing. 2. In the corridors sitting on top of a handrail. The door that leads to the Upper Grand Staircase is very close to this location. 3. In the very next room from the previous part, sitting in front of a wooden crate.
This page contains a map of the Voyage of Despair Zombies map in Call of Duty Black Ops 4 (COD BO4), also known as Titanic Ship Map. Instead of running back and forth in the game to take a look at the map (and being chased away by zombies), you can refer to the full area map overview below. You start out at the Forecastle on the right side of ...
Black Ops 4 Zombies - Voyage Of Despair FULL Map Walkthrough! (Call Of Duty BO4) Subscribe http://www.youtube.com/subscription_center?add_user=LAAZRGAMING---...
Voyage of Despair is a fun map with a lot of twists and turns throughout the ship. But it'll definitely take some time for you to get used to all of the different areas around the map. You'll ...
Black Ops 4's Voyage of Despair brings a whole new cast of characters to the Call of Duty Black Ops Zombies franchise: Scarlett Rhodes. Description: Despite resenting her father and his tireless pursuit of myth and legend, the tech-minded Scarlett Rhodes will stop at nothing to find him when he disappears. All of her rational convictions will ...
Earn the Abandon Ship achievement / trophy and complete the main Easter egg quest on "Voyage of Despair" — here's how to do all the secret steps in this Titanic-themed Black Ops 4: Zombies ...
10. Call of Duty: Black Ops 4 Zombies - Voyage of Despair
On the heels of Scarlett's missing father, Alistair Rhodes, the Chaos heroes embark upon the doomed maiden voyage of the RMS Titanic. It is here where a precious artifact from a mysterious society is the hidden link between our heroes and Alistair Rhodes' whereabouts. Scarlett, Diego, Bruno and Stanton must now fight from bow to hull ...
The Black Ops 4 Zombies Voyage of Despair Easter eggs see the Chaos crew right in the thick of it as the undead clamber aboard the Titanic on its infamous maiden voyage. Like all the Black Ops 4 ...
Four intrepid adventurers board the RMS Titanic to pull off a daring heist involving a mysterious artifact. Little do Scarlett Rhodes, Diego Necalli, Bruno Delacroix and Stanton Shaw suspect that a giant iceberg will be the least of their problems… - Voyage of Despair - Welcome to the place of everything Call of Duty maps, every map from every game can be found here and will continue to be ...
The Voyage of Despair is a new Black Ops 4 Zombies map that's set on the fateful R.M.S. Titanic. Like previous iterations, this zombies map features a machine called the Pack-a-Punch which ...
The Titanic is a massive ship, but the Voyage of Despair has accurately depicted it as one with an assortment of tight, complicated spaces that zombies will have no problem getting the jump on you ...
THE ULTIMATE FULL BLACK OPS 4 ZOMBIES VOYAGE OF DESPAIR EASTER EGG GUIDE (TUTORIAL WALKTHROUGH)!!No nonsense, easy guide to get the Voyage of Despair Easter ...
Voyage of Despair introduces the new Black Ops 4 characters of Scarlett Rhodes, Diego Necalli, Bruno Delacroix and Stanton Shaw. Set on the historical ship the RMS Titanic, after an attempt to steal an ancient artefact goes wrong, players are left to survive in a giant map that's full of twisted corridors, cramped areas and verticality. ...
Iceberg? Spoiler Alert: It was Zombies.Watch the first look at Voyage of Despair, an all-new Zombies experience in Call of Duty®: Black Ops 4Call of Duty®: B...
Voyage of Despair is a Zombies map in Call of Duty Black Ops 4, based on the RMS Titanic ship and like the majority of the Zombies maps, comes with its own Easter Egg for you to solve. The Easter ...
Voyage of Despair - Complete Map (with location names, part spawns, and more) No wonder it's so easy to get lost - 9 levels! For the Easter egg, I can see this being helpful, but it's honestly easier to learn a map by just playing it than referring to an image like this every single time you get lost. Remember when it was like 4 perks a ...
Voyage of Despair is one of the three zombies maps featured in Call of Duty Black Ops 4.You are tasked with hunting down an artifact aboard the RMS Titanic, and in typical Zombies fashion things ...
Here's how to get it. To get the Sentinel Artifact in Black Ops 4's Voyage of Despair you will first need to make your way to the bow of the ship, which is opposite of your starting location ...
Black Ops 4 - Zombies - Voyage of Despair Easter Egg
PA8620. ADMIN MOD. If you haven't yet, check out Voyage of Despair on COD Black Ops 4. It's a zombies map on the Titanic. It's not perfect or anything, but the level of detail and the amount of area covered on the ship is pretty impressive. You can go throughout the ship, from the grand staircase to the front and end of the ship to the ...
Meanwhile, Starship Titanic has not only avoided the dustbin of video game history; replays now offer a new and emotional experience thanks to the fundamental humanity and joy within every aspect ...
"Titanic: An Immersive Voyage", la mostra dedicata al grande transatlantico "Titanic: An Immersive Voyage", la mostra dedicata al grande transatlantico. Exhibition Hub Art Center Scalo Farini. dal 03 set 2024 al 14 feb 2025 Rivivere luoghi e vicende, scoprire nomi ed emozioni, svelare aneddoti e segreti: sono i contenuti dell ...