

How to De-Winterize Your Travel Trailer (RV Checklist)
Are you ready to take on the camping season? Before hitting the road, it’s important that you de-winterize your travel trailer. To ensure you don’t miss a beat, we’ve created an extensive de-winterize travel trailer checklist:
How to De-winterize Your Travel Trailer:
- Charge and Re-install All Batteries
- Check the Tires. During winter storage, an RV’s tires will lose about two to three psi of air pressure for every month or inactivity. Also, check depth of the tire tread
- Check the Exterior for cracks, broken seals, and exterior lights
- Flush the Freshwater System of All Antifreeze
- Sanitize the Freshwater System
But that’s just a quick glimpse!
So below, we’ll go through all the necessary steps for a safe and successful camping season. From checking propane tanks and water lines to draining plugs and inspecting batteries, our de-winterize travel trailer checklist has got everything covered.
So don’t delay – get started now with these most important steps so you can hit the open road in no time.
Table of Contents:
De-winterizing the exterior of an rv, de-winterizing the propane system of an rv, de-winterizing the freshwater system of an rv, check all rv batteries after winterization, what should i remove from the rv for winter, when should you de-winterize a travel trailer.
- How do you sanitize a camper water system after Dewinterizing?
Do you have to de-winterize an RV?

When de-winterizing your RV for the spring and summer, it’s a good idea to inspect the exterior of your vehicle.
This includes checking for any signs of damage from winter weather or animals that may have nested in the vehicle while not in use. Start by looking over all surfaces of your RV, including windows, walls, roof, and tires.
Check for any cracks or holes that could cause a leak or other issues during travel.
Next, check all tire pressure levels to ensure they are properly inflated and safe to drive on. Tires can deflate during cold temperatures so make sure they are filled with air before hitting the road again.
Inspect each tire individually as well as tread depth – if you notice uneven wear patterns this may indicate an alignment issue which should be addressed prior to driving long distances with your RV.
If you have a spare tire, don’t forget about those also!
Tire covers are a great thing to consider for your RV during the downtime in winter as they can protect your RV’s tires from sun, rain, snow, sleet, and cold. They are surprisingly easy to put on and are fairly inexpensive.
Click that link to read all about them on my site.
To maintain the aesthetic appeal of your RV, use a soft brush such as an old toothbrush and a gentle cleaner like dish soap mixed with warm water to clean off any dirt or debris that has accumulated on its exterior.
Use a gentle cleaner like dish soap mixed with warm water along with a soft brush such as an old toothbrush – avoid using anything abrasive which could scratch paintwork or decals on the side of your trailer. Make sure you rinse off completely after cleaning too so there is no residue left behind.
Gently scrub away any accumulated dirt and debris on the exterior of your RV with a soft brush such as an old toothbrush, taking care not to damage paintwork or decals.
Use a gentle cleaner such as dish soap mixed with warm water along with a soft brush like an old toothbrush – avoid using anything abrasive which could scratch paintwork or decals on the side of your trailer. Make sure to rinse off completely after cleaning so there is no residue left behind.
After thoroughly inspecting the exterior of your RV for any damage or wear and tear, you can now proceed to de-winterize it. Moving on to the propane system of an RV, it is important that all components are properly checked before use.

Propane systems are essential for many RV owners, providing the fuel needed to power appliances and heaters. After a long winter, it’s important to de-winterize your propane system before you hit the road. Here’s what you need to do:
Check Propane Tanks:
Start by inspecting your propane tanks for any signs of damage or leaks. Ensure all valves are firmly shut and the container is still tightly sealed. Inspect the tanks for any flaws, and if found, get them substituted quickly before reuse.
Test Connections:
Once you have checked the tanks themselves, test all of their connections with a soapy water solution or leak detector spray. This will help identify any potential leaks in the lines between your tank and other components such as hoses or regulators. If there is a leak present, make sure it gets fixed immediately before turning on your propane system again.
Replace Components if Necessary:
In some cases, parts may need to be replaced due to age or wear and tear from being exposed to cold temperatures during winter storage periods. Check things like hoses, regulators, and other components for cracks or tears in order to ensure they can safely hold pressure when used again this season.
Check Gas Lines & Valves:
Lastly, inspect gas lines throughout your RV for any signs of corrosion or blockages which could prevent the proper flow of gas through them when turned on later down the line – literally. Make sure that all valves along these lines are functioning correctly too; otherwise, you might find yourself stuck without hot water until they’re repaired.
Essential measures should be undertaken to de-winterize an RV’s propane system in order to guarantee secure and proficient functioning. Next, we will look at how to properly de-winterize the freshwater system of an RV.
Once you’re done checking, test all LP gas appliances by lighting the burners and ensuring everything is working normally. Your refrigerator also likely runs on propane, so also check to make sure the fridge is starting to get cold .

De-winterizing the RV water system is a vital step in preparing for your next camping adventure.
The first step in the de-winterizing process is draining and flushing all non-toxic RV antifreeze from the RV’s fresh water tank, system, and RV water lines, including connections to your hot water heater as well as other fixtures.
If you removed the water filter when winterizing, make sure that gets put back in place.
The step-by-step process is:
- Connect your trailer’s water intake to a garden hose (at your house or campground)
- Turn on the water at the spigot
- Turn on every faucet in the camper including the shower (both hot and cold water in case there is lingering antifreeze in the hot water heater tank)
- Let the water run until totally clear
- Turn off the water at the spigot
- Turn on the water pump
- Repeat the procedure to eliminate any antifreeze in the freshwater tank
This process will fill up your holding tanks, so ideally have that connected at a dump station or campground or have a plan to dump it soon.
If you aren’t able to connect to a water source, this process will still work with a full fresh water tank in conjunction with the water pump.
The last step in de-winterizing is checking all valves associated with the freshwater system to ensure they are opened correctly and do not leak when pressurized.
This can be done by turning each valve handle several times clockwise until tight then back off slightly counterclockwise – if done properly these should remain open without having to constantly adjust them manually every time you want fresh water flowing into your RV.
Lastly, test out all faucets and shower (including an outside shower if you have one) within reach to make sure everything is working properly before hitting those dusty trails once more.
To ensure the freshwater system of your RV is de-winterized properly, be sure to follow all steps in this checklist. Moving on, it’s important to check all batteries after winterization for optimal performance and safety.
It is essential to check all RV batteries after winterization.
Verify that the batteries have been adequately charged to guard against destruction or erosion during storage. Connectors should be cleaned and tightened, while battery fluid levels should also be checked and topped off if necessary with distilled water.
If possible, it’s best to use a battery tester/charger like this one on Amazon when checking the voltage of each battery in order to get an accurate reading. Anything lower than 12 volts indicates that the battery needs charging before being put back into service. If your RV has two or more batteries connected together in parallel, they should both read at least 12 volts when tested individually with a multimeter.
That tester is good for regular as well as deep-cycle batteries, lead-acid batteries, as well as both 6-volt, and 12-volt systems.
You can also test for resistance between terminals using an ohmmeter or continuity tester; anything higher than 0 ohms indicates a good connection between terminals and proper electrical flow through the cables connecting them.
Additionally, you may want to inspect the case of each battery for signs of wear such as cracks or bulges which could indicate internal damage due to overcharging or other issues caused by improper maintenance during winterization procedures.
Frequently Asked Questions
Before winterizing your RV , it is important to remove all food and perishables.
All water tanks should be drained and cleaned with a bleach solution. Remove any batteries from the RV and store them in a warm location. Cover windows, vents, air conditioners, and other openings with plastic or foam insulation to protect against cold temperatures.
Finally, inspect all hoses for cracks or leaks before storing away until springtime. Taking these steps will ensure your RV is properly winterized and ready for the next camping season.
It is important to de-winterize a travel trailer as soon as the weather begins to warm up. In Texas where I live, that would be early March. But if you live in Chicago, that may be too soon.
Here’s a handy chart showing the date of the last freeze regionally around the US:
This will help prevent damage from freezing temperatures and ensure that all systems are functioning properly before taking it out on the road. To de-winterize, start by draining any antifreeze or water left in the system, then flush out fresh water until it runs clear.
Next, inspect all hoses and fittings for cracks or other damage and replace them if necessary. Finally, fill with fresh potable water and check for leaks at each connection point. Taking these steps now can save you time and money later.
How do you sanitize a camper water system after de-winterizing?
To sanitize a camper water system after de-winterizing, it is important to first flush the entire system with fresh water.
Add a quarter cup of bleach for every 15 gallons of tank capacity and fill the tank with fresh water, then proceed to turn on all faucets until chlorine is detectable.
Turn on all faucets until you smell chlorine at each outlet, then let sit for 12 hours before draining and refilling with clean potable water. Lastly, run all faucets again to ensure that any remaining traces of bleach have been flushed out completely. Following these steps will help keep your camper’s drinking water safe and free from contaminants.
Yes, IF you added biodegradable antifreeze to your trailer’s freshwater system, de-winterizing an RV is a necessary step before taking it out for the first time in the season.
Now if you live somewhere mild like Florida, adding antifreeze isn’t likely necessary, in which case you may not need to do much of anything.
But for most of us, this process involves flushing antifreeze from the water lines and draining tanks to ensure that all systems are working properly. Inspecting and replacing any components or accessories that may have been harmed during storage should be carried out, if necessary.
Following these steps will help ensure safe travels throughout your camping adventure.
Today we looked at all the crucial things you must do to get your RV ready after having winterized it during the colder months. From batteries to the fresh water system, to interior and exterior checks, we covered it all.
After following this step-by-step guide, you are now ready to enjoy your RV during the camping season.
Before embarking on your journey, ensure that there are no water leaks or other potential issues present in the RV. Ensure all is in good working order to guarantee a secure and delightful excursion with companions and family.
It’s also a good idea to check and maybe replace batteries in a smoke alarm if your trailer has one.
DSC09424 by Adventures On Wheels and IMG_0081 by JBLM MWR is licensed under CC2.0 and may be cropped, edited, and/or had a text overlay added. Still frame taken from video How to Winterize an RV + What Tools & Supplies You Need | RV DIY by RVLove | Marc & Julie Bennett , also licensed under CC2.0 and may be cropped, edited, and/or had a text overlay added.
Middle Class Dad is a participant in the Amazon Services LLC Associates Program, an affiliate advertising program designed to provide a means for sites to earn advertising fees by advertising and linking to Amazon.com. As an Amazon Associate, I may earn a small commission from qualifying purchases if you click to Amazon from my site and choose to make a purchase. This is no way increases the cost to you.
Jeff Campbell
Jeff Campbell travels on and off with his 3 daughters in a Newmar Baystar Class A Motorhome. He writes extensively on both RVs, campgrounds, parenting on the road tips, remote learning & schooling, and much more! Click Here to learn more about me. Click Here to learn more about my site. Editorial Policies.
Leave a Reply Cancel reply
Your email address will not be published. Required fields are marked *
Save my name and email in this browser for the next time I comment.
Recent Posts
RV vs Regular Toilet Paper: Key Differences
When it comes to choosing the right toilet paper for your recreational vehicle (RV), there are some important considerations to keep in mind. But what's the difference between RV toilet paper and...
Essential Family Camping Gear 2024 Must-Haves
When it comes to family camping, having the right gear can make all the difference in creating lasting memories and enjoying the great outdoors. Whether you're planning a weekend getaway or a longer...
Home » Guides » How To Dewinterize A Travel Trailer
How To Dewinterize A Travel Trailer

- Last Updated: Apr 10, 2024
If you’re like most people, the colder weather means it’s time to put your travel trailer away for the winter. But if you neglect to de-winterize your trailer, you could be in for some big problems when you finally try to use it again. In this blog post, we’ll show you how to de-winterize a travel trailer so that it’s ready for use when the warmer weather arrives.

When Should You Dewinterize Your Travel Trailer?
It’s that time of year again! The weather is getting warmer and the days are getting longer, which can only mean one thing: it’s time to start thinking about taking your travel trailer out of storage. But before you hit the open road, there’s one important task you need to take care of first: de-winterizing your travel trailer.
So when is the best time to de-winterize your travel trailer? Generally speaking, it’s best to do it as early as possible in the spring. This gives you plenty of time to check for any damage that may have occurred over the winter months and to make any necessary repairs. It also gives you a chance to give your travel trailer a good cleaning before hitting the road.
Of course, every travel trailer is different, so be sure to consult your owner’s manual for specific instructions on how to de-winterize your particular model. But in general, the process involves draining all the water from the system, then flushing it with fresh water and antifreeze. Once that’s done, you should be good to go for another season of adventure!
Checklist To De-winterize Your Trailer :
To help you get started, here is a checklist of things to do when you are de-winterizing your trailer:
Inspect The Tires And Check The Tread Depth
Before you hit the road this spring, it’s important to make sure your trailer is ready for the journey ahead. One of the most important steps in de-winterizing your trailer is to inspect the tires and check the tread depth. Temperature changes can cause tires to lose air pressure, and low tread depth can make it difficult to maintain control on wet roads.
By taking a few minutes to check your tires, you can help ensure a safe and enjoyable trip. In addition to checking the tires , you should also take a close look at the brakes and suspension. If you notice any problems, it’s best to have them fixed before hitting the road. De-winterizing your trailer may seem like a lot of work, but it’s worth it when you consider the alternative.
Check All Of The Lights And Signal Lamps
One important task is to check all of the lights and signal lamps. These are essential for safety, so you want to be sure they are in good working order before hitting the open road. Checking the lights is a simple process: just turn them on and make sure they are bright and visible from all angles.
If any of the bulbs are burned out, be sure to replace them. Once you’ve checked the lights, it’s also a good idea to test the RV’s horn to ensure it is working properly. With these simple checks, you can help ensure a safe and enjoyable RVing season. After spending months in storage, it’s not uncommon for bulbs to burn out or connections to become corroded.
Taking a few minutes to check these items will ensure that you’re visible to other drivers and avoid any potential accidents. So before you head out on your first trip of the season, be sure to give your lights a quick once-over.

Test The Brakes
Brakes can wear down over time, and they may not work as well in cold weather. That’s why it’s a good idea to test the brakes before you head out on your first trip of the season. Here are a few tips:
- Park your RV or trailer on level ground and set the parking brake.
- Apply pressure to the brake pedal and hold it for a few seconds. If the pedal sinks to the floor, there may be a problem with the brakes.
- With the engine off, pump the brakes a few times to build up pressure. Then start the engine and apply pressure to the brake pedal again. If the pedal sinks, there may be an issue with the brake fluid or other components.
If you have any concerns about your brakes, it’s best to take your RV or trailer to a qualified mechanic for inspection. By taking care of maintenance items like this, you can help ensure that your travels are safe and enjoyable all season long.
Check All Of The Fluid Levels In The Trailer
Checking the fluid levels in your trailer is a crucial part of maintaining it. The brakes and bearings are two areas that need regular maintenance, and both require different types of fluids. The brakes use hydraulic fluid, while the bearings need grease.
You should check the level of each type of fluid regularly, and top them off as needed. If you’re not sure how to do this, consult the owner’s manual for your trailer. By taking the time to keep an eye on the fluid levels, you can help ensure that your trailer remains in good working order.
Lubricate The Moving Parts
Any experienced camper knows that regular maintenance is essential to keeping your trailer in good condition. One important task is to lubricate the moving parts, such as the hitch, jack, and door hinges. This will help to prevent rust and keep the parts moving smoothly. In addition, it’s a good idea to inspect the tires and brakes before each trip.
Once you have completed this checklist, your trailer should be ready for another season of adventures. However, if the parts are already showing signs of wear, it is important to take them to a qualified mechanic for repair or replacement. By taking these simple steps, you can help to prolong the life of your trailer and keep it running smoothly for many years to come.
Winter is coming to an end and it’s time to start thinking about de-winterizing your travel trailer. If you don’t take the necessary precautions, you could find yourself in a world of trouble when it comes time to hit the open road again. This post outlines the steps you need to take to properly de-winterize your travel trailer so that everything is ready for summer adventures.
Other Popular Posts:
What Size Generator For A Travel Trailer
How To Winterize A Travel Trailer (Step by Step Guide)
How To Jack Up A Travel Trailer: The Ultimate Guide

Leave a Comment Cancel reply
Recently published guides.

Buying a Generator for RV Life

RV Refrigerators: How Do They Work?

How to Repair Norcold Fridge Flap
- Find a Location
How To Dewinterize Your RV

Do this early to allow time to schedule any necessary maintenance before it’s time to embark on your spring camping trip.
Take time to inspect your fire safety systems . Ensure the carbon monoxide detector, smoke alarm , LP detector, and fire extinguishers are all in working order. Consult the manuals for each device for testing and inspection criteria.
Service the Major RV Systems
Your next step when learning how to dewinterize your RV is inspecting the major systems:
- Electrical System
- Propane System
- Tire Condition
Technician Tip: The checks below will help you perform a basic walkthrough of your RV each spring. But even if each appliance and system appears to function, it may not be performing at its best.
Your 12-volt DC and 120-volt AC electrical, LP gas, and RV water systems should be professionally tested before each new season of use. These tests are complex and require specialized tools. This is NOT a DIY task.
Camping World offers specials on these important preseason tests.
Electrical System Checks
These basic electrical system checks can be performed without expensive tools when you dewinterize your RV. If you’re having any electrical issues, we highly recommend contacting an RV service center to have the system diagnosed.
- Visually inspect all battery connections. If the terminals are corroded, be sure the shore power is disconnected, and you wear safety goggles and latex gloves when cleaning them off.
- Charge your RV batteries and battery fluid levels. Charge the battery and/or add distilled water as needed.
- Check your generator’s air filter (if equipped) for nests and ensure it doesn’t need to be replaced.
- Prime your generator. Generator manufacturers recommend running the unit for a specific amount of time to warm up and for a specific amount of time under load, even when it is not being used. This will keep oil in the top end to prevent dry starts and fresh fuel in the carburetor, pump, and fuel lines. Please perform this simple task to avoid fouling the carburetor and/or pump and dry rotting the fuel lines.
- Run your generator to operating temperature, shut it off, and then check the oil level .
- Test all appliances on the electric setting.
Propane System Checks
Your RV’s propane system delivers fuel to your propane-burning appliances that keep the interior warm, heat your water for dishes or showering, or allow you to cook a hot meal. Here’s how to check your propane system to dewinterize your RV:
- Ensure all propane appliances are turned off (furnace, stove, oven, refrigerator, water heater).
- Inspect the water heater, refrigerator, and furnace from the RV’s exterior with a flashlight. Remove debris from burner tubes and look for insect nests in the intake/exhaust tubes. Blow out with compressed air if available.
- Inspect your propane lines to be sure the seals and hoses aren’t cracked.
- Check propane levels. Refill your LP container(s) to 80% of full capacity.
- If everything looks okay, open the valve on the container(s) all the way . You can check for leaks by using a soapy water solution around the valves and looking for bubbles.
- Test all propane appliances to setpoint multiple times if possible. Each appliance will cycle on and off based on thermostat settings. Allow them to run through a few cycles to be sure they will not fail on your first camping trip. Don’t just turn them on and presume they are fine after a few seconds.
- Check your carbon monoxide detector and propane safety alarm . Consult the owner’s manual for each device for proper testing criteria.
RV Tire Checks
If you’re just learning how to dewinterize your RV, don’t overlook your RV tires. They’re the foundation of your trailer or motorhome and their condition is essential to ensuring your safety during the upcoming camping season. Here’s how to check your RV tire’s condition:
- Check your RV tires (and the spare) for proper inflation when they are cold (i.e. have been sitting for at least three hours.
- Inflate tires to the recommended tire pressure (PSI) from your RV’s manufacturer rather than the tire manufacturer, as that recommendation is based on your unit’s weight and cargo carrying capacity (CCC).
- Inspect each tire for cracks, cuts, scrapes, bulges, or bumps along the sidewall. Anything suspicious warrants a trip to your service center for a professional opinion.
- Check the tread depth for each tire. A minimum of 4/32” is recommended for safe RV travel. Tires with tread depth less than 4/32” will provide poor traction in rain, snow, mud, or other slippery conditions.
- Repack wheel bearings. This should be done annually.
Study up on everything you need to know about RV and trailer tires . If your tires need replacement, set up an appointment to install new tires.
Dewinterize Your Fresh Water System and Holding Tanks
If you use non-toxic RV antifreeze to winterize your fresh water system, you’ll need to drain and flush it from the plumbing system. Do this with the following steps:
- If removed, re-insert the low-point drain caps or plugs.
- Put the anode rod (Suburban water heaters) or drain plug (Atwood water heaters) back in. If your anode rod wasn’t removed, replace it now.
- Repressurize the water system using either a hose or filling the fresh water tank and turning on the water pump.
- Open faucets, showerheads (indoor and outdoor), and the toilet to flush out the antifreeze in the system.
- Turn off the water pressure, remove the low-point drain caps, and turn the water pressure back on to flush out the remaining antifreeze from the water lines.
- Turn off the water pressure and replace the low-point drain caps.
- Change the valves on the water heater bypass to “use” mode. This means closing the bypass valve and opening the hot and cold valves.
- Check the operation of your water pump and city water hook-up and test all valves, including faucets, outside shower, and toilet.
After draining and flushing the system, it should be sanitized with a proper bleach dilution or a solution like Aqua Pure. Follow the instructions on the container, but you can also consult the video above.
Inspect Your RV’s Interior and Restock the Essentials
Don’t forget the RV essentials when learning how to dewinterize your RV. These supplies are vital for enjoyable camping trips and these checks will help you avoid uncomfortable surprises on your first RV shakedown trip of the season:
- Thoroughly clean the interior from ceiling to floor, using only RV-safe interior cleaning products .
- Drain dehumidifiers (or replace disposables), if applicable.
- Check inside cabinets and under sinks for signs of pests or rodents. If you discover signs, find the source and use insect and rodent-repellent solutions before adding any new food items to the pantry.
- Check the water filtration system and install new filter media. Never reuse filters from a previous season, as they may have been contaminated.
- Go through your camping supplies and restock the essentials .
Inspect and Wash Your RV’s Exterior
Now it’s time to inspect your RV’s exterior before you give it a thorough cleaning. You want your RV to look good just as much as you want all the systems to function as expected for your spring camping trip. Here’s a checklist for inspecting and cleaning your RV’s exterior:
- Perform a thorough RV walkaround . Look at the condition of windows, window seals, paint, latches, doors, door seals, compartments, and all exterior components.
- Climb up safely and inspect the roof . Look at seams along the edges and around all roof vents, antennas, A/C units, etc.
- If you find any cracks in the caulking or missing sealant, remove the old sealant and replace it.
- Wash your RV from roof to tires using a soft bristle brush and an RV-friendly exterior cleaner . Don’t forget the awnings. They are exposed to all weather conditions and rarely see sunlight on their underside, making them prone to mildew.
- Rinse well and dry completely. Leave awnings extended for a few hours to dry fully before retracting. Using a soft towel to dry windows will help to prevent spots.
Don’t Want to Dewinterize Your RV Yourself?
Take the time to run these checks and perform necessary maintenance, so your spring camping season is a success. Then, all you’ll need to do is pick a location and head out for an epic spring break RV vacation .
But if you don’t have time to dewinterize your RV yourself, reach out to your local Camping World Service Center . Our trained technicians are happy to help you get your RV prepped for another exciting season of RV adventures.
Now that you’ve learned how to dewinterize your RV and where you can have it done for you, here are a few more resources to help you plan your spring camping trip:
- RV Spring Break Destinations for Families
- RV Spring Cleaning Tips
- RV Safety Tips for Spring and Summer Storms
Do you have any questions about RV de-winterization? Let us know in the comments below!
- Comment (11)

Where is the hot water heater by pass valve located in a 2024 Mallard 210rb?
The bypass valve should be located on the cold water inlet of your water heater. But depending on the plumbing design in your unit, you have multiple valves on the plumbing entering and exiting your water heater (usually one on the cold water inlet and one on the hot water outlet).
Let us know if you have any follow up questions!

How do you hook up your 50 Amp to a regular house plug (120)
You’ll need the appropriate power adapter, but you should be cautious that you won’t enjoy full use of a 50 amp RV as intended when plugged into a 120-volt AC outlet, just like you wouldn’t if using an adapter to connect to a 30-amp outlet. This means restricting the use of high-draw appliances like your air conditioner and microwave.
That said, you can search for a compatible power adapter here: https://www.campingworld.com/outside-rv/outdoor-electrical/electrical-hardware/electrical-adapters

How much does it cost for Camping World to dewinterize your travel trailer?
You’ll need to contact your local Service Center for a quote on this service. Here’s where you can find the location closest to you and find their contact info: https://rv.campingworld.com/rv-service-maintenance#js-anchor-locations

No shower since 7/5/21? Wow, glad I am not around you! Please stay down wind.

The video is not quite chronologically correct. You’ll want to flush all the anti-freeze through the faucets “before” turning the by-pass valves to regular use otherwise you end up with a bunch of anti-freeze in the hot water tank.

10 mins after my hot shower i turned on the hot water in my bathroom sink and no water came out!! But i have cold flow on cold side!! We have checked the bypass valves they are closed, we have drained water heater and refilled, water enters the tank of the water heater but idk if its flowing out cuz no water will come from any faucet in the camper!! Please help its been 2 days and i really want a warm shower
You are indeed correct on that order. The water heater bypass valves should remain closed until the pink RV antifreeze has been rinsed out.
Thanks for noting that!

Check for a blocked shower head.
Leave Your Comment Cancel Reply
Save my name, email, and website in this browser for the next time I comment.
Shop By RV Type

Your Adventure Awaits
Copyright © 2023 cwi, llc all rights reserved.
- RV Glossary |
- Privacy Policy |
- California Privacy Rights |
- Do Not Sell or Share My Personal Information |
- Targeted Advertising Opt Out |
- Terms of Use
How To De-Winterize A Travel Trailer
With the upcoming warmer weather, you’ll have more time to indulge in a travel trailer experience. As an RVer who loves spending time traveling to your favorite spots, you need to get your travel trailer ready.
Take it out from your storage, get ready to perform its maintenance, and head out for the camping trip during the spring season.
If you don’t know how to de-winterize a travel trailer, consider the factors mentioned in this guide.
Table of Contents
Check Your Tires
When you store the RV for a longer duration, the tires start losing their air pressure to around 2-3 psi during a month. So, if you stored them for six months, you need to refill them.
Apart from that, if you stored the RV in a cold area or an outer area, the tires might be extremely deflated when you check it out for the spring season.
If you take a risk and drive the travel trailer with underinflated tires, you might end up with uneven wear and tear, poor handling, blowout, and ultimately an accident.
Invest in a tire pressure gauge to check air pressure within RV tires plus the spare tire. Reinflate all your tires based on the recommended load. You can check the user manual for correct tire pressure. If your tires are completely worn out, you may purchase RV tires during the start of the season.
Inspect the Exterior
Before you plan to start your trip, you must also check the RV’s exterior, as it helps you find any damages, cracks, or leaks. Identify weather stripping around doors, windows, and others. Plus, replace the peeled or cracked roof sealants . Make sure to check slide-out, roof plus body seams, and then replace them with new seals.
If your RV was stored outdoors, check water damage or roof because snow accumulation can cause structural damage causing cracked seams.
If you own a towable camper, inspect hitch components to identify damage and rust. Then, replace all damaged parts, so you don’t face any bad experiences during the trip.
Charge and Reinstall your Batteries
Batteries are the essential components of RV travel trailers. You can never overlook them. Similar to RV tires, RV batteries also lose their charging because of internal leakage.
Periodic checking of the RV batteries is a must even if you store the RV and take it out during the season. If you keep your batteries charged at times of storage, this expands the RV battery’s lifespan and helps you get ready for the trip.
Before you start up with the trip, make sure to check the battery charging with a voltmeter. The RV should not be connected with any electricity as it might lead to a false reading. Usually, full battery charging shows 12 volts or above. If it’s below 12, you need to charge it before taking it out for a trip.
For charging the RV batteries, make sure to attach the RV battery to the charger while keeping it off. Then turn the battery charger on and let your battery charge completely. Based on the battery size, you need to charge it for a few days and a few hours.
Once the battery is ultimately charged, check its water level, then add the correct amount of distilled water. If you see the water below its plates, add some to reach the point before charging the battery.
When you reinstall the RV battery, make sure to connect it securely. You can also take help from a professional RV maintenance service.
Flush your Water System
When de-winterizing a travel trailer, flushing the water system is a crucial system. When traveling, you believe in using clean water for washing, cleaning, cooking, showering, or drinking.
During winters, you must have added the non-toxic antifreeze RV solution that prevents freezing of water pipes. When going out in spring, you need to flush off the antifreeze from your RV’s plumbing system making your water clean for use.
If you placed the antifreeze within the freshwater holding tank in winters, you need to drain your tank completely. Next, add potable water within the freshwater holding tank and follow these steps for flushing antifreeze.
- Make sure to turn on your water pump.
- Next, open the water faucets like showers or sinks.
- Make sure that the water runs from the entire system for a few minutes.
- When the RV pump runs, flush your toilet for some time.
- Once your water seems clean, you can turn off the pump and close all faucets.
- Make sure to switch the water heater from bypass mode. If you forgot to place your water heater in a bypass mode during winters, you need to drain antifreeze from your water heater tank, collect it for disposal.
- Replace the water filter cartridges which you removed at times of storage.
- Dump the black and gray water holding tanks on the official dumpsite.
Sanitize your Water System
Another essential step at times of de-winterizing the travel trailer, you need to sanitize the water system. Even if you avoided using antifreeze for the plumbing system, sanitize the water lines. This step is essential for getting rid of all molds and bacteria that might grow in water pipes at storage times.
To sanitize the water system, you need to follow these simple measures
- Close the drains and make sure to install durian plugs.
- Make sure to measure a 1/4th cup of bleaching agent for 15 gallons the freshwater tank holds.
- Now pour bleach in a 1-gallon container, next fill it using water.
- Now add this mixture with a freshwater holding tank.
- Fill this tank using potable water.
- Now turn on all the water faucets and pumps.
- Make sure to run the water till the time this smell is gone.
- Make sure that this solution suits for around 12 hours within the waterline and water tank.
- Drain the entire water from your RV’s system.
- Next, refill the entire freshwater tank using potable water.
- Now flush the system after turning the water pump and open all faucets.
- Make sure that the water runs till there is no bleaching smell.
Check the Engine
Now check the RV engine, check the entire engine fluid levels, and ensure the controls and lights are operational. Make sure to check fluid levels, power steering, brake fluid, engine oil, transmission, engine coolant, and windshield washer fluid. If you find any low levels, keep them on point to have an ultimate RV traveling experience.
Once you are done checking engine fluid levels, start your engine. Check readings over gauges and check the headlights, dash lights, windshield wipers, and taillights.
Apart from these steps, check leaky pipes, replace your propane tanks, check the propane appliances, test all 120-volt appliances, RV generator, replace filters, and check all safety devices, windows, and air vents. Apart from mechanical things, stock first aid, emergency supplies with updated insurance and registration.
How do you flush antifreeze out of a camper?
For flushing antifreeze out of a camper, you can turn on the water pump, open all water faucets, and water will run in the entire system. When your RV water pump is running, flush the toilet for a specific time.
Once the water is clean, turn off your pump and close the faucets. You also need to switch the water heater from bypass mode and drain antifreeze. Next, you need to replace the water filter cartridge and dump black and gray water holding tanks.
How much does it cost to winterize an RV?
Winterizing an RV travel trailer is a straightforward process where you can save a lot if you know all measures. The cost for processing varies between $10 or under.
More about winterizing an RV read here .
Can I dump RV antifreeze on the ground?
As the RV antifreeze is flammable, it’s best to avoid dumping this antifreeze in the ground. Ethanol and propylene are non-toxic, but they can result in a bad smell or taste. This can lead to drying out of the rubber plumbing seals leading to leaks. Again, these are flammable, so it’s best to avoid dumping them in the ground.
How much antifreeze do you need to winterize a travel trailer?
The amount of antifreeze varies based on the vehicle size and the waterline length. Usually, you need 2-3 gallons of propylene glycol antifreeze. However, if you don’t plan to bypass the water heater, you need six extra gallons of the antifreeze.
Can you put bleach in RV black water tank?
Bleach kills odor-causing bacteria within black water tanks, but adding extra chlorine can damage RV gaskets and seals. However, using diluted non-chlorine or chlorine bleach like hydrogen peroxide is safe in RV black water tanks.
Besides, you can add safer options for cleaning black water tanks like dishwashing detergents, enzyme formulas, yeast, and baking soda.
Once you are done following the RV travel trailer winterizing tips, you can end up coming to your favorite spot in the upcoming season.
Apart from following these tips, keep the exterior neat, check critters, clean air conditioners and fans, wash screens and windows, change all towels and linens then vacuum.
Have fun at your next travel trailer experience.

I`m a current Law Enforcement Officer working within the Counterterrorism Bureau in New York State. I have been Camping for over 20 years. My styles of camping include tent, car, truck, van, and RV travel trailer. I have a YouTube channel where I teach all types of camping with an entertaining method: https://youtube.com/@TheSmallsRVAdventures
Similar Posts

How To Charge An RV Battery From A Tow Vehicle
RV batteries are heavy, large, and relatively new. If you own an RV and you need to move it, you may not have the tools to do so without the help of a tow vehicle. Most tow vehicles don’t have the capability to fully charge an RV battery. How To Charge An RV Battery From…

19 Best Camper Trailer Kitchens
RVs are available in all shapes and sizes, and a few are smaller than others. Finally, owning an RV is 1 strategy for having the ability to downshift how you live relatively easily and quickly. If your RV did not have a roof mounted vent fan, you can get this be a important upgrade. Most…

Cherokee Grey Wolf Problems: 2023 Easy Solutions Guide
You have probably encountered Cherokee Grey Wolf Problems if you’re an outdoors person who would prefer RV camping over sleeping in a tent. This camping vehicle from Forest River has innovative features similar to Arctic Fox with a great interior. Let’s look at the ultimate guide with problems and quick-fix measures that can save you from frequent repair shop visits. Cherokee Grey Wolf…

4 Most Used RV Cable TV Wiring Diagram for Better Experience
A lot of people are confused when installing their Cable TV in an RV. Fortunately, for help comes the RV Cable TV wiring diagram. Read on to learn how to connect Cable TV to your RV, how to check if its TV antenna is wired, and 4 of the most used Wiring Diagrams. Without further…

Dynamax Isata 5 Problems: 2023 Easy Troubleshooting Guide
Have you reached this guide while searching for solutions to Dynamax Isata 5 problems? If yes, then I have got you covered with the easy-to-follow solutions. This motorhome is known to have sway problems, brake problems, slide-out problems, and coolant leaks in some instances. To help you avoid any further damage, I will discuss ten…

How to Light a Suburban Rv Oven and What to Do When It Does Not Ignite?
So you are ready for your next adventure and looking forward to cooking up some meals along the way. But how do you pilot light that thing up safely? And what happens if it doesn’t light? Well, we’re here to help! In this article, we’ll be walking you through how to light a suburban RV…

How to De-Winterize an RV or Camper: A Step-by-Step Guide
When winter ends and the weather starts to warm up, it’s time to get your RV or camper out of storage and prepare it for the upcoming camping season. One of the most important steps in this process is de winterizing your RV. Knowing how to de winterize an RV typically involves reversing the steps you took to winterize it, which includes flushing out the antifreeze and making sure all the water lines and tanks are clean and ready to use. There is a bit more to it than that though, which we’ll cover in today’s guide.
Inspecting the RV or Camper

Exterior Inspection
Before taking your RV or camper out of storage, it’s important to inspect the exterior for any damage that may have occurred during the winter months.
Start by performing a thorough walkaround of your RV and look at the condition of windows, window seals, paint, latches, doors, door seals, compartments, and all exterior components.
Climb up safely and inspect the roof. Look at seams along the edges and around all roof vents, antennas, A/C units, etc.
Check for any cracks or leaks on the roof. Look for any signs of water damage around the roof vents, skylights, and air conditioning units.
Finally, check the seals around the doors and windows1, and replace any that are worn or damaged.
Finally, check and test all exterior lights to ensure they are working properly, including the headlights, taillights, brake lights, and turn signals. Replace any bulbs that are burned out or not functioning properly.
Interior Inspection
Once the exterior has been inspected, it’s time to move on to the interior. Start by checking the batteries and ensuring they are fully charged. Test the smoke detectors and carbon monoxide detectors to ensure they are working properly.
Next, check the plumbing system for any leaks or damage. Turn on the water pump and check for any leaks under the sink or around the toilet. Check the water heater and ensure it is functioning properly.
Inspect the appliances, including the refrigerator, stove, and microwave, to ensure they are working properly. Check the propane system for any leaks or damage. Finally, inspect the interior for any signs of water damage or pests.
Check Your RV Tires

Before hitting the road after a long winter, it’s important to check your RV’s tires. Over time, tires can lose air pressure, which can lead to uneven wear and even blowouts. Here are some steps to follow when checking your RV tires:
- Check the tire pressure: Use an air inflation gauge to check the pressure of each tire when they are cold. Inflate them to the correct pressure according to the manufacturer’s guidelines.
- Inspect the tires: Look for signs of wear, such as cracks in the sidewalls and worn down treads. If you notice any significant damage, it may be time to replace your tires.
- Check the tread depth: Use a tread depth gauge to check the depth of the tire treads. If the treads are worn down to 2/32 of an inch or less, it’s time to replace the tires.
- Check the age of the tires: Even if your tires look fine, they may still need to be replaced if they are more than six years old. Over time, the rubber can break down and become less reliable, and you don’t want to find that out the hard way while on the road.
By following these steps, you can ensure that your RV tires are in good condition and ready for the road. It’s also a good idea to carry a spare tire and a tire repair kit with you in case you run into any issues on the road.
Here’s a helpful video from RV Education 101 on how to inspect your RV tires:
Charge And Reinstall Your Camper’s Batteries

Most people remove their RV batteries when they store the vehicle for the winter. This practice ensures that the battery maintains a regular temperature and doesn’t freeze during the storage period.
Before reinstalling the battery, ensure that it’s fully charged and topped up with water (if applicable). Check with a multimeter for the minimum reading of 12 volts. You will need your battery hooked up to perform the next steps.
Attach the battery charger to the RV charger while the battery charger is turned off. Turn the battery charger on and allow the battery to fully charge. Depending on the battery size, your RV batteries may need to charge for a few hours or even a few days.
Once the battery is fully charged, reinstall it in your camper. Make sure to connect the terminals correctly and double check the connections and tighten them well.
Refill or Replace Your Propane Tanks

Propane is an essential component of any RV or camper, as it powers the stove, refrigerator, furnace, and water heater. Before using your RV or camper, you need to refill or replace your propane tanks.
If your propane tanks have been sitting idle all winter, it’s crucial to check them for leaks and damage. Inspect the hoses, fittings, and valves for any cracks or signs of wear and tear. If you notice any damage, replace those parts immediately.
When it comes to refilling your propane tanks, you have a few options. You can either refill them at a propane filling station or exchange them for new ones at a propane exchange location.
Refilling your tanks is typically cheaper than exchanging them, but it can take a little more time.
When refilling your propane tanks, make sure to fill them to no more than 80% capacity. Overfilling your tanks can cause them to burst or leak. You should also turn off all propane-powered appliances and pilot lights before refilling your tanks.
It’s important to note that propane tanks have a lifespan of 12 years. If your propane tanks are nearing the end of their lifespan or are due for recertification, it’s best to replace them rather than refill them.
When replacing your propane tanks, make sure to choose the right size for your RV or camper. You can consult your owner’s manual or speak with a professional to determine the appropriate size.
Overall, refilling or replacing your propane tanks is a crucial step in dewinterizing your RV.
Flushing the Water System

Te next step in dewinterizing an RV or camper is to remove the antifreeze and flush the water system .
First, fill the fresh water tank with clean water. Then, turn on the water pump and open all the faucets, including the shower and toilet, until the water runs clear. This can take several minutes.
It’s also a good idea to flush the hot water tank separately. Turn off the water pump and drain the hot water tank. Then, close the drain valve and refill the tank with clean water. Turn the water pump back on and open all the hot water faucets until the water runs clear.
It’s important to note that some RVs and campers may have a built-in water filtration system. If this is the case, it’s still recommended to sanitize the water system after flushing it because the filter may not remove all bacteria or other contaminants.
Check out this video showing the RV water system dewinterization process:
Sanitizing the Water System

After de-winterizing the RV water system, it is important to sanitize it to ensure that it is free of harmful bacteria and other contaminants. Sanitizing the RV water system involves the following steps:
- Fill the fresh water tank with a solution of one-quarter cup of household bleach for every 15 gallons of water.
- Turn on the RV water pump and open all of the faucets (hot and cold) to allow the solution to run through the entire water system.
- Let the solution sit in the water system for at least 12 hours.
- Drain the water system completely and refill the fresh water tank with potable water.
- Run the water through the entire system again, opening all of the faucets (hot and cold), until the bleach smell is gone.
It is important to note that the bleach solution should not be used in the freshwater tank for more than 24 hours, as it can damage the tank. Additionally, the water heater should be turned off during the sanitization process to prevent damage to the heating element.
Once the water system has been sanitized, it is important to regularly maintain it to prevent the growth of harmful bacteria and other contaminants. This can be done by regularly flushing the water system with fresh water and using a water filter to remove impurities.
Check Your Plumbing System For Leaks

Once you’ve drained, flushed, sanitized, and refilled your water system, you should next check for any leaking pipes in your rig.
Turn on the electric water pump and get everything re-pressurized, and wait for the pump to shut off.
Listen for the pump turning back on, and if so, it means you could have a leak somewhere.
Visually inspect under sinks, around the toilet, and anywhere else plumbing runs in your rig to make sure there are no leaks, and address any leaks you find immediately.
Testing the Appliances and Systems
After de-winterizing your RV, it’s important to test all of the appliances and systems to ensure they are in proper working order. This will help you identify any potential problems before you hit the road.
Water Heater
The water heater is an important component of your RV, especially if you plan on using hot water during your travels. To test the water heater, turn it on and let it run for a few minutes. Check the temperature of the water to make sure it’s heating properly. You should also check for any leaks around the water heater.
The furnace is another important part of your RV, especially if you plan on traveling in colder weather. To test the furnace, turn it on and let it run for a few minutes. Check to make sure it’s blowing warm air and that the temperature is adjusting properly. You should also check for any unusual noises or smells.
Air Conditioner
The air conditioner is essential for keeping your RV cool during hot weather. To test the air conditioner, turn it on and let it run for a few minutes. Check to make sure it’s blowing cold air and that the temperature is adjusting properly. You should also check for any unusual noises or smells.
Refrigerator
The refrigerator is important for keeping your food and beverages cold during your travels. To test the refrigerator, turn it on and let it run for a few hours. Check to make sure it’s cooling properly and that the temperature is adjusting as needed. You should also check for any leaks, smells (like ammonia ) or unusual noises.
By testing these appliances and systems, you can ensure that your RV is ready for your next adventure. If you notice any problems, it’s important to address them before hitting the road.
Test Your Camper’s Electrical System
Before hitting the road, it’s important to ensure that your camper’s electrical system is in good working order. This will help prevent any issues on the road and keep you and your passengers safe. Here are a few steps to test your camper’s electrical system:
Step 1: Test the Outlets
Next, test the outlets in your camper to ensure that they are working properly. Plug in a small appliance, such as a hair dryer or phone charger, and make sure it works. If an outlet is not working, check the breaker box to see if a breaker has tripped.
Step 2: Make Sure Your RV Inverter Is Working
Make sure the RV’s power inverter is working by checking the input voltage which should be 12V. Then check the output voltage to ensure it’s 120V.
If both are reading these measurements, you’re good to go.
Restock Emergency and First Aid Supplies

Restocking your RV’s emergency and first aid supplies is an important step in preparing for the upcoming season. It’s important to make sure you have everything you need in case of an emergency or unexpected situation. Here are some tips to help you restock your emergency and first aid supplies:
- Check the stock of your emergency supplies and restock any items that need it.
- Throw out any expired medications and dry food.
- Make sure you have enough bottled water for emergency use.
- Check your first aid kit and make sure it’s fully stocked with all the necessary items like bandages, antiseptic, and pain relievers.
- Consider adding items such as a fire extinguisher, a flashlight, and a whistle to your emergency supplies.
By taking the time to restock your emergency and first aid supplies, you’ll be better prepared for any unexpected situations that may arise during your travels. It’s always better to be safe than sorry, and having the right supplies on hand can make all the difference in an emergency.
Double-Check Your RV Insurance And Registration
Before hitting the road, it is important to ensure that your RV insurance and registration are up to date. Double-checking these items can save you from potential legal and financial troubles down the road.
First, check your RV insurance policy to ensure that it is current and provides adequate coverage for your needs. This may include liability coverage, collision coverage, comprehensive coverage, and more. Make sure to review the terms and conditions of your policy, including any deductibles or exclusions.
Next, verify that your RV registration is current and up to date. This will ensure that you are legally allowed to operate your RV on public roads. Check with your state’s Department of Motor Vehicles (DMV) to see if there are any specific requirements or regulations that you need to follow.
If you plan on traveling to other states or provinces, be sure to research the local laws and regulations regarding RV insurance and registration. Some states may require additional coverage or registrations, while others may have different requirements for RVs than passenger vehicles.
By double-checking your RV insurance and registration, you can have peace of mind knowing that you are legally and financially protected while on the road.
Replace Your RV’s Air And Water Filters
One important step in de winterizing an RV is to replace its air and water filters. Over time, these filters can become clogged with debris, reducing the efficiency of your RV’s systems and potentially causing damage.
When replacing the air filter, first locate the filter compartment. This is typically located near the engine or in the cabin of the RV. Remove the old filter and dispose of it properly. Then, insert the new filter, making sure it is securely in place. Consult your RV’s owner manual or a professional mechanic if you are unsure of how to replace the air filter.
Replacing the water filter is also important for ensuring clean and safe drinking water while on the road. The location of the water filter will vary depending on your RV’s make and model. Consult your owner’s manual or a professional mechanic for guidance on locating and replacing the water filter.
When replacing the water filter, it is important to choose the correct type of filter for your RV. There are a variety of water filters available, including carbon filters and sediment filters. Carbon filters are effective at removing chlorine and other chemicals from the water, while sediment filters are designed to remove dirt, sand, and other particles. Consider your specific needs when selecting a water filter for your RV.
Regularly replacing your RV’s air and water filters is a simple but important step in maintaining your RV’s systems and ensuring a safe and comfortable trip.
Repack Your Camper’s Wheel Bearings
One of the most important steps in de winterizing your RV or camper is repacking the wheel bearings. Neglecting this task can lead to premature wear and tear on your tires and even cause dangerous accidents on the road. Here are the steps to repack your camper’s wheel bearings:
- First, jack up the camper and remove the wheel and hub assembly from the axle spindle.
- Next, remove the outer bearing and clean it with a solvent.
- Inspect the bearing for any signs of wear, such as pitting, cracking, or discoloration. If the bearing is damaged, replace it with a new one.
- Use a bearing packer (or your hands) to apply new grease to the bearing. Make sure the grease is evenly distributed throughout the bearing.
- Reinstall the outer bearing and hub assembly onto the spindle.
- Repeat steps 2-5 for the inner bearing.
- Finally, adjust the wheel bearing to the recommended torque specifications and reinstall the wheel onto the hub assembly.
It’s recommended to repack your camper’s wheel bearings every 10,000 to 12,000 miles or at least once a year, whichever comes first. If you frequently travel on rough roads or in extreme weather conditions then you may need to repack them more often.
Here’s a helpful video from Brazen Brits showing how to repack RV wheel bearings:
If you’re not comfortable performing this task yourself, it’s best to have an RV repair center do it for you. Neglecting to repack your camper’s wheel bearings can lead to costly repairs and even put your safety at risk.
Do A Spring Cleaning

After the RV has been dewinterized, it’s time to do a thorough spring cleaning. This will help ensure that the RV is clean and ready for use. The cleaning should start from the top and work down to the bottom.
First, clean the roof of the RV. Remove any debris or leaves that may have accumulated during the winter. Check for any damage or leaks that may have occurred during the winter.
Next, clean the exterior of the RV. Use a mild detergent and a soft brush to clean the exterior. Rinse thoroughly with water. Check for any damage or cracks in the exterior.
After the exterior is clean, move on to the interior of the RV. Start by cleaning the floors. Use a vacuum or broom to remove any dirt or debris. Then, mop the floors with a mild detergent.
Next, clean the walls and ceiling of the RV. Use a soft brush or cloth to remove any dust or dirt. If there are any stains, use a mild detergent and water to clean them.
Finally, clean the appliances and furniture in the RV. Use a mild detergent and water to clean the appliances. Use a soft cloth to clean the furniture.
By following these steps, the RV will be clean and ready for use. It’s important to do a spring cleaning every year to ensure that the RV is in good condition and ready for use.
When Should I De Winterize My RV?
Knowing when to dewinterize your RV is crucial to ensuring that it is in good condition for the upcoming camping season. Generally, it is recommended to dewinterize your RV or camper in the early spring once the temperatures start to consistently stay above freezing.
If you live in an area with milder winters, you may be able to dewinterize your RV earlier than someone living in a colder climate. It’s important to keep an eye on the weather forecast and make sure that there are no more freezing temperatures expected before you begin the camper de-winterization process.
It’s also important to consider how long your RV has been in storage. If it has been stored for an extended period of time, it’s a good idea to do a thorough inspection before the time comes to start your RV dewinterization. This can help you get ahead of and address any potential issues that could get in your way and delay your project.
Leave a Comment Cancel reply
Save my name, email, and website in this browser for the next time I comment.
Terms and Conditions
Dewinterizing a Travel Trailer: The Complete Guide
It’s the moment you’ve been waiting for all year. The ice, cold, and snow of winter are gone, and the warmth of spring has finally arrived, which means it’s time to get your travel trailer ready for the first camping trip of the season.
In order to do that, you’ll need to dewinterize it to ensure that everything is working as it should. However, the dewinterizing travel trailer process is tricky and involves several steps that can be difficult for first-timers and new RVers.
Because failing to properly dewinterize your travel trailers’ electrical, plumbing, and HVAC systems could result in camper issues, proper dewinterization is essential.
Inspect and Prepare Your Travel Trailer Exterior
The best way to dewinterize your RV is to start outside with the tires, axles, and batteries on the RV’s exterior before proceeding indoors.
Check the RV Tires and Axles
Your RV’s tires and axles are two of the most critical components of a travel trailer, and the success of your journeys will start and end with them. Therefore, it’s essential to check your tire pressure as well as the tread and overall appearance of the tire.
If any of your tires have low tread or are showing signs of cracking, you should replace them before you take your RV on the open road. Additionally, check the axles to ensure they aren’t bent or rusted, both of which can lead to tire blowouts.
Assess and Recharge Your RV Battery
After checking your tires and axles, examine your travel trailer battery. If you correctly winterized your battery, you should have removed it and stored it in a dry, warm area during winter , as cold weather wreaks havoc on lead-acid batteries.
Once you’ve retrieved the battery, you’ll need to inspect and clean the terminals. You should also ensure that the terminals are tight and not too corroded, as either of these issues can create a poor connection.
If everything looks okay, re-install the battery onto the front of your camper and connect it to the battery charger, being careful not to overcharge it.
You should also check the water levels and add distilled water as needed. If the battery terminals are corroded or dirty, use a concoction of baking soda and vinegar that’s mixed with water. Dip a soft scrub brush into the concoction and start to clean the terminals.
Check the Exterior For Leaks
If your camper didn’t have leaks before you put it into storage, it shouldn’t have any when you dewinterize it. Just to be sure, however, you should walk around the outside of the camper, as well as inspect the roof, focusing specifically on the seals. Double-check around windows, doors, and roof vents, as these are the most prone to issues.
Flush and Repair the RV Plumbing System
Next up, you’re ready to move onto your plumbing system, which is the trickiest part of dewinterizing your RV. To dewinterize your plumbing system, you’ll need to remove the antifreeze that you put into your water lines when winterizing it, as well as check for plumbing leaks .
Here’s how to dewinterize your camper’s plumbing system:
- Open all the hot and cold faucets inside your travel trailer and let the antifreeze flow out of the spigots.
- Connect a water hose to your camper’s water inlet port and let potable water flow into your RV.
- Leave your travel trailer faucets open until you see clear water, which indicates that all the antifreeze is out of your plumbing system.
As you’re running fresh water through your plumbing system, check your pipes and valves for potential leaks. If you find any, turn the water off and make any repairs that are necessary. You can also sanitize your toilet water lines at this time by depressing the toilet flush pedal until clear water appears.
How Neighbor is changing RV storage
Transparent monthly savings.
Renters save 30-50% on RV storage, on average. No rate hikes.
Keep your RV nearby
25,000 locations means that your RV is always close by.
Storage made simple
Don't settle for stone age tech and long contracts. Neighbor makes it easy.
Flush the Freshwater System
Once you’re finished with the plumbing system, you also want to dewinterize and sanitize your fresh water tank. The freshwater tank is a storage compartment for freshwater that you can use on extended RV trips when you don’t have a standard water connection.
The dewinterizing process for the freshwater system is similar to the process of dewinterizing the overall plumbing system . Here’s how it works:
- Start by disconnecting the water supply from your camper’s city water port and connecting it to the freshwater tank.
- Turn on your RV water pump so that water from the freshwater tank flows out of your kitchen and bathroom faucets.
- Any RV antifreeze that was in the freshwater tank will exit the tank via the faucets.
- Continue running water out of the holding tank and through the faucets until clear water appears.
Sanitizing the Fresh Water System
With the RV water system flushed, the next step is to sanitize it to eliminate bacteria and mold.
- To do this, start by finding out how many gallons of water your freshwater tank holds.
- Next, use a mixture of ¼ cup of household bleach for every 15 gallons of fresh water.
- Fill the fresh water tank to capacity with this concoction, and run water through your faucets until you smell bleach.
- Close the faucets and let the water and bleach solution sit for several hours so the bleach can sanitize your water lines and holding tank.
- After 3 to 4 hours, open the faucets and drain the water lines and freshwater holding tank.
Dewinterize the RV Water Heater
Dewinterizing your hot water heater is the final step of getting your plumbing system ready for camping season.
Dewinterizing your water heater isn’t as complicated as dewinterizing the other parts of your plumbing system, because you shouldn’t have filled it with antifreeze when winterizing it.
When winterizing, you should have only drained the water heater tank, meaning all you’ll need to do is refill it to get it working again.
To check off this box, here are the steps you should follow:
- Remove the heating anode from the water heater and check it for corrosion.
- If it looks okay, re-install the anode and start filling the hot water tank with water via the city connection port on your travel trailer.
- If you close the water valve of the water heater during the winterization process, you will need to re-open it so water can flow to the tank.
- Once the tank is full, turn the water heater on.
- If you turn the heater on when the tank is empty, it will ruin the anode , and you’ll need to replace it.
- Once the heater is turned on, you should have hot water within 20 to 30 minutes.
Flush Your Sewage System and Grey Water Tank
Flushing your black and grey water tanks is the easiest aspect of the dewinterizing process. To do this, simply connect your sewer hose to the holding tank dumping ports and empty the tanks one at a time.
You’ll need to complete this step at a campground or designated dumping area because your tanks are full of antifreeze. Antifreeze must be disposed of safely and securely. Simply dumping the antifreeze onto the open ground is dangerous and could contaminate the local water supply.
Inspect and Refill Propane System
With your plumbing, water, and sewage systems squared away, you’re ready to move on to your propane system.
The most important thing to do with your propane system is to check for leaks. To do this, refill your propane tanks at a local refill station and open the gas valve to let gas flow from the tanks to gas appliances in your travel trailer.
Propane has a very distinct sulfuric and rotten egg smell, so you should notice immediately if there’s a leak. If you suspect a leak, listen for a hissing noise when gas leaks out of a valve, appliance, or pipe.
You should also have a spray bottle with a mixture of soap and water handy for further leak detection . If you spray the water onto a joint or valve and the water starts bubbling, it means that air is leaking out of the area in question, and you’ve found the source of your leak.
Save up to $1,200/year on RV storage & parking
Verify the functionality of appliances and safety devices.
It’s also important to check your appliances and safety devices before using your camper for the first time post-dewinterization. While safety devices and appliances don’t need winterization or de-winterization, they may have sustained damage over the winter (or when you disconnected and reconnected your camper’s power supply).
Therefore, simply turn on each of your gas and electrical appliances and devices to ensure they’re working, including the following:
- Refrigerator
- Stove
- Water heater
- Air conditioner
- Furnace
- RV generator
- Outlets
- Lights
- Electronics
- Circuit breakers
- Smoke detectors
- Carbon monoxide detectors
Clean and Refresh Your Travel Trailer
Giving your travel trailer a thorough washing is an often-forgotten step in the dewinterizing process.
While cleaning, give your camper time to air out, as there’s a good chance the interior air grew stagnant while it was in winter storage. Here’s a quick rundown of how to get your travel trailer clean, refreshed, and ready to go for summer.
- Start by thoroughly washing and waxing the exterior using Gel Gloss RV Wash and Wax or a similar product.
- Make sure to use soft brushes and non-abrasive cloths when washing your travel trailer and drying your windows to keep your travel trailer in pristine condition.
- When inside the camper, open up all the windows, doors, and vents to let your vehicle air out a bit.
- Keep the windows and vents open while you thoroughly clean the inside of the camper, including sweeping, mopping, and dusting.
- Check the refrigerator, freezer, and pantry and remove any expired foods or drinks.
- Thoroughly wash and clean the freezer and refrigerator so that it’s ready for food storage.
Update Registration and Insurance
Last but not least, you’ll want to update your travel trailer’s registration and insurance if they expired over the winter. This is vital if you don’t want to start your camping season off with a hefty fine.
Final Thoughts
There’s a lot that goes into dewinterizing your travel trailer and preparing it for the camping season. You can make your life much easier by properly winterizing your camper before parking it for storage . That way, the dewinterization process will be as fast, easy, and seamless as possible.
Additionally, storing your camper in a safe, dry place will also make the dewinterization process easier. It will also ensure that your rig remains leak and damage-free while it’s in storage. To make this happen, consider using Neighbor , a peer-to-peer storage marketplace offering safe and affordable storage options near you.
Frequently Asked Questions
How do i open my camper after winter.
Opening your camper after storing it for winter can be a worrisome experience, especially if you didn’t winterize and store it properly. To open it back up and air out your camper after storage, open the doors, windows, and vents for maximum airflow.
How Do I Dewinterize My RV Hot Water Tank?
To dewinterize your hot water heater, start by draining the tank—if you forgot to do so during the winterization process. This will remove any sediment, rust, and corrosion that built up within the tank over the winter.
Next, check the water heater anode for corrosion before reinstalling or replacing it and filling the tank with water. You should have hot water within half an hour.
How Do You Flush Antifreeze Out of a Camper?
To flush antifreeze out of a camper, connect a water or garden hose to the city inlet port, turn on the water, and open the faucets to run fresh water through your camper. You can then flush your holding tanks to completely remove antifreeze from the camper.
How Do You Sanitize a Camper Water System After Dewinterizing?
The best way to sanitize your fresh tank and water system after dewinterizing is with a mixture of bleach and water. The bleach will remove any mold, bacteria, and growth that built up inside the system over the winter.
How Often Should I Check and Maintain My RV Batteries for Optimal Performance?
Checking and maintaining your RV batteries every 30 days will ensure optimal performance and longer battery life. Additionally, make sure to disconnect and store your batteries in a warm, dry location during the winter.

Related Posts
- RV Ownership
How to Dewinterize Your RV for the 2024 Camping Season
- Home Maintenance
Dewinterizing: What It Is and Why It’s Important
How to winterize an rv: a beginner’s guide, rv winter storage checklist: tips and tricks, rv inspection checklist for buying a used rv, top picks: the best 4 season travel trailers for year-round use.

Justin earns $650/mo on Neighbor. Find out how you can too!
Stay in the loop ↓
Welcome To The General RV Blog!
Because RVing Is Awesome…
How To Dewinterize Your RV For Camping Season
Last Updated on February 27, 2023 by Christina
Camping season is coming quickly in many states, and it’ll soon be time to dewinterize your RV. Dewinterizing your RV means getting your RV out of RV storage , inspecting it and preparing all the mechanics for camping.
If this is your first time dewinterizing your RV, you’ve come to the right place. We asked our RV experts everything you need to know about prepping your RV for another season of making memories!
When Should I Dewinterize My RV?
You want to dewinterize an RV when the weather consistently stays above freezing. If the temperature is still inconsistent, you risk having your pipes freeze. Just like a house, if your pipes freeze and you have water in your tanks, it could damage your RV’s water systems and lead to expensive repairs.
Dewinterizing an RV can take half a day or longer depending on how many systems you have. Prepare your time wisely, and don’t be afraid to seek professional RV service for dewinterization. RV experts are here to help you start the camping season smoothly.
Just remember that all RVs are different, so this is a general overview of how to dewinterize an RV. Not all steps may apply to your RV. Read your owner’s manual before getting started for model-specific RV dewinterizing instructions.
Step By Step Instructions For Dewinterizing Your RV and Preparing For Camping Season
Remove your rv from storage and inspect the exterior.

Take your RV cover off or remove any debris that may be on your RV. Thoroughly check the exterior for any signs of damage from the weather. Look for any damages, cracks or leaks on the whole exterior of your RV. Make sure the caulk isn’t cracked along the seams of your RV. Replace any sealant that is damaged to ensure water does not enter your RV.
Look Over Your RV Tires

RV tires naturally lose some air during the winter months sitting in storage. The RV owner’s manual has the recommended PSI based on the load of the RV. Correct the pressure of your tires and examine the tread. If your RV was sitting for an extended period of time on dirt, grass or asphalt without blocks you could risk having flat spots on your tires. Vibration, difficulty handling, or a thumping noise while driving indicates that you may have a flat spot and need new tires.
If You Have A Motorhome, Check The Engine
Checking your motorhome’s engine is very important when dewinterizing. Check your engine’s fluid levels like oil, coolant, transmission fluid, power steering fluid and windshield washer fluid. If you have a diesel engine, check your Diesel Exhaust Fluid (DEF) levels, too.
When you start your RV, be sure to check that no check engine lights are on and all your systems work properly in the cab. If your motorhome’s check engine light comes on or your systems are not working properly, get your motorhome serviced professionally.
Check Your RV’s Battery Condition

Now it’s time to get your battery hooked back up. RV batteries will lose a bit of charge while in storage. Check the charge on your RV batteries and recharge them if needed. It is important to make sure your battery is not connected to electricity or else you could get an incorrect reading.
Check the RV battery fluid levels as well, adding distilled water to your lead-acid batteries as needed until the battery is properly filled. If you have to fill your battery fluid level, make sure you wear gloves and remove all jewelry. Wearing jewelry while working with electricity can lead to burns if you are not careful.
Inspect Your RV’s Propane System
The next step is to check your RV’s propane system if your RV has one. Double check the hoses and seals for any cracks or damages before you turn on your propane appliances. If your propane system looks good and your tanks are filled, you can turn your system on and check each propane appliance.
If you are checking your RV propane hot water heater, make sure your tanks are flushed of any antifreeze and full of fresh, potable water. Manufacturers warn against having antifreeze in hot water heaters. Antifreeze can harm the anode rod and can be hard to flush out of your hot water heater.
Examine Your RV Generator Or RV Solar Components
Inspect the generator for any debris or corrosion on the exhaust. If the generator looks clean, make sure the oil level is properly filled and you have fuel to run it. If you periodically ran your generator during the winter, it should start without any issues. The oil can sludge, and you can risk the components seizing if you don’t run your RV generator regularly during storage. Give it a few minutes to warm up and then put it under a 50% load for about half an hour.
If you have RV solar panels, snow or hail can crack them in the winter. Make sure the solar panels are free of damage and debris, as well as any bird nests or other small animals that may have taken shelter under the panels. Let your RV solar panels charge fully before turning on any appliances to test your electrical system.
Test Your RV’s Electrical System
Once you have tested all your systems to make sure they are working properly, you should also check your RV’s interior and exterior electrical system. Make sure all your lights work inside and outside, as well as any speakers, awnings and appliances. If you have RV auto leveling jacks or RV hydraulic jacks, test that they are working properly.
You also should check your motorhome or travel trailer’s turn signals, running lights and any other exterior lights for the roadway. If they are not working properly, check the bulb or schedule repairs to diagnose the problem before the camping season and a potential ticket.
If your RV has slideouts, extend them and inspect the interior and exterior for signs of water damage. Make sure your slide seals are in good condition; if you can see light through your RV’s slide seals, you need to replace them. It’s also recommended to lubricate the slides on some RVs. Check your owner’s manual for the manufacturer’s recommended procedures for your RV.
Flush And Sanitize Your RV Water System
Before you flush your RV’s plumbing system, look for any water damage or cracks in the pipes. You also need to double check that your water heater is still in bypass mode.
Flush Your RV Water System

There are two ways you can dewinterize your system: through the water tank or city water connection. To fill from the tank, fill water into your freshwater holding tank and turn on the water pump. If you are flushing your system through the city water connection, a garden hose works well to flush the system. Some RVs have low-point drains that you can open. You can use these valves to help the antifreeze run out of the pipes.
The next step is to run each fixture one by one, turning hot and cold on separately. Run each interior faucet and any outside shower, kitchen, or other various water sources. You should also flush the toilet a few times. Most RV antifreeze is pink in color and bubbles, indicating that antifreeze is still present. When no bubbles are present and the water is clear, the line is clean of antifreeze.
Washing machines, dishwashers and icemakers have special dewinterizing instructions. Check the owner’s manual carefully or seek professional service if applicable to your RV.
Then properly dispose of the antifreeze and empty your black and grey water tanks.
Sanitize Your RV Water System
The second step to dewinterizing your RV water system is to sanitize it. Sanitizing your water system removes bacteria from your lines that might be growing from sitting over the winter months. Double check your owner’s manual if you are able to sanitize your hot water heater as well. Some brands allow for sanitization while others can become damaged. If you cannot sanitize your water heater, leave your drain plug out and water heater in bypass mode until you are done.
Use ¼ cup bleach for every 15 gallons of water your fresh water tank holds. Fill the fresh water tank with the mixture and make sure the tank is full.
Turn on your RV water pump and turn on each faucet until you can smell the bleach mixture. It may take a couple minutes at first for the mixture to come through the lines. Then close the faucets and let the solution sit for a minimum of three hours. You can leave the sanitizing solution in the water lines for up to 12 hours.
Once the mixture has sat, it’s time to drain the system and refill with fresh water. Flush the system again until you no longer smell the bleach and all the water is flushed out.
Don’t forget to put your drain plug back in for the hot water heater. Once you are done sanitizing, you have successfully made your RV’s water system ready for camping!
Replace RV Filters and Safety Devices

After flushing and sanitizing your RV’s plumbing system, it’s time to replace your water filters. Water filters need to be replaced every three to six months depending on use and brand. This will also ensure that your water does not have a lingering taste from the sanitization.
Check the air filters to see if they need to be replaced too. Air filters are necessary for flowing clean and cool air throughout your RV. If you don’t regularly clean the filters, they can start to draw more energy, reduce airflow and damage your AC system if left unaddressed for too long. Some RV air filters can be washed, while others need to be replaced. Check your owner’s manual to see your requirements.
Since you are already preparing your RV for the camping season, safety devices are another important thing to check. Put in fresh batteries and test the smoke detectors, LP detector and carbon monoxide detector. Also, check the fire extinguisher’s expiration date and replace it if needed.
Clean Your RV Before Your First Trip
Next, do a little spring cleaning to get your RV ready for the camping season. Wash and wax your RV thoroughly. Extend your awning and wash the top and bottom. Awnings are prone to mildew, so airing it out after a good cleaning will protect from unwanted moisture. Lubricating your awning arms is also a good idea to protect it from malfunctioning and becoming stuck.
Clean your window screens for better airflow and check that there are no holes for bugs to creep into. Dusting around your RV, vacuuming and sweeping are other good spring cleaning tasks. This way you have no cobwebs or debris in your RV before your first trip. If you left your bedding and towels in the RV, spring cleaning is also a great time to refresh your linens before your first adventure.
A good tip for when you are getting ready for camping season is to check your gear! Grills, camping chairs and other essentials you store in the RV might need to be replaced. Make sure everything is still in good condition. Nothing is worse than a broken camping chair you forgot to replace. This is a good practice to do before going on any camping trip, but taking note of the gear you need will help you feel more prepared for your first trip ahead of time.
Get Your Dewinterization Done Professionally

Getting your RV dewinterized by an RV dealership is time saving and hassle-free. They can also look over your RV for any issues while you’re there. By scheduling regular maintenance with your dewinterization, you can have peace of mind that you’ll be ready for the camping season.
Regular maintenance can include a multipoint inspection, where they will look over everything from wheel to roof, making sure your RV is ready for the open road. They can also test for leaks if you notice your seals or caulk are cracked.
Travel trailers also require wheel bearing repacking every year or every 12,000 miles depending on how much you travel. This regular maintenance will help keep you from experiencing towing issues and a potential tire blowout.
When getting your RV dewinterized professionally, you can also get a roof wash and treatment to properly seal your roof for the camping season. RV experts will seal your roof to help prevent harsh summer weather from harming your roof.
All Systems Go For Camping Season
Now that you have dewinterized your RV, you are ready to hit the road! Just remember, all RVs are different and it is best to consult the owner’s manual or seek professional service if you have any issues.
Find your nearest General RV dealer if you want to learn more about having your RV professionally dewinterized. With over 500 service bays across our 14 locations, having your RV serviced for the camping season is easy.
- Class A Motorhomes
- Class B Motorhomes
- Class C Motorhomes
- Diesel Motorhomes
Travel Trailers
5th Wheel Trailers
RVs on Clearance
RVs on Order
Used Motorhomes
- Used Class A Motorhomes
- Used Class B Motorhomes
- Used Class C Motorhomes
- Used Diesel Motorhomes
Used Travel Trailers
Used 5th Wheel Trailers
- RV Lifestyle
- Maintenance
- Order Repair Parts
- Van Conversion Parts
Fill out our online appraisal form and find out what your RV is worth.
- RV DIY (Do It Yourself)
- Camping 101 to Advanced
- RV Maintenance & Service
- RV Parts & Accessories
- Towing Guides
- Brand & Manufacturer Guides
- RV Body Type Breakdowns & Comparisons
- About Bucars
- Leave a Review
- Why Bucars?
- Check our Reviews
- Warranty Progrßams
- Diamond Kote
- Sell Your RV
- Pre-qualify for Financing
- Get Directions
- Schedule an RV Viewing
- Schedule a Service Appointment
- View Address and Contact Form

- Learning Centre
How to De-winterize Trailers: The Ultimate RV De-winterizing Checklist
April 12, 2021
Share The Article
The sun is shining, the birds are chirping, and the ice is thawing – do you know what that means? It’s about time to de-winterize your RV! Keep in mind that Canadian weather can be very unpredictable. One day it might be sunny and +20°C and the next day we could have 10 inches of snow! Before you start the process of de-winterizing your RV, it’s best to wait until the last snowstorm of the year has passed. Mid to late April is generally a safe bet and it’s just in time for a May long weekend trip! It’s crucial to de-winterize your RV to reverse the winterizing process and get your RV all set for your next trip. The process of de-winterizing your RV includes many important steps so it’s a good idea to set aside a few hours. This will ensure you aren’t rushing to de-winterize your trailer right before your trip which may cause you to miss a crucial step in the process. As a general rule of thumb, you’ll also want to de-winterize your RV 3-4 weeks prior to your first trip of the year. This means you better get a move on if you’re aiming for May long weekend! In this article, we’re sharing a complete checklist of everything you’ll need to do to de-winterize your trailer. Are you ready to get started? Let’s dive in!
Examine & Repair Your RV Exterior
The exterior of your trailer is a great place to start the de-winterizing process. Heavy snow and ice can be very damaging to the exterior of RVs, so it’s important to check for common damage before you hit the road. This is especially important when it comes to cracks and leaks. A leak in your trailer’s exterior can lead to many unpleasant problems down the line, such as wet insulation and mould. Here are the steps you should take when inspecting your RV’s exterior:
- Check all vents, windows, compartments, and doors for cracked caulking and be sure to replace any caulking that is cracked or peeling.
- Take a look at the seams of all your slides and replace the seals if necessary.
- Extend your awning , check for any damage at the end of the awning rail, give your awning a good rinse, and leave it out to dry.
- Look for signs of water damage especially on the roof. You’ll want to pay attention to cracks in the seams that may have been caused by heavy snowfall.
- Inspect your hitch for rust and damage and replace any broken parts.
- Check all of your exterior lights (brake lights, turn signals, running lights) and replace any bulbs that have burnt out.
Check & Reinflate Your Tires

- Find out the manufacturer’s recommendations for your tire pressure based on your load.
- Use a tire pressure gauge to check the air pressure of your tires.
- Inflate your tires to the specified pressure.
- Check your tires for any tread deformities and uneven wear and purchase new tires if your tires are worn out. A fresh set of tires is a great way to start the camping season!
Bonus tip: When checking your tires, make sure they are cold for the most accurate tire pressure readings.
Charge & Reinstall Your RV Batteries
Every month that your RV is in storage, your RV batteries lose a small percentage of their charge. As you may know, your RV batteries play a ton of important roles when you’re not connected to power. Batteries power your cooking appliances, water heaters, refrigerators, power awnings, and more. Without charged batteries, you could be dealing with lukewarm food and water all trip long. Yum… lukewarm milk… Here’s what you should do to ensure your batteries are good to go for your next trip:
- Disconnect your RV from electricity to ensure you will get an accurate reading.
- Use a voltmeter to check the charge of your batteries . 12-volt RV batteries will read 12.7 volts when they are fully charged. If your batteries are fully charged, you can skip the next steps!
- Turn off your engine and any internal appliances.
- Use a wrench to remove the cables from the battery leads , starting with the black cable first and then the red cable.
- Check the water level and refill with distilled water if the water level is below the plates.
- Attach the battery charger cables to the battery , starting with the red cable first and then the black cable.
- Plug the charger into the power source and turn it on .
- Allow your batteries to charge completely . This may take a few hours or even a few days depending on the battery size. The charger usually has an indicator light that will tell you when the battery is fully charged.
- Turn off the power and disconnect the battery from the charger.
- Check the water level and fill the battery with distilled water to the correct level.
- Ensure that batteries are reinstalled securely .
Bonus tip: A best practice to extend the lifespan of your RV batteries is to let the batteries discharge only 50% before recharging them. Next winter, try to keep your batteries charged consistently and you’ll be ready to go once the season starts.
Flush & Sanitize Your Water System
One of the best parts about having an RV is the ability to turn on a tap for quick and easy access to clean drinking water on the go, even in the most remote locations! That’s what makes this part of the RV de-winterizing process so crucial. In order to keep your pipes from freezing, you probably added antifreeze to your water system last fall. If you didn’t… you might have a whole different problem on your hands!
Flushing Your Water System
Antifreeze is great for preventing your pipes from freezing but it needs to be flushed from your system in the spring so your water is safe to drink. Here are the steps you’ll need to take to flush your water system:
- Close all taps and install all drain valves.
- Drain your fresh water holding tank entirely to remove the majority of the antifreeze and replace it with potable water.
- Turn on your water pump .
- Starting with the fixture furthest away from your fresh water tank, turn on every water faucet one at a time.
- Flush your toilet several times.
- Keep the water running for several minutes , until the water runs clear and all the antifreeze has been flushed.
- Turn off all your faucets and the water pump.
- Perform a pressure test to check for any small, unnoticeable leaks.
- Switch your water heater out of bypass mode and into the summer position (or drain the antifreeze from the water heater tank if it was not in bypass mode).
- Replace all of your water filters .
- Dump your grey and black water tanks .
Sanitizing Your Water System
After flushing your water system, you’ll want to sanitize it to remove any bacteria or mould. Here are the steps you’ll need to take to sanitize your water system:
- Find out how much bleach you will need. Measure 1/4 cup of bleach for every 16 gallons of water in your freshwater tank
- Dilute your bleach in at least a gallon of water.
- Use a funnel to pour your bleach-water mixture into your freshwater tank .
- Fill your fresh water tank full with potable water.
- Turn on all of your faucets until you start to smell bleach.
- Let the water sit for 12 hours.
- Drain all the water from the system.
- Refill your fresh water tank with potable water.
- Turn on the water pump and turn on all your faucets , keeping them running until you can no longer smell bleach.
Bonus tip: If your water still doesn’t taste clean and fresh after flushing & sanitizing your systems, you can add baking soda into each of your drains to improve the flavour. Be sure to flush your water system again and the taste should eventually improve.
Check Your Propane System

- Turn off all appliances that run on propane .
- Open the propane valves and check for a bad odour. (This smell is added by the manufacturer to help you identify leaks). It’s possible that the smell may have worn away due to rust in the tank. If there’s no smell, proceed to the next step to make sure you don’t have any leaks!
- Apply soapy water or a leak detector solution to the propane valve .
- Slowly open the valve . If bubbles start to form, you’ve got a leak on your hands!
- In case of a leak, make sure there are no flames or sparks, keep light switches and appliances turned off, and keep your phone away from the area.
- If you detected a leak, make sure to get your propane system repaired before your next trip!
Now You’re Ready to Hit the Road!
And there you have it! Once you’ve completed every item on this checklist, you should be all set and ready to go for your first camping adventure of the season! During your RV de-winterizing routine, you may have noticed that your old RV just doesn’t cut it anymore. Maybe it’s old and rundown or maybe there isn’t enough space for your growing family or your new hobbies. Does that sound like you? It might be time for an RV upgrade ! At Bucars RV, we love helping our customers find the RV of their dreams. We have a huge selection of new and used RVs to meet everyone’s needs, wants, and price points! Come visit us at our showroom just north of Calgary or contact us today!
Recent Articles

Calgary RV Dealership Celebrates 65 Years of ‘Refreshingly Different’ Customer Service with Canada-first Award Win
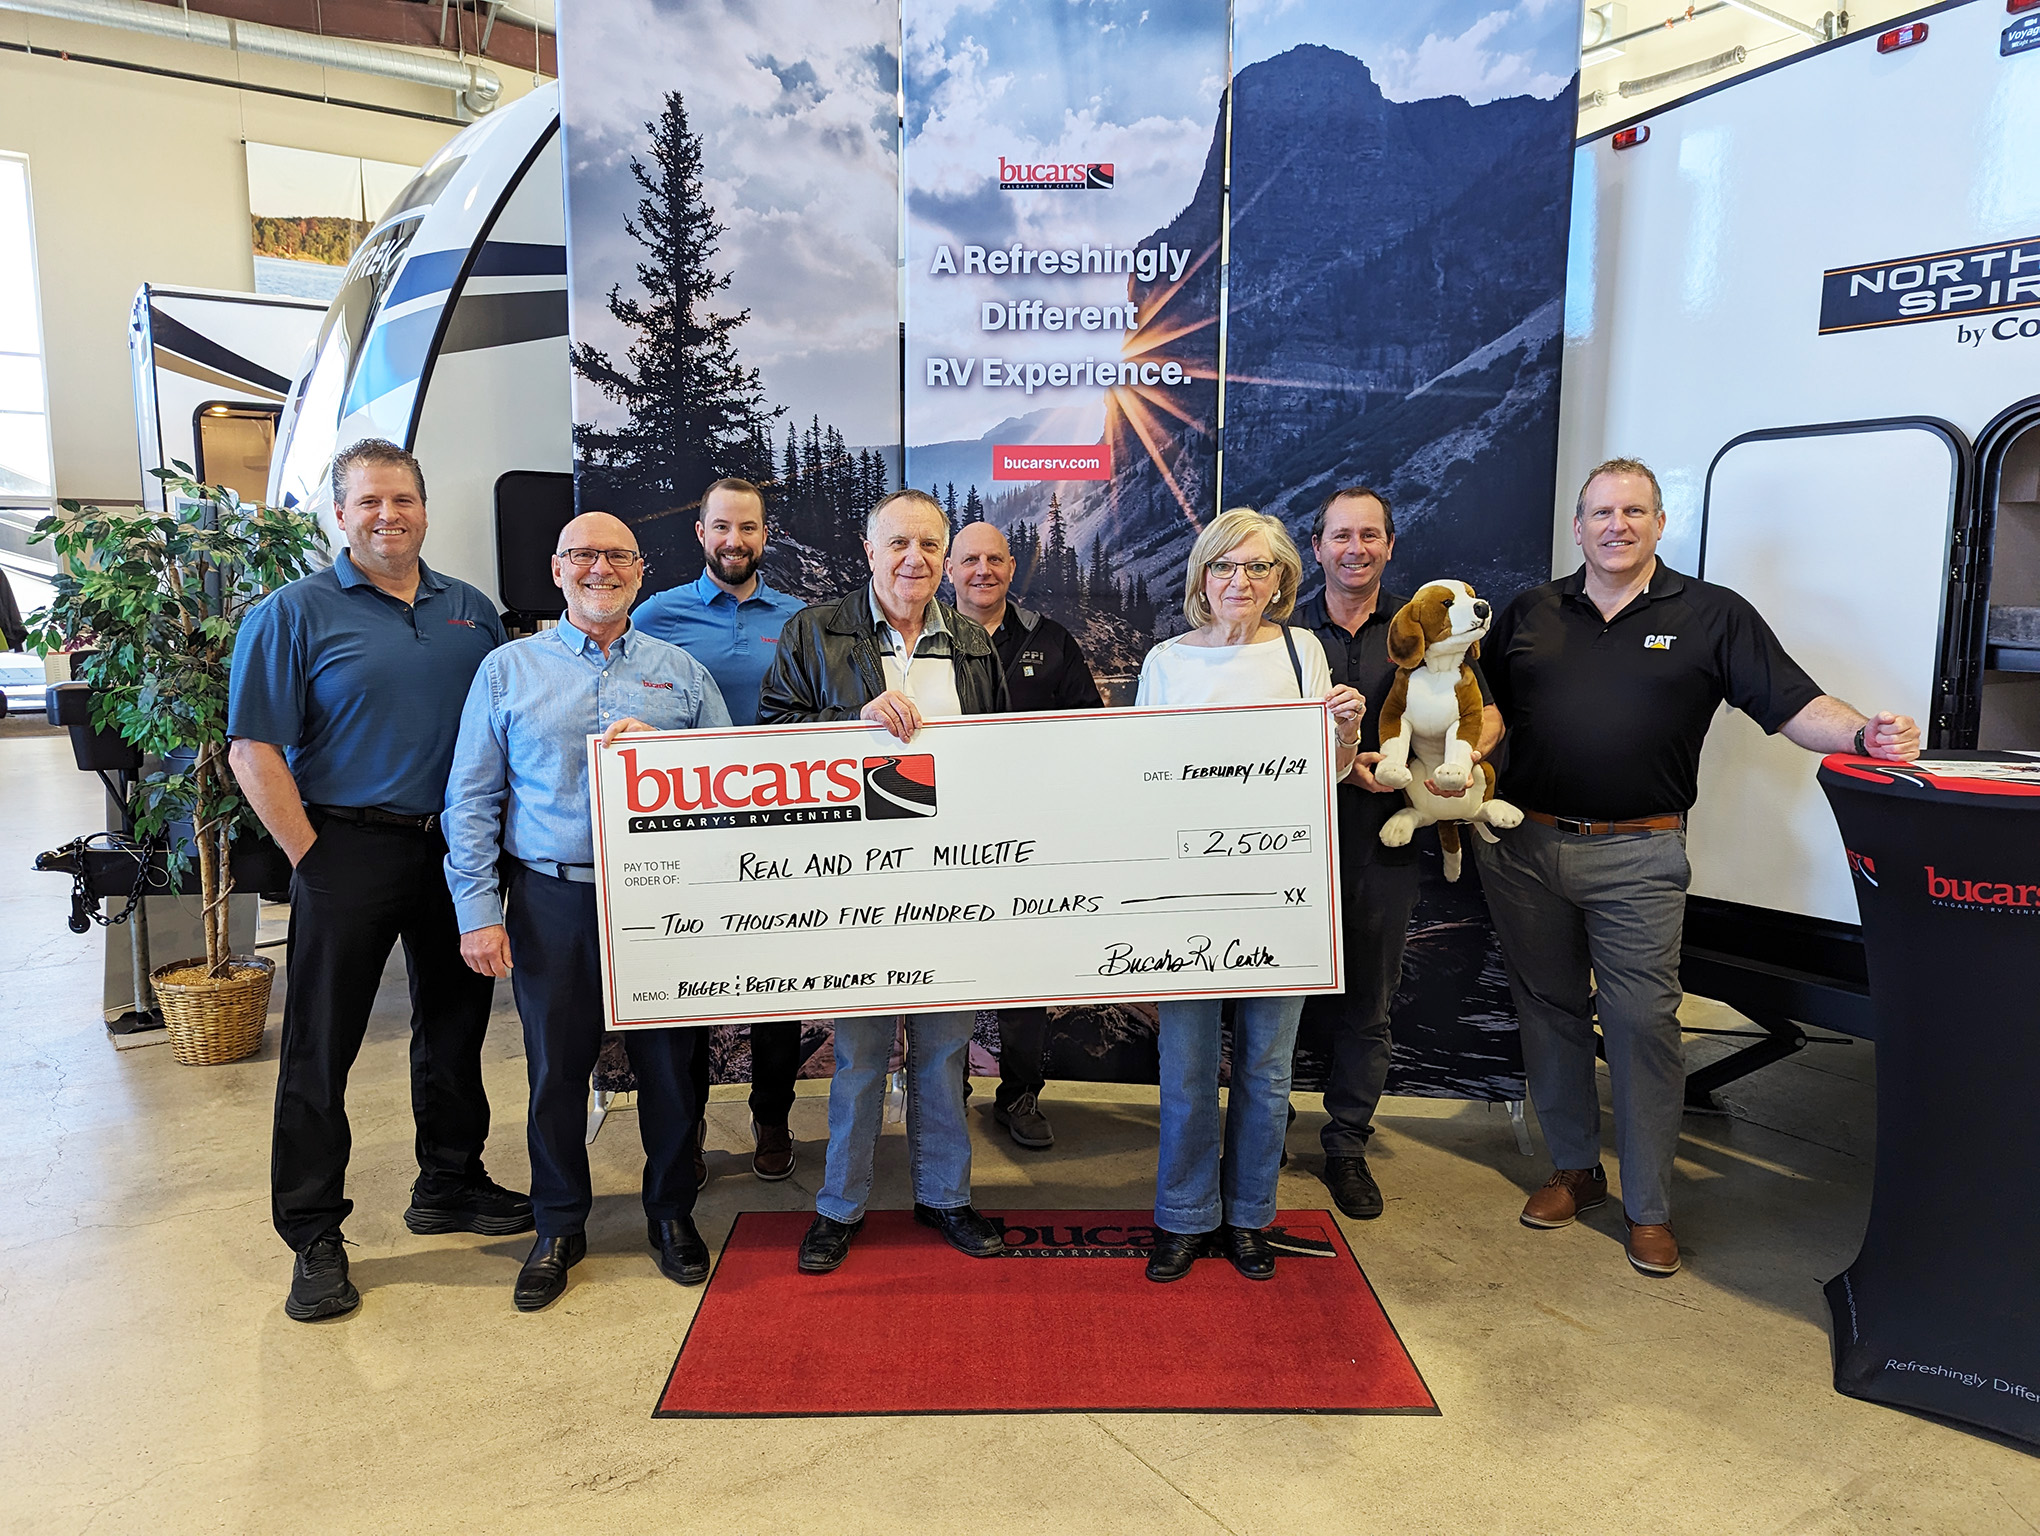
$2,500 Prize Winner: Real Millette!
Categories:, you might also be interested in.

Dewinterizing Your RV and Getting Ready for the Camping Season
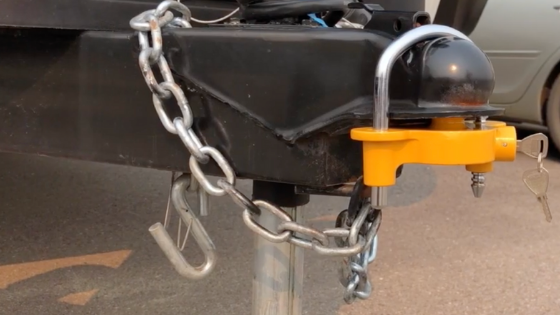
5 RV Security Tips
Finance Your RV
At Bucars RV Centre we have one of the most experienced and reputable RV finance departments in Calgary and area. Our team works hard to provide RV financing rates and terms that let our customers leave with the RV of their dreams.
What's On Now
Trailer towing – rv202 on april 20 at 10:00 a.m..
Master safe and efficient trailer towing with expert guidance at the Bucars U seminar. Registration is open to anyone for our free, fun and informative RV seminars. Save your seat today!

Book Your RV Spring Maintenance Today
Spring appointments are filling up fast, book your RV repair & service now! Get your RV tuned up and be #BucarsReady for the spring camping season!
Introducing the 2025 Tiffin Wayfarer: Arriving Soon!
This new Class C motorhome combines innovative features with exceptional craftsmanship. Be first to take it for a test drive, schedule your VIP Viewing today.

$2,500 Cash Prize: Our Winner Has Been Drawn!
Click to find out who the lucky winner of our $2,500 cash prize winner is from the Bigger & Better at Bucars RV Sale!
Pre-Order Your 2024 Model Today
Now taking pre-orders on 2024 models from our leading selection of Manufacturers. Order now for spring delivery.
Pre-Owned Inventory, Backed by Bucars RV.
Browse pre-owned RVs and find the RV of your dreams this summer. Each pre-loved RV is backed by Bucars’ Certified Pre-Owned stamp of approval.
Check Out the Clearance Corral, New RVs Added!
New RV’s at clearance prices, round up a great deal from our Clearance Corral today.
Raptor Ridge RV Resort & Bucars RV Centre
Experience a newly built RV Resort minutes from downtown Drumheller. Titled lots are selling now.
Fly & Buy Appointment
" * " indicates required fields

IMAGES
VIDEO
COMMENTS
In this video, we'll go through the step-by-step process of dewinterizing my 2020 Keystone Bullet 243BHS travel trailer. While you may have a different RV, m...
Check the Tires. During winter storage, an RV's tires will lose about two to three psi of air pressure for every month or inactivity. Also, check depth of the tire tread. Check the Exterior for cracks, broken seals, and exterior lights. Flush the Freshwater System of All Antifreeze. Sanitize the Freshwater System.
Freshwater tank and water line sanitization. The next step in dewinterizing an RV is to sanitize the freshwater system. Using a ratio of approximately 1/4 cup bleach for every 15 gallons of water or a water system cleaner, fill the freshwater tank almost full. If possible, hauling your RV is a great way to agitate the mixture.
Step 1: Reconnect Plumbing System. The plumbing system is the lifeline for water usage in your RV and the key focus of your dewinterization effort. To begin, ensure that all valves and outlets are closed before introducing water into the system. Next, reconnect the main water supply and gradually fill the system, keeping a keen eye out for any ...
10 Steps to Dewinterize your RV. Below we have a 10-step process for how to dewinterize an RV. Most of the steps can be completed within a single day, but altogether it will probably take a few days to finish everything. This is an important process for anyone who stores their RV for the winter, so don't overlook anything! 1. Check for any ...
👇 *Click _"SHOW MORE"_* below to open the full video description! 👇About This Episode: This episode explains the principles to properly dewinterize a trav...
Join the KYD Insiders for monthly Livestreams, meet-ups and the most supportive RV community anywhere! https://patreon.com/keepyourdaydreamRV De-winterize Ch...
Park your RV or trailer on level ground and set the parking brake. Apply pressure to the brake pedal and hold it for a few seconds. If the pedal sinks to the floor, there may be a problem with the brakes. With the engine off, pump the brakes a few times to build up pressure. Then start the engine and apply pressure to the brake pedal again.
Spring is right around the corner, and your camper is calling. The beginning of the camping season is the perfect time to assess the condition of each distinct part of your motorhome or trailer before hitting the road. Knowing how to dewinterize your RV properly goes beyond removing RV antifreeze from your waste and plumbing systems.. According to many RV technicians, proper dewinterization is ...
Fill the fresh water holding tank completely full of water. Turn on the water pump and run water through all hot and cold faucets until you smell the bleach. Close the faucets and let the solution sit in the water tank and water lines for twelve hours. Drain all of the water and re-fill the tank with potable water.
5) Check Tire Pressures (Including Spare) and Inflate as Necessary. 6) Check Your Chassis Battery and House Battery System. 7) Check Inside and Outside the RV for Potential Rodent Damage. 8) Fill Propane and Fuel Tanks. 9) Tend to Any Maintenance Tasks. 10) Test/Run Systems and Appliances. 11) Clean the Interior.
1. Flush Water System. Dewinterizing an RV's water system is arguably the most essential and extensive step to dewinterizing your RV and ensuring you're ready to trek the great, rapidly thawing outdoors. You can't be without fresh, potable water to support you throughout all your adventures to come!
Make sure to measure a 1/4th cup of bleaching agent for 15 gallons the freshwater tank holds. Now pour bleach in a 1-gallon container, next fill it using water. Now add this mixture with a freshwater holding tank. Fill this tank using potable water. Now turn on all the water faucets and pumps.
Guide to Dewinterizing Your RV. Steps to dewinterize your RV RV spring cleaning tips Start planning your next trip. The weather is getting warmer, the days are getting longer and the excitement of hitting the road in your RV is setting in again. Unless you are a full-time RV-er, this means bringing your rig out of storage and performing RV ...
Flushing the Water System. Te next step in dewinterizing an RV or camper is to remove the antifreeze and flush the water system. First, fill the fresh water tank with clean water. Then, turn on the water pump and open all the faucets, including the shower and toilet, until the water runs clear.
There are many issues that can easily become problems if not attended to. Taking the time to properly dewinterize an RV will ensure a safe and problem free RVing season. Every RV varies slightly in its dewinterizing needs, however, there are some basic steps that apply to all RVs. Here are 10 simple steps to dewinterizing an RV.
However, the dewinterizing travel trailer process is tricky and involves several steps that can be difficult for first-timers and new RVers. Because failing to properly dewinterize your travel trailers' electrical, plumbing, and HVAC systems could result in camper issues, proper dewinterization is essential.
Use ¼ cup bleach for every 15 gallons of water your fresh water tank holds. Fill the fresh water tank with the mixture and make sure the tank is full. Turn on your RV water pump and turn on each faucet until you can smell the bleach mixture. It may take a couple minutes at first for the mixture to come through the lines.
Measure 1/4 cup of bleach for every 16 gallons of water in your freshwater tank. Dilute your bleach in at least a gallon of water. Use a funnel to pour your bleach-water mixture into your freshwater tank. Fill your fresh water tank full with potable water. Turn on all of your faucets until you start to smell bleach.
The process to dewinterize a trailer is a bit different than that of a camper. Dewinterizing an RV. Winterizing an RV is as easy as PIE — Plumbing, Interior, Exterior — and so is dewinterizing a camper or trailer. Let's break it all down. How to Dewinterize a Travel Trailer. Dewinterize a trailer in 6 easy steps: Check the tires; Examine ...
Basic tips and walkthrough on one of the services we perform to make sure your RV is de-winterized properly at Fraserway RV.Visit us online at https://www.fr...
Jeff from Johnson's RV shows us how to properly de-winterize a trailer for the upcoming camping season!
Insert the Anode Rod or tank plug first. Locate the water heater bypass, and turn the bypass off allowing the tank to begin filling. Go to the kitchen sink faucet, and turn the hot water, purging the air out of the tank. Follow this step on ALL faucets, be sure to complete it for all baths, interior/exterior showers, and any other hot water ...